Here’s the mochi cake recipe I posted on my Instagram feed a while back. If you’re familiar with black sesame tangyuan, this mochi cake tastes like that but in baked, crisp-edged brownie form. The sticky squares are dense and chewy with a caramelized buttery exterior and a rich nuttiness and distinctive flavor from the toasted black sesame.
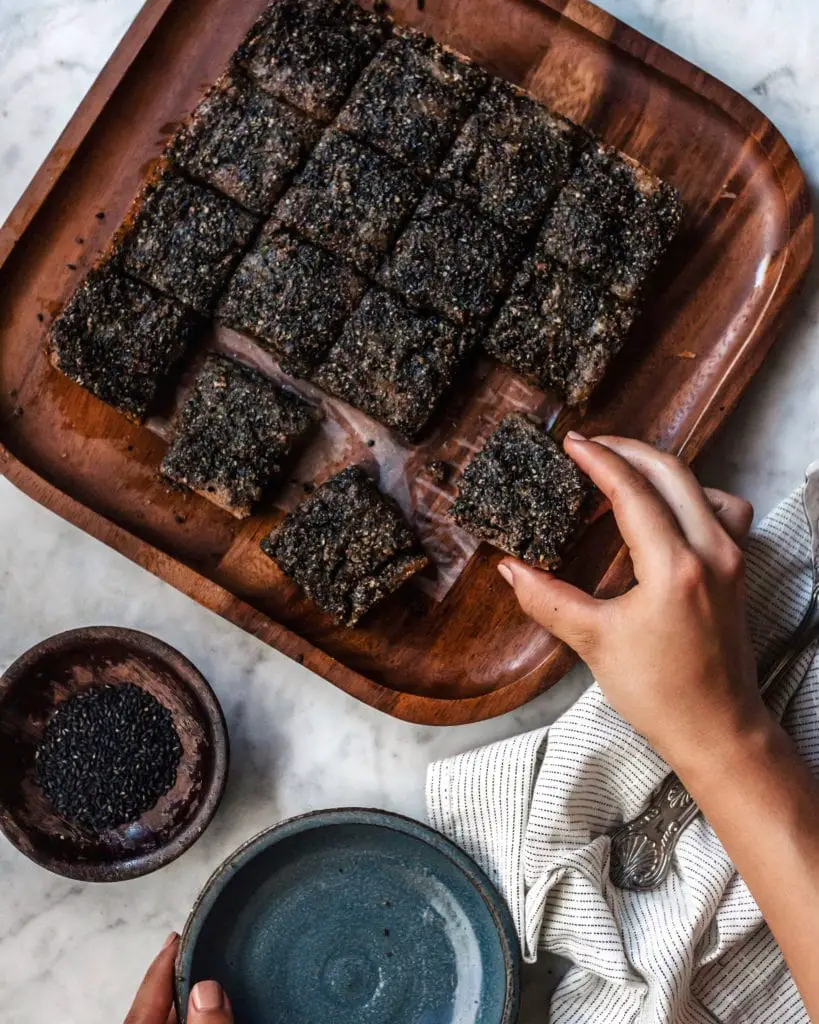
Hope you all are staying safe during this strange, anxious times. It’s moments like these that make me more grateful for the smallest things in the world, like the intoxicating scent of a cake baking in the oven, the sound of birds chirping, the drowsy silence of a clean, cool kitchen in the afternoon. I spent the morning in isolation cleaning my entire house from cupboards to floor, a satisfyingly engrossing task, and it left me sweaty and hungry. Time to bake this mochi cake and enjoy it with a hot cup of oolong tea.
Print📖 Recipe
Black Sesame Mochi Cake (Vegan, Gluten-Free)
Sticky mochi squares, dense and chewy with a crisp buttery exterior, sandwiching a black sesame layer. The perfect mochi treat.
- Prep Time: 15
- Cook Time: 40
- Total Time: 55 minutes
- Yield: 16 1x
- Category: Dessert and Sweets
- Method: Bake
Ingredients
Sesame Layer:
- ¼ cup black sesame seeds
- ¼ cup coconut sugar
- ¼ cup tahini or black sesame tahini
- pinch of salt
Mochi layer:
- 8 oz (1.5 cups) glutinous rice flour
- 1 cup unsweetened non-dairy milk
- ⅔ cup organic sugar*
- 4 tablespoon melted vegan butter (sub melted coconut oil)
- 2 flax eggs (2 tbsp ground flaxseed + 5 tbsp water)
- 1 teaspoon vanilla extract
Instructions
- Preheat oven to 350F and line a 8-inch square pan with parchment paper. Whisk together flax seed and water in a small bowl and let sit for a few minutes to thicken.
- Make black sesame filling: toast black sesame seeds, stirring constantly for 2-3 minutes until the seeds start to pop and smell fragrant. Add sesame seeds, sugar, and salt into a food processor or blender and pulse until the mixture resembles fine sand.
- Set aside two tablespoons of this finely ground mixture (you’ll scatter this on top of the cake before baking). Add tahini to the remainder, combining until it forms a paste.
- Make mochi: In a mixing bowl, combine glutinous rice flour, milk, sugar, butter or oil, flax eggs, and vanilla, and whisk vigorously until smooth.
- Pour batter (reserving half) to the baking pan, then dollop on the prepared black sesame paste. Add the remaining half of the batter on top, smoothing out the surface with a spoon. Sprinkle with reserved black sesame topping, then bake for 32-35 minutes, or until the center of the cake springs back when lightly pressed. Let cool thoroughly before slicing.
Notes
- I used coconut sugar, but it makes the color of the mochi darker. If you want white mochi layers use regular cane sugar or turbinado sugar.
If you made this recipe let me know how you liked it by leaving a comment and a rating below! Also be sure to follow me on Pinterest and on Instagram for all the latest recipes and stories.



Maggi says
Hey, can I use regular rice flour instead of the sticky one?
Hannah says
Mm you can try it but it won’t be the same! Glutinous/sticky rice is key for the mochi texture here
Allen says
How long will this keep, and how should I store it (room temp uncovered? refrigerator?)
Hannah says
Anything mochi-based is honestly pretty hard to store— you can keep it at room temperature for a day or two, but if storing for longer I’d recommend freezing it (in an airtight container or wrapped up), as the fridge will dry it out. To reheat I recommend steaming to infuse some moisture back into it.
Hannah says
Fantastic recipe! Made it a couple times and my roommates now request it. I’ve used chia eggs, peanut butter, an 8-inch round pan–there’s room for substitutions.
★★★★★
Tony R says
Very good recipe! I added bitter chocolate to the recipe and it was really awesome. Thanks 🙂
★★★★★
Layla says
It turned out really yummy! I added peanut butter and cooked a little longer because I think my flaxseed egg ratio was off. Not overly sweet. Just right!
★★★★★
Abby says
Amazing recipe! I used a store bought egg replacer and left it in the oven a little longer, and it came out great
★★★★★