A guide to making Cantonese-style baked mooncakes, plus recipes for 6 different fillings.
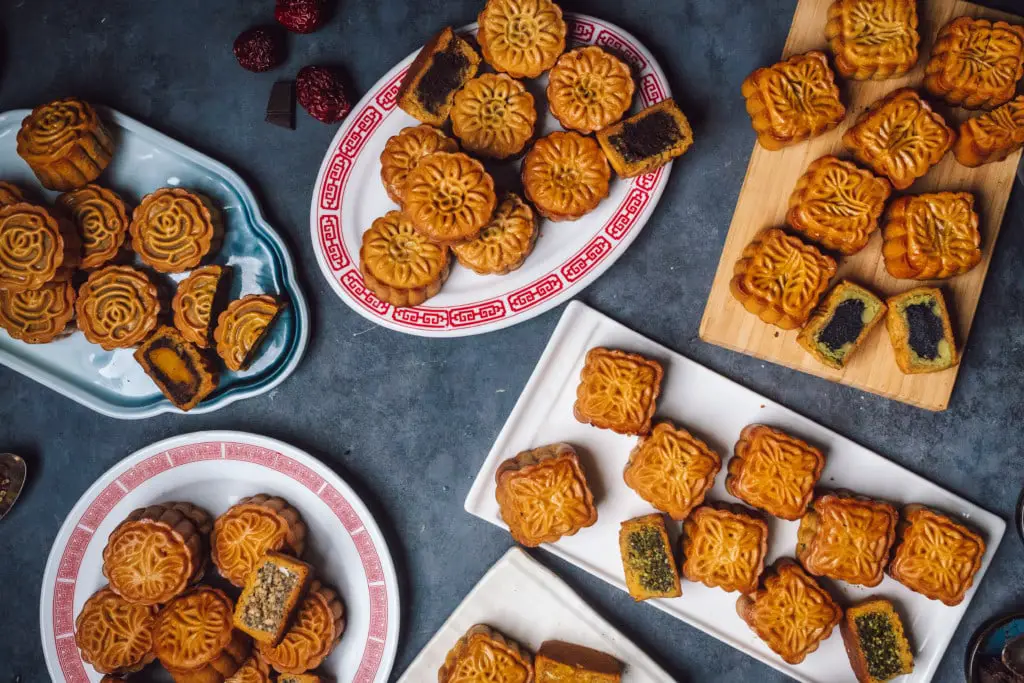
This year I wanted to try my hand at traditional baked mooncakes.
Chinese people typically don’t mooncakes at home— they’re more like gifts you buy to give to loved ones over the Mid-Autumn Festival. (They can be expensive, often twenty to thirty dollars for a small box!) I’ve been making vegan snowskin mooncakes for some time, which are delicious, but more delicate and difficult to ship. Also, there’s just something to the glamorous, embossed look of baked mooncakes that makes them both appealing and intimidating.
Turns out, homemade mooncakes are surprisingly easy to make. You will need two specific ingredients— golden syrup and lye/alkaline water, and mooncake molds.
Filling-wise, I’ve noticed these days that mooncakes in China and in Taiwan tend to be more inventive than traditional, toying with wild, unexpected combinations— salty-savory, spiced and numbing, milky and cheesy, or some crazy molten center. I had fun playing around with a few ideas, and these are my six favorites: fruity, nutty/salty-sweet, traditional bean/seed paste, and one chocolate.
Read on for the full recipe and guide. I’ll be ranking these too, so scroll to the end to see which one was my favorite.
How to Make Vegan Mooncakes
STEP 1: Prepare the filling(s) of choice in advance.
The most time-consuming part of mooncakes is preparing the filling. Unless you buy ready-made sweetened bean pastes (which you certainly can), making these from scratch will involve some combination of soaking and cooking or toasting, and the most important step, chilling overnight.
Each of these filling recipes will make 9 30g filling balls, for 9 50g-sized mooncakes.
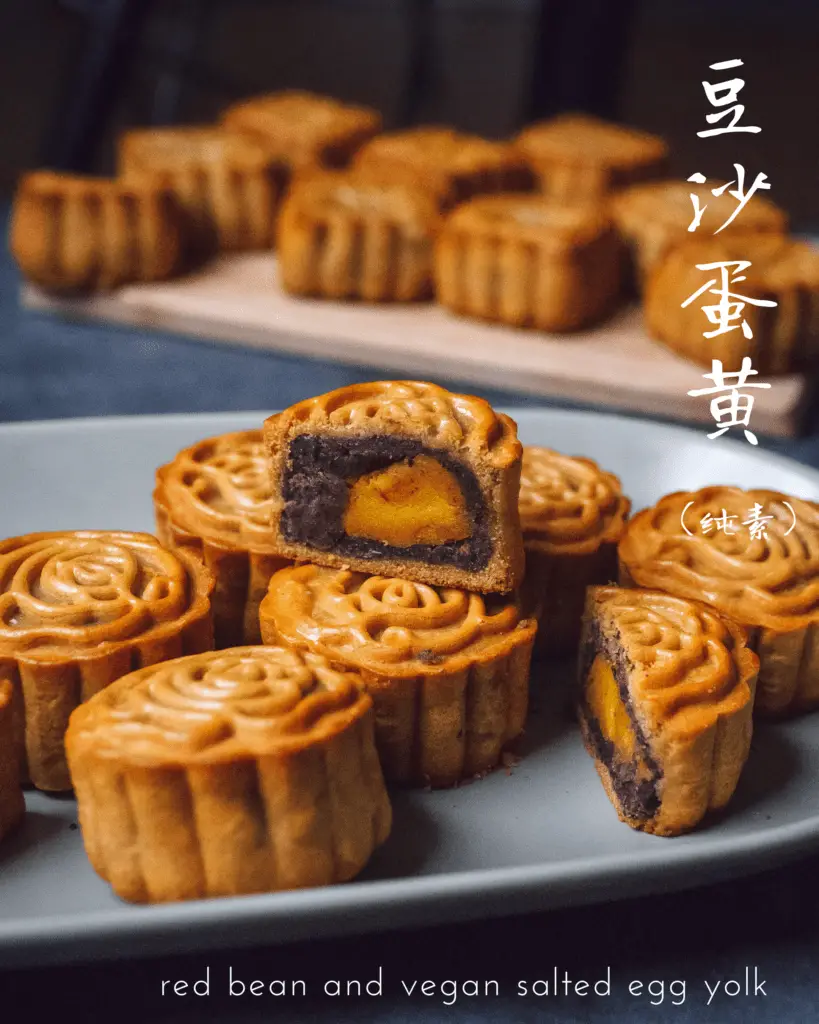
Option 1: Red Bean Paste and Vegan Salted Egg Yolk
For the red bean paste:
1 cup (200 grams) dried adzuki beans, soaked overnight or at least 4 hours
½ cup (100 grams) sugar
¼ teaspoon salt
2 tablespoons (28 grams) refined coconut oil
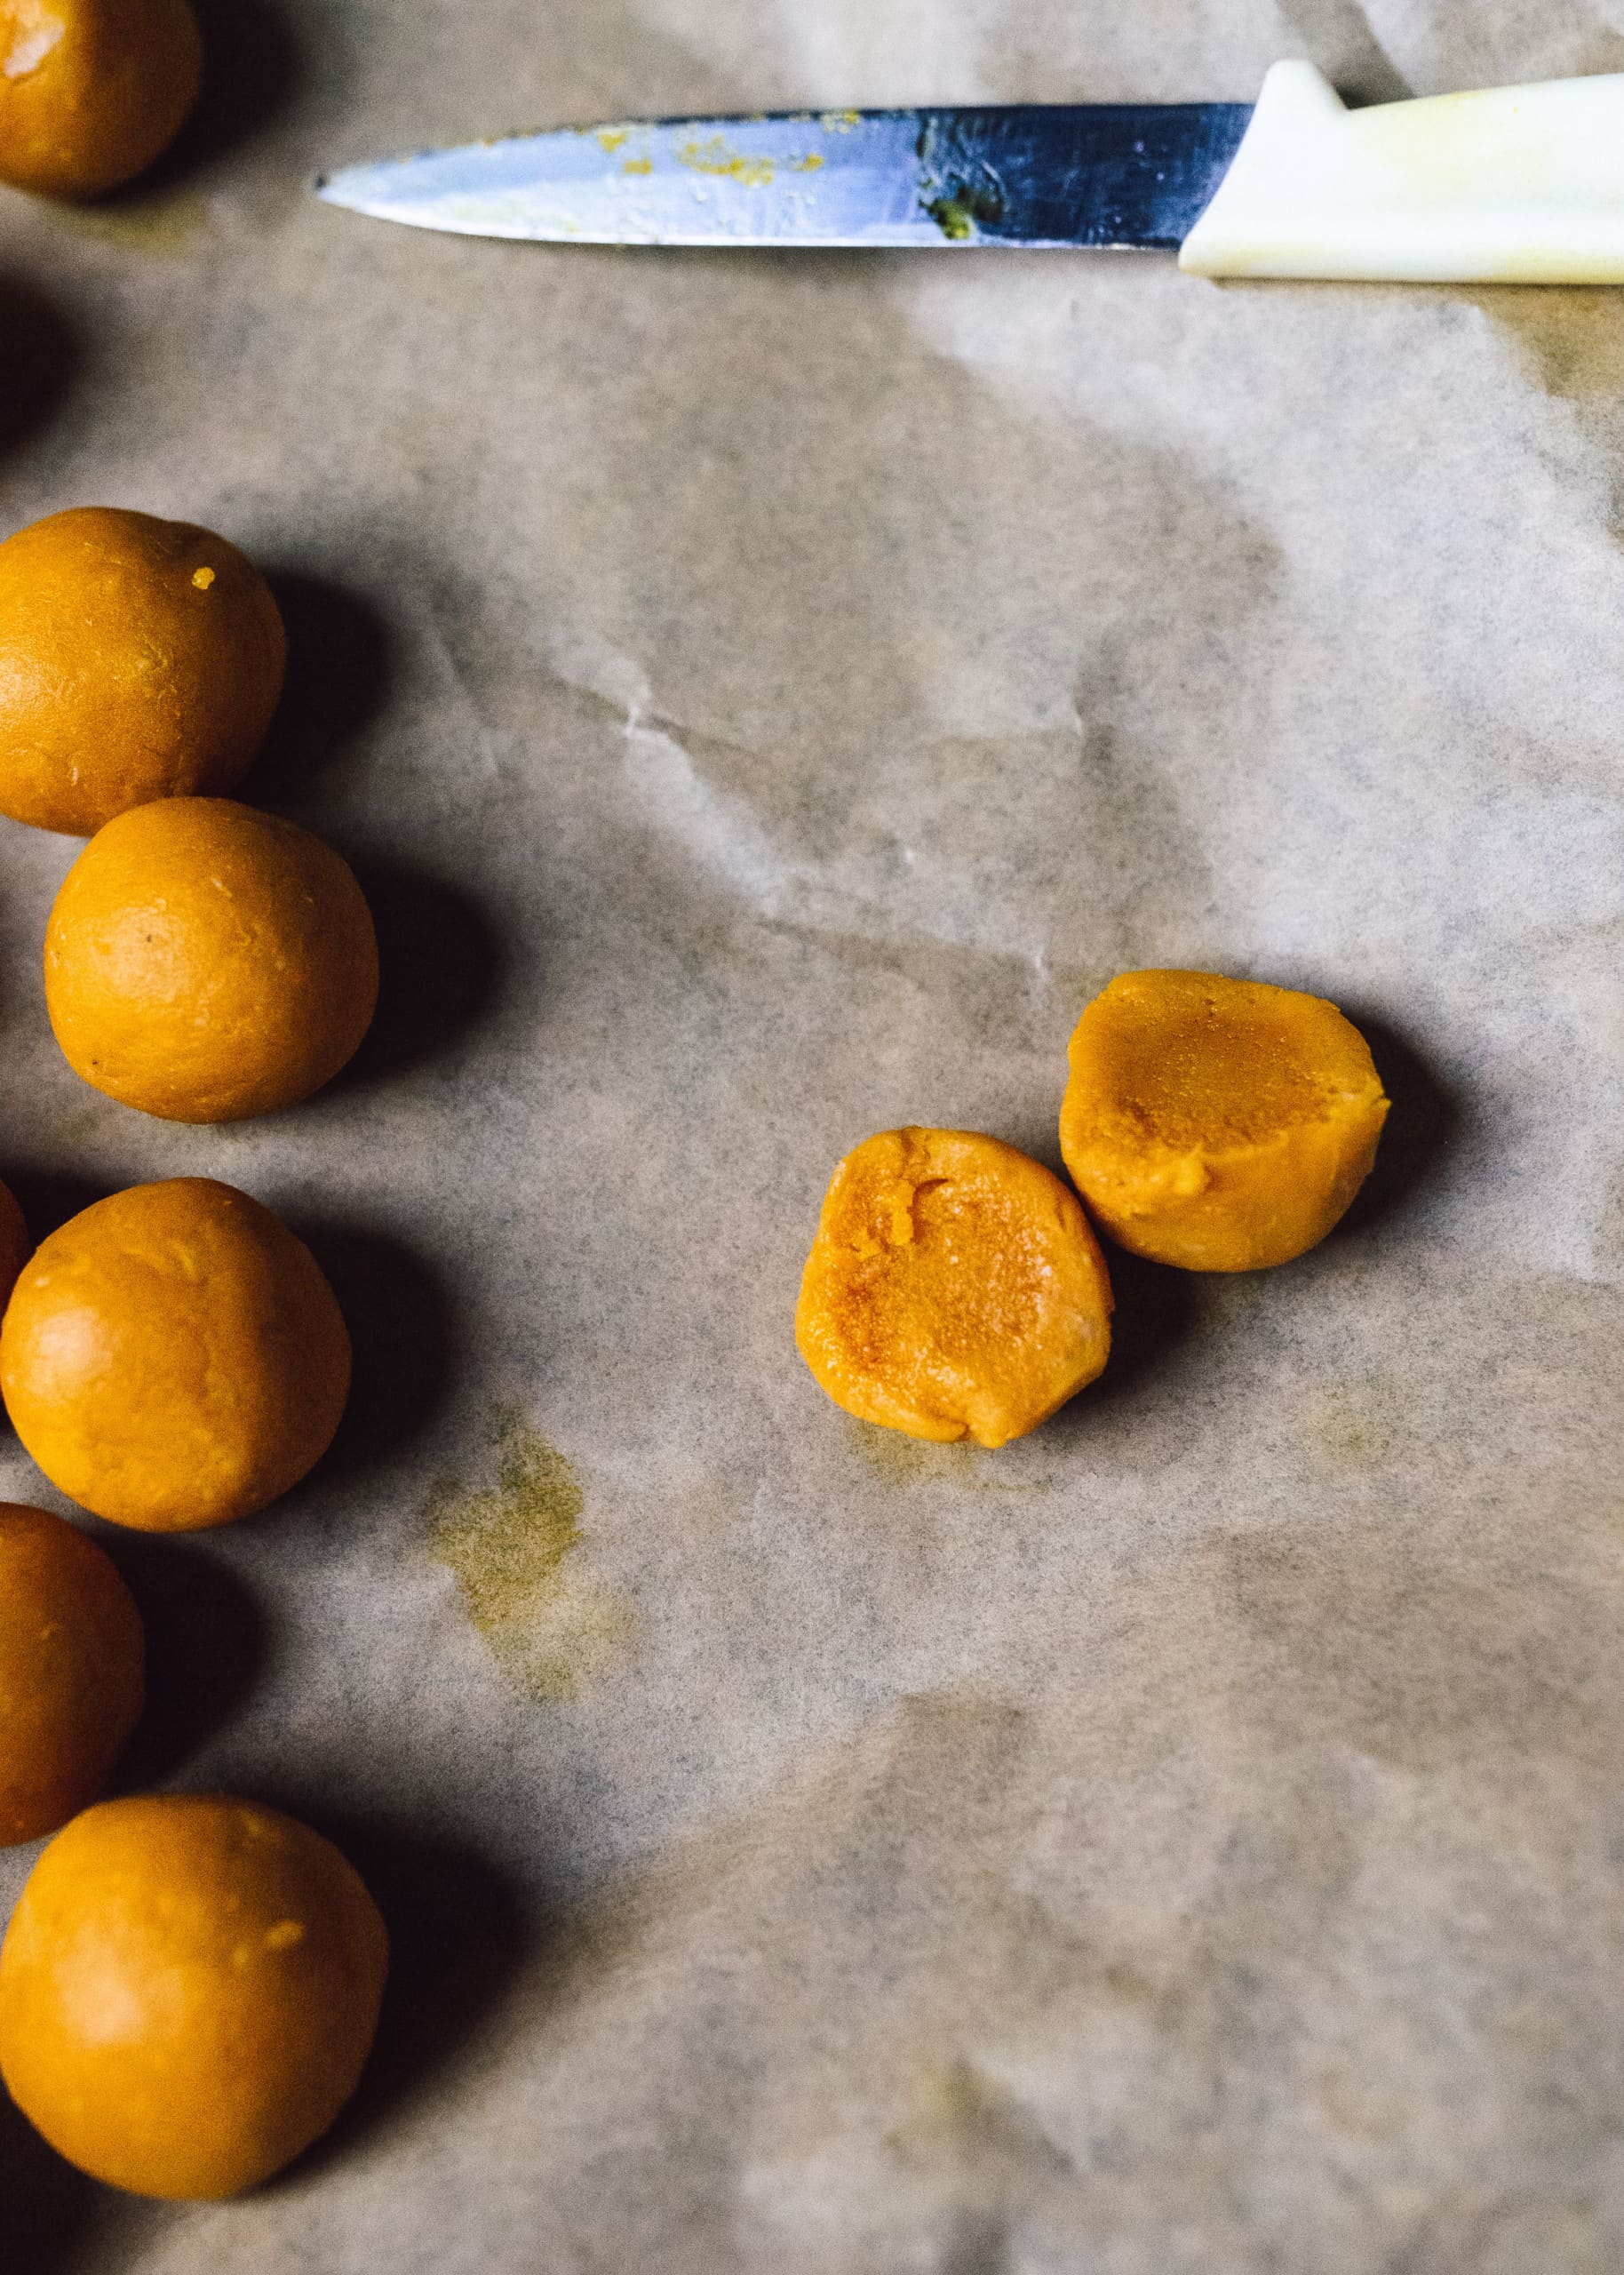
9 (10 grams each) vegan salted ‘egg yolks‘, prepared and chilled in advance
Make the red bean paste: Drain the soaked beans and place them in a small pot or Instant Pot pressure cooker. Add enough water to cover the top by 2 inches, then seal and cook on high pressure for 25 minutes, then let pressure release naturally for 10 minutes. OR, bring to a boil on the stovetop and simmer for 60-90 minutes until they are soft and easily crushable between your fingers. Transfer the cooked beans to a food processor, with just enough liquid to puree.
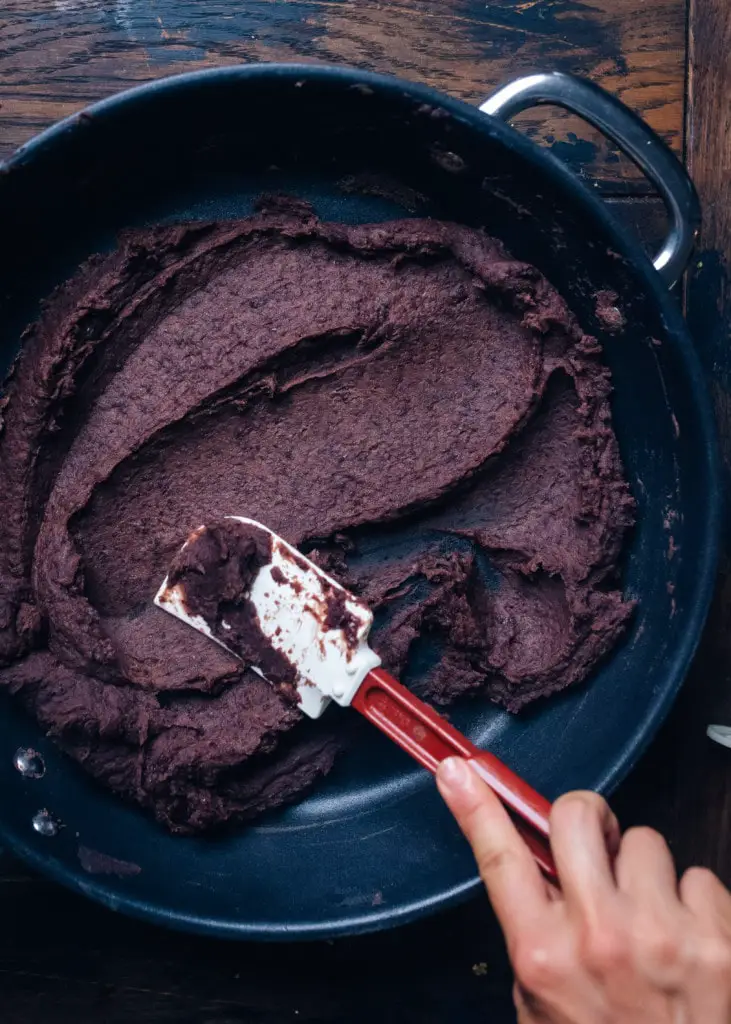
In a thick-bottomed pan or nonstick pan, heat the oil over medium-low heat. Add the bean puree and the sugar, and cook down, stirring every couple of minutes, until the puree has thickened and pulls away from the pan, holding its shape (a rubber spatula should come out clean). This will take about 8-10 minutes. Taste and adjust sugar as desired. Transfer to a heat-proof container and cool completely in the refrigerator.
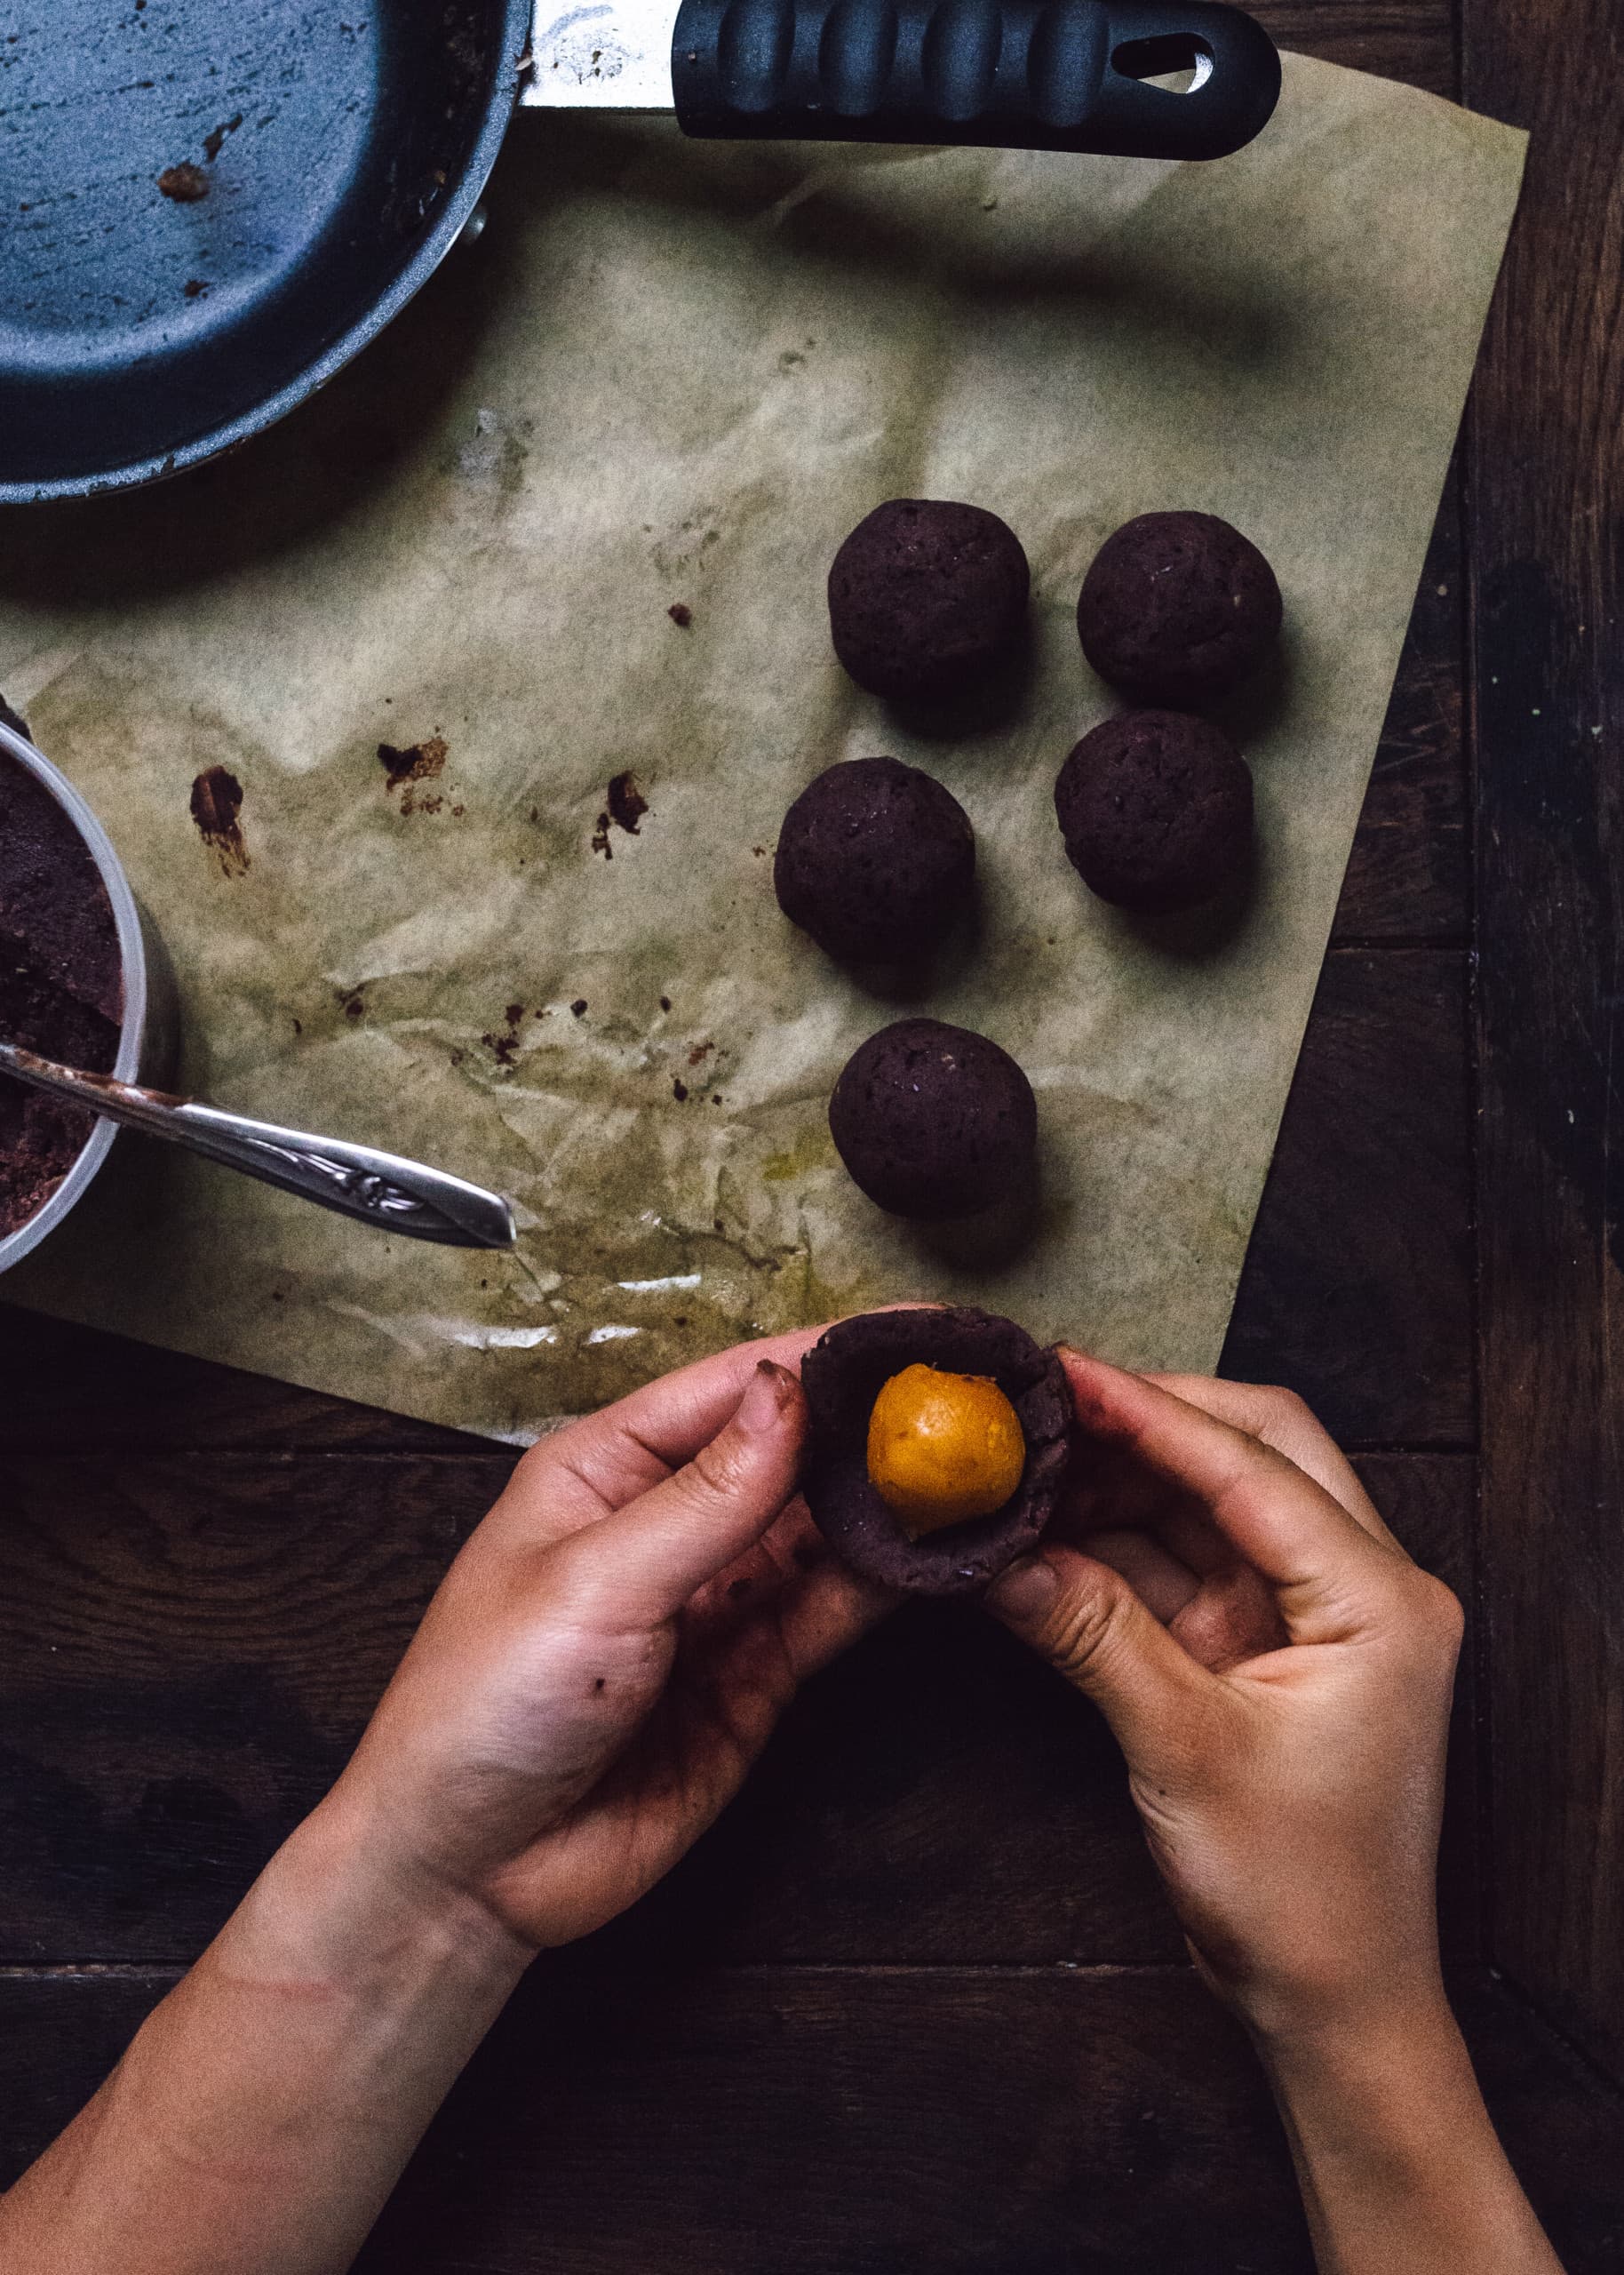
Take one 20g portion of chilled red bean paste, flatten into a disc, place one 10g vegan egg yolk in the center, and tuck and wrap the red bean paste around to enclose, for 30g balls. Chill in the fridge until ready to use.
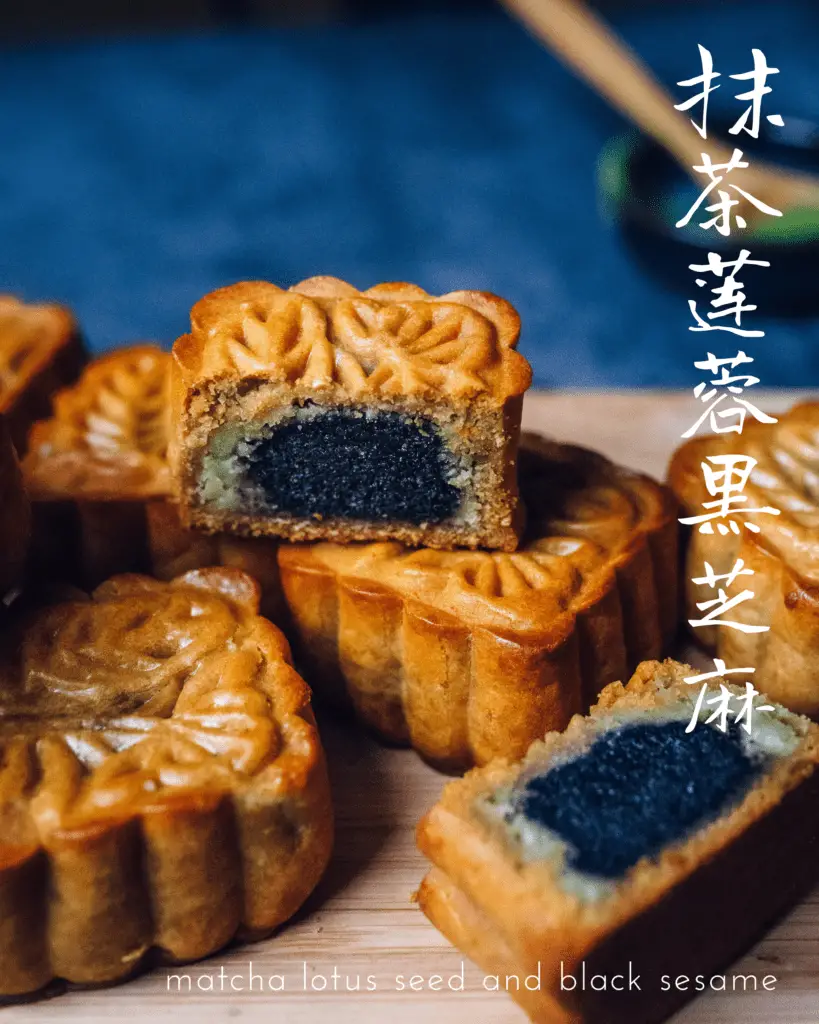
Option 2: Matcha Lotus Seed Paste with Black Sesame Filling
For the lotus seed paste:
100 grams (1 cup) dried lotus seeds, soaked for 3 hours or overnight, green shoots inside removed
45 grams (¼ cup) refined coconut oil
50 grams (¼ cup) sugar
2 teaspoons matcha powder, optional
For the black sesame filling:
70 grams (½ cup) black sesame seeds, toasted
50 grams (¼ cup) sugar
½ teaspoon salt
28 grams (2 tbsp) refined coconut oil
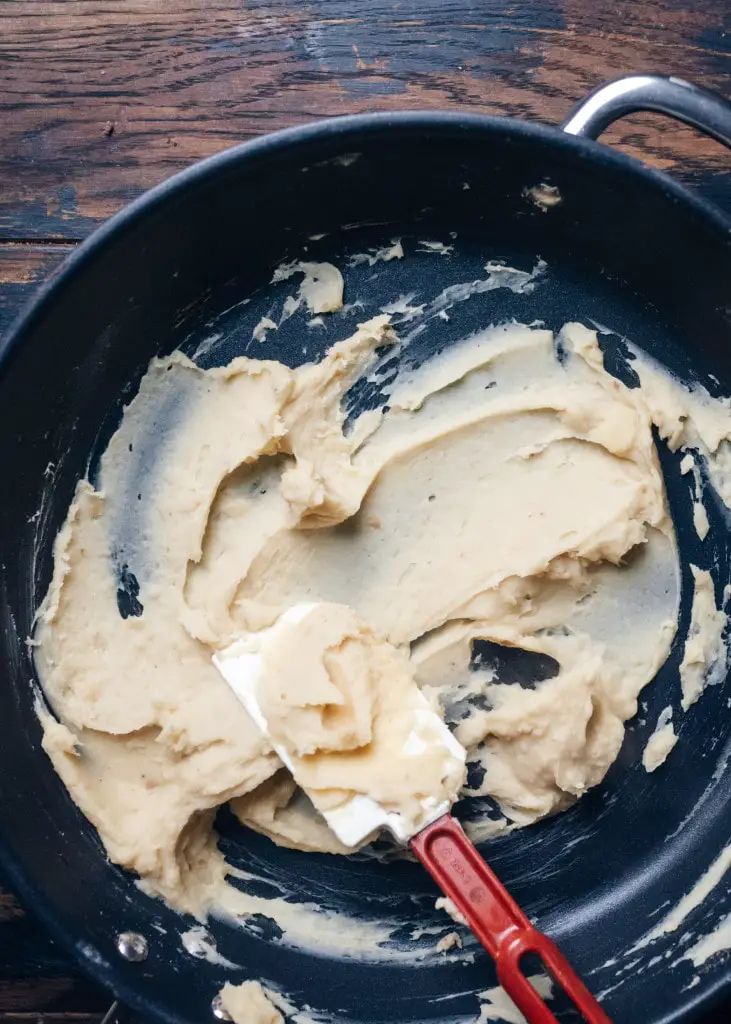
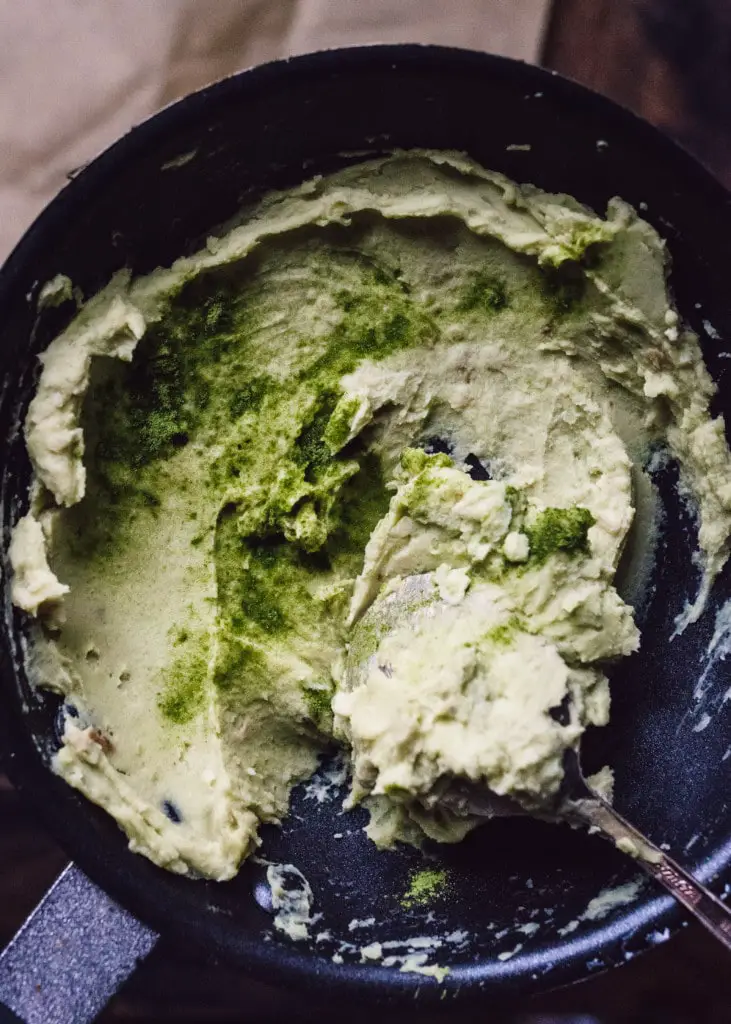
Make the lotus seed paste: Follow the same instructions for the red bean paste. The only difference is that the cooking time is shorter, 15 minutes for Instant Pot or 1 hour for stovetop. After removing from heat, stir in the matcha powder until smooth. Transfer to a heat-proof container and cool completely in the refrigerator.
Make the black sesame filling: toast the black sesame seeds until they pop in the pan, then transfer immediately to a plate and cool slightly. Add to a food processor or blender with the sugar and salt and pulse into a fine meal. Stir in the coconut oil and chill in the refrigerator to harden.
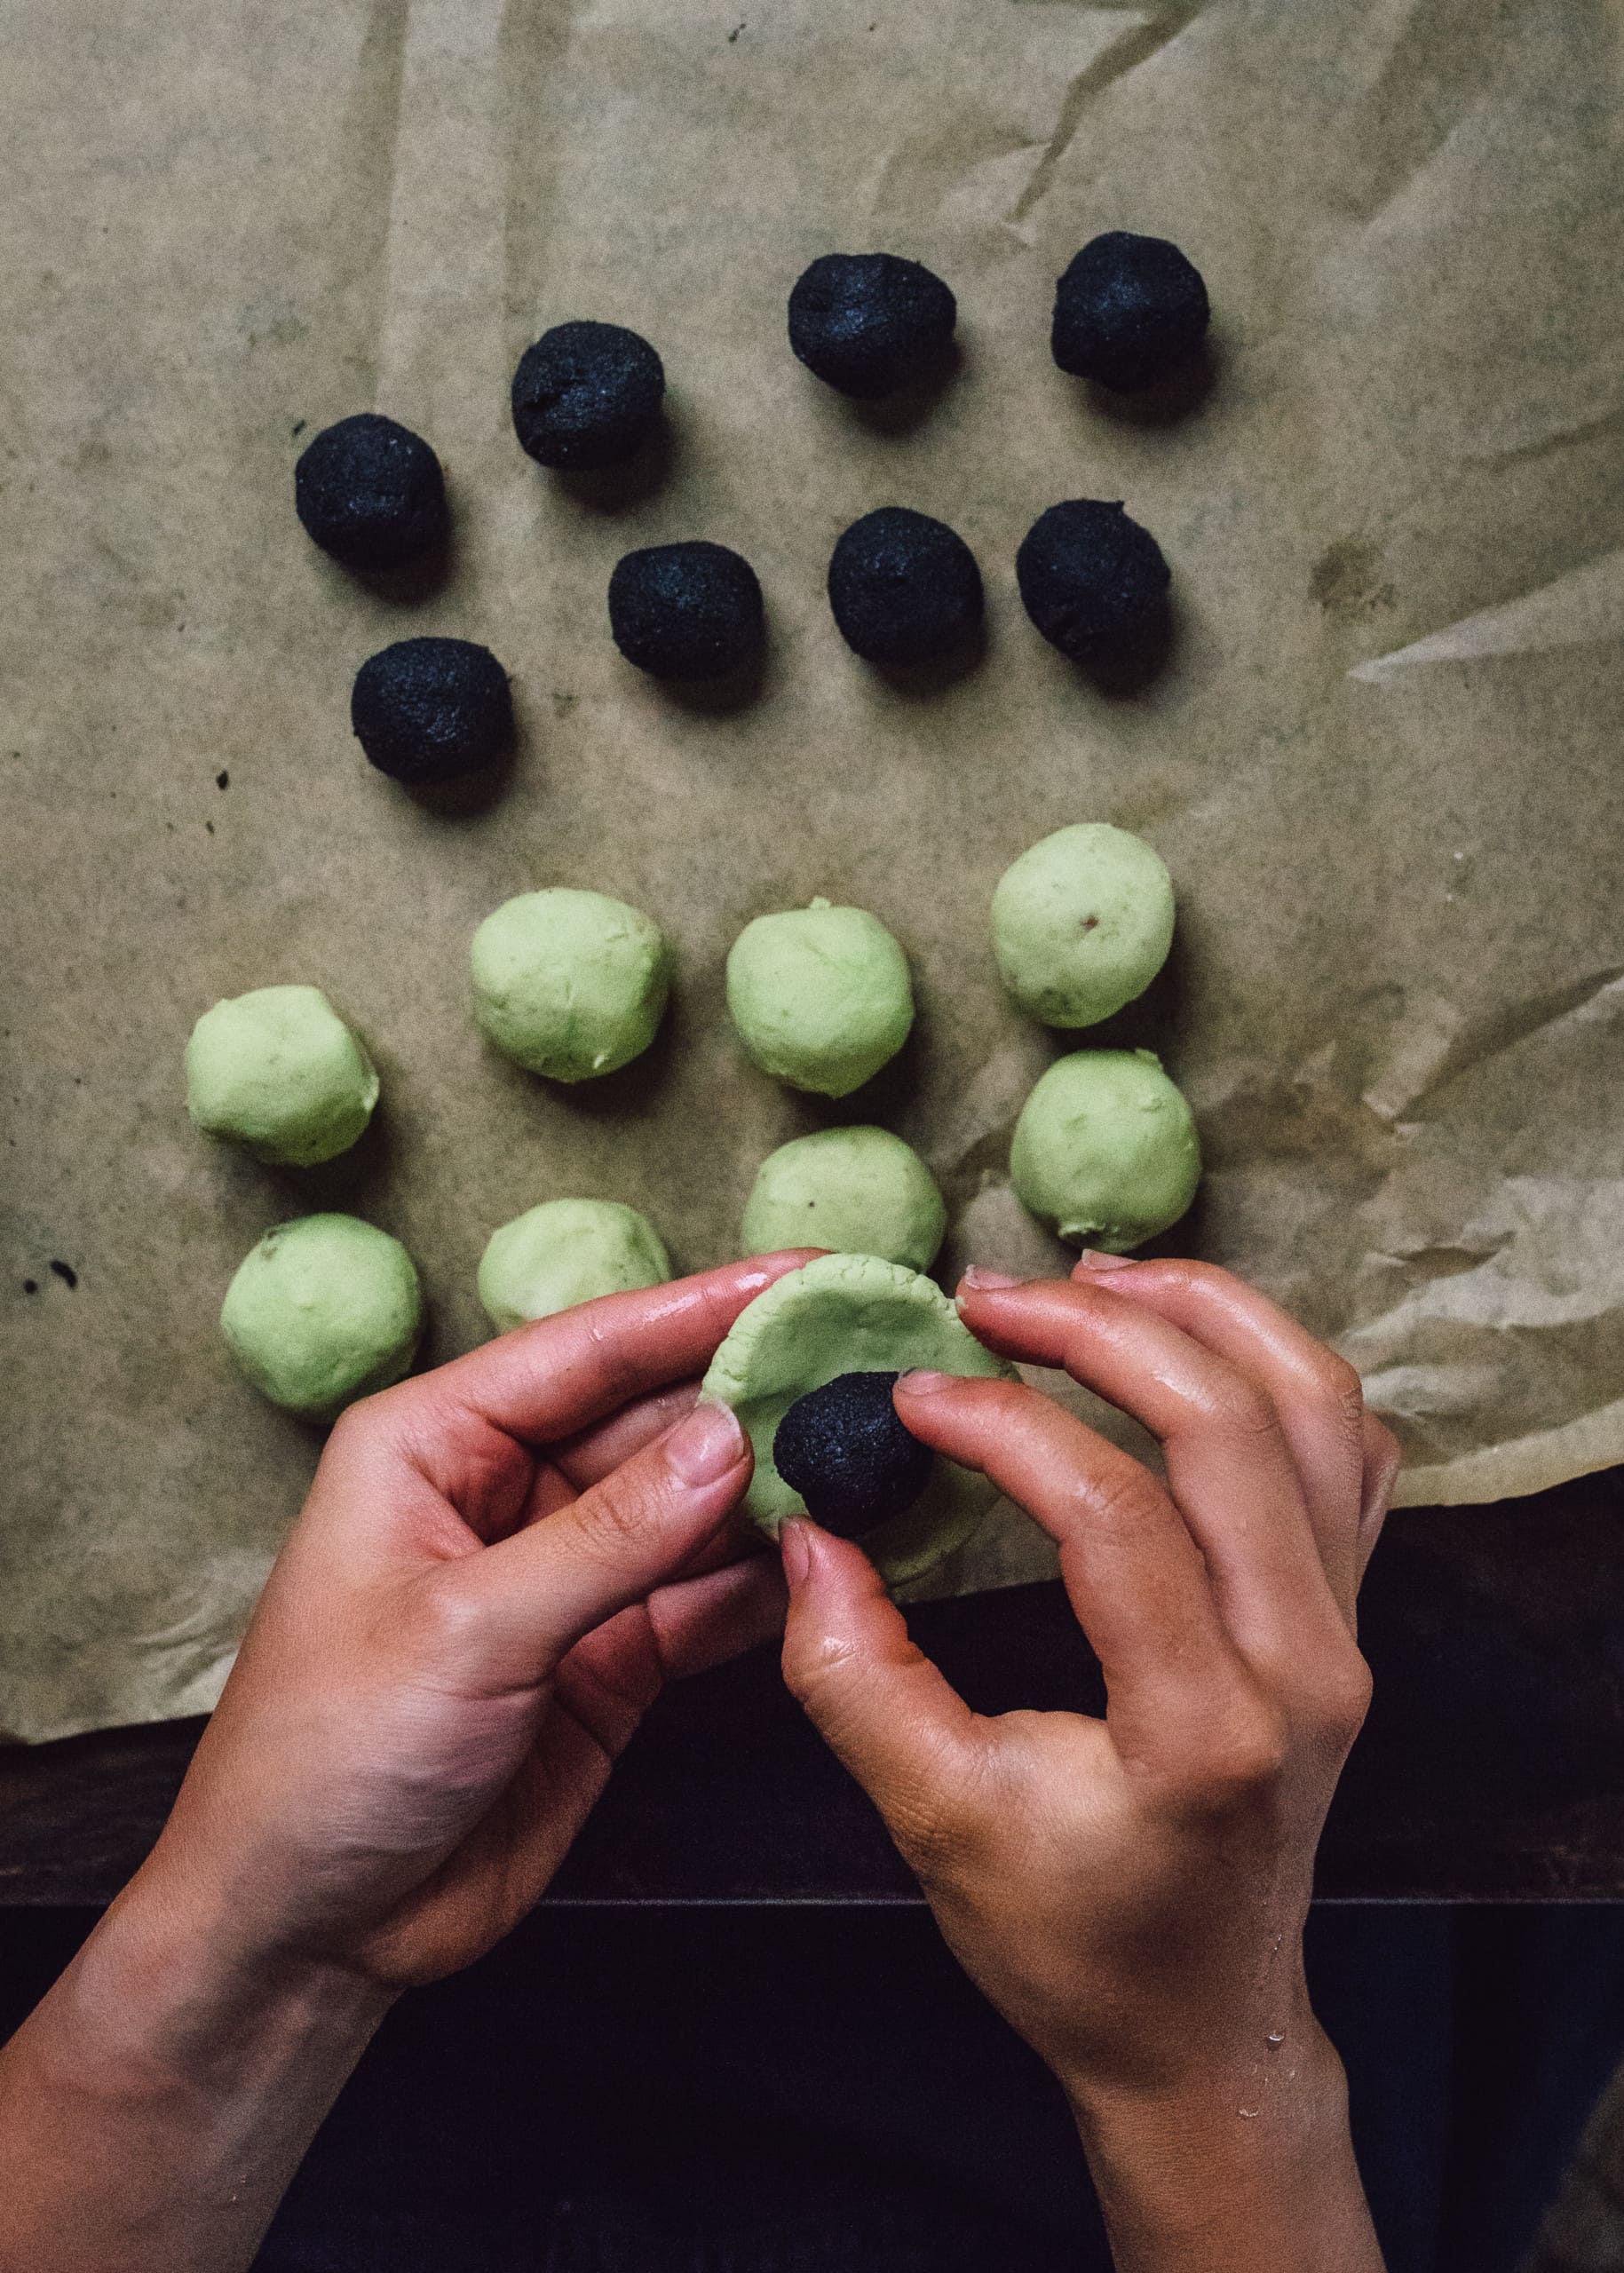
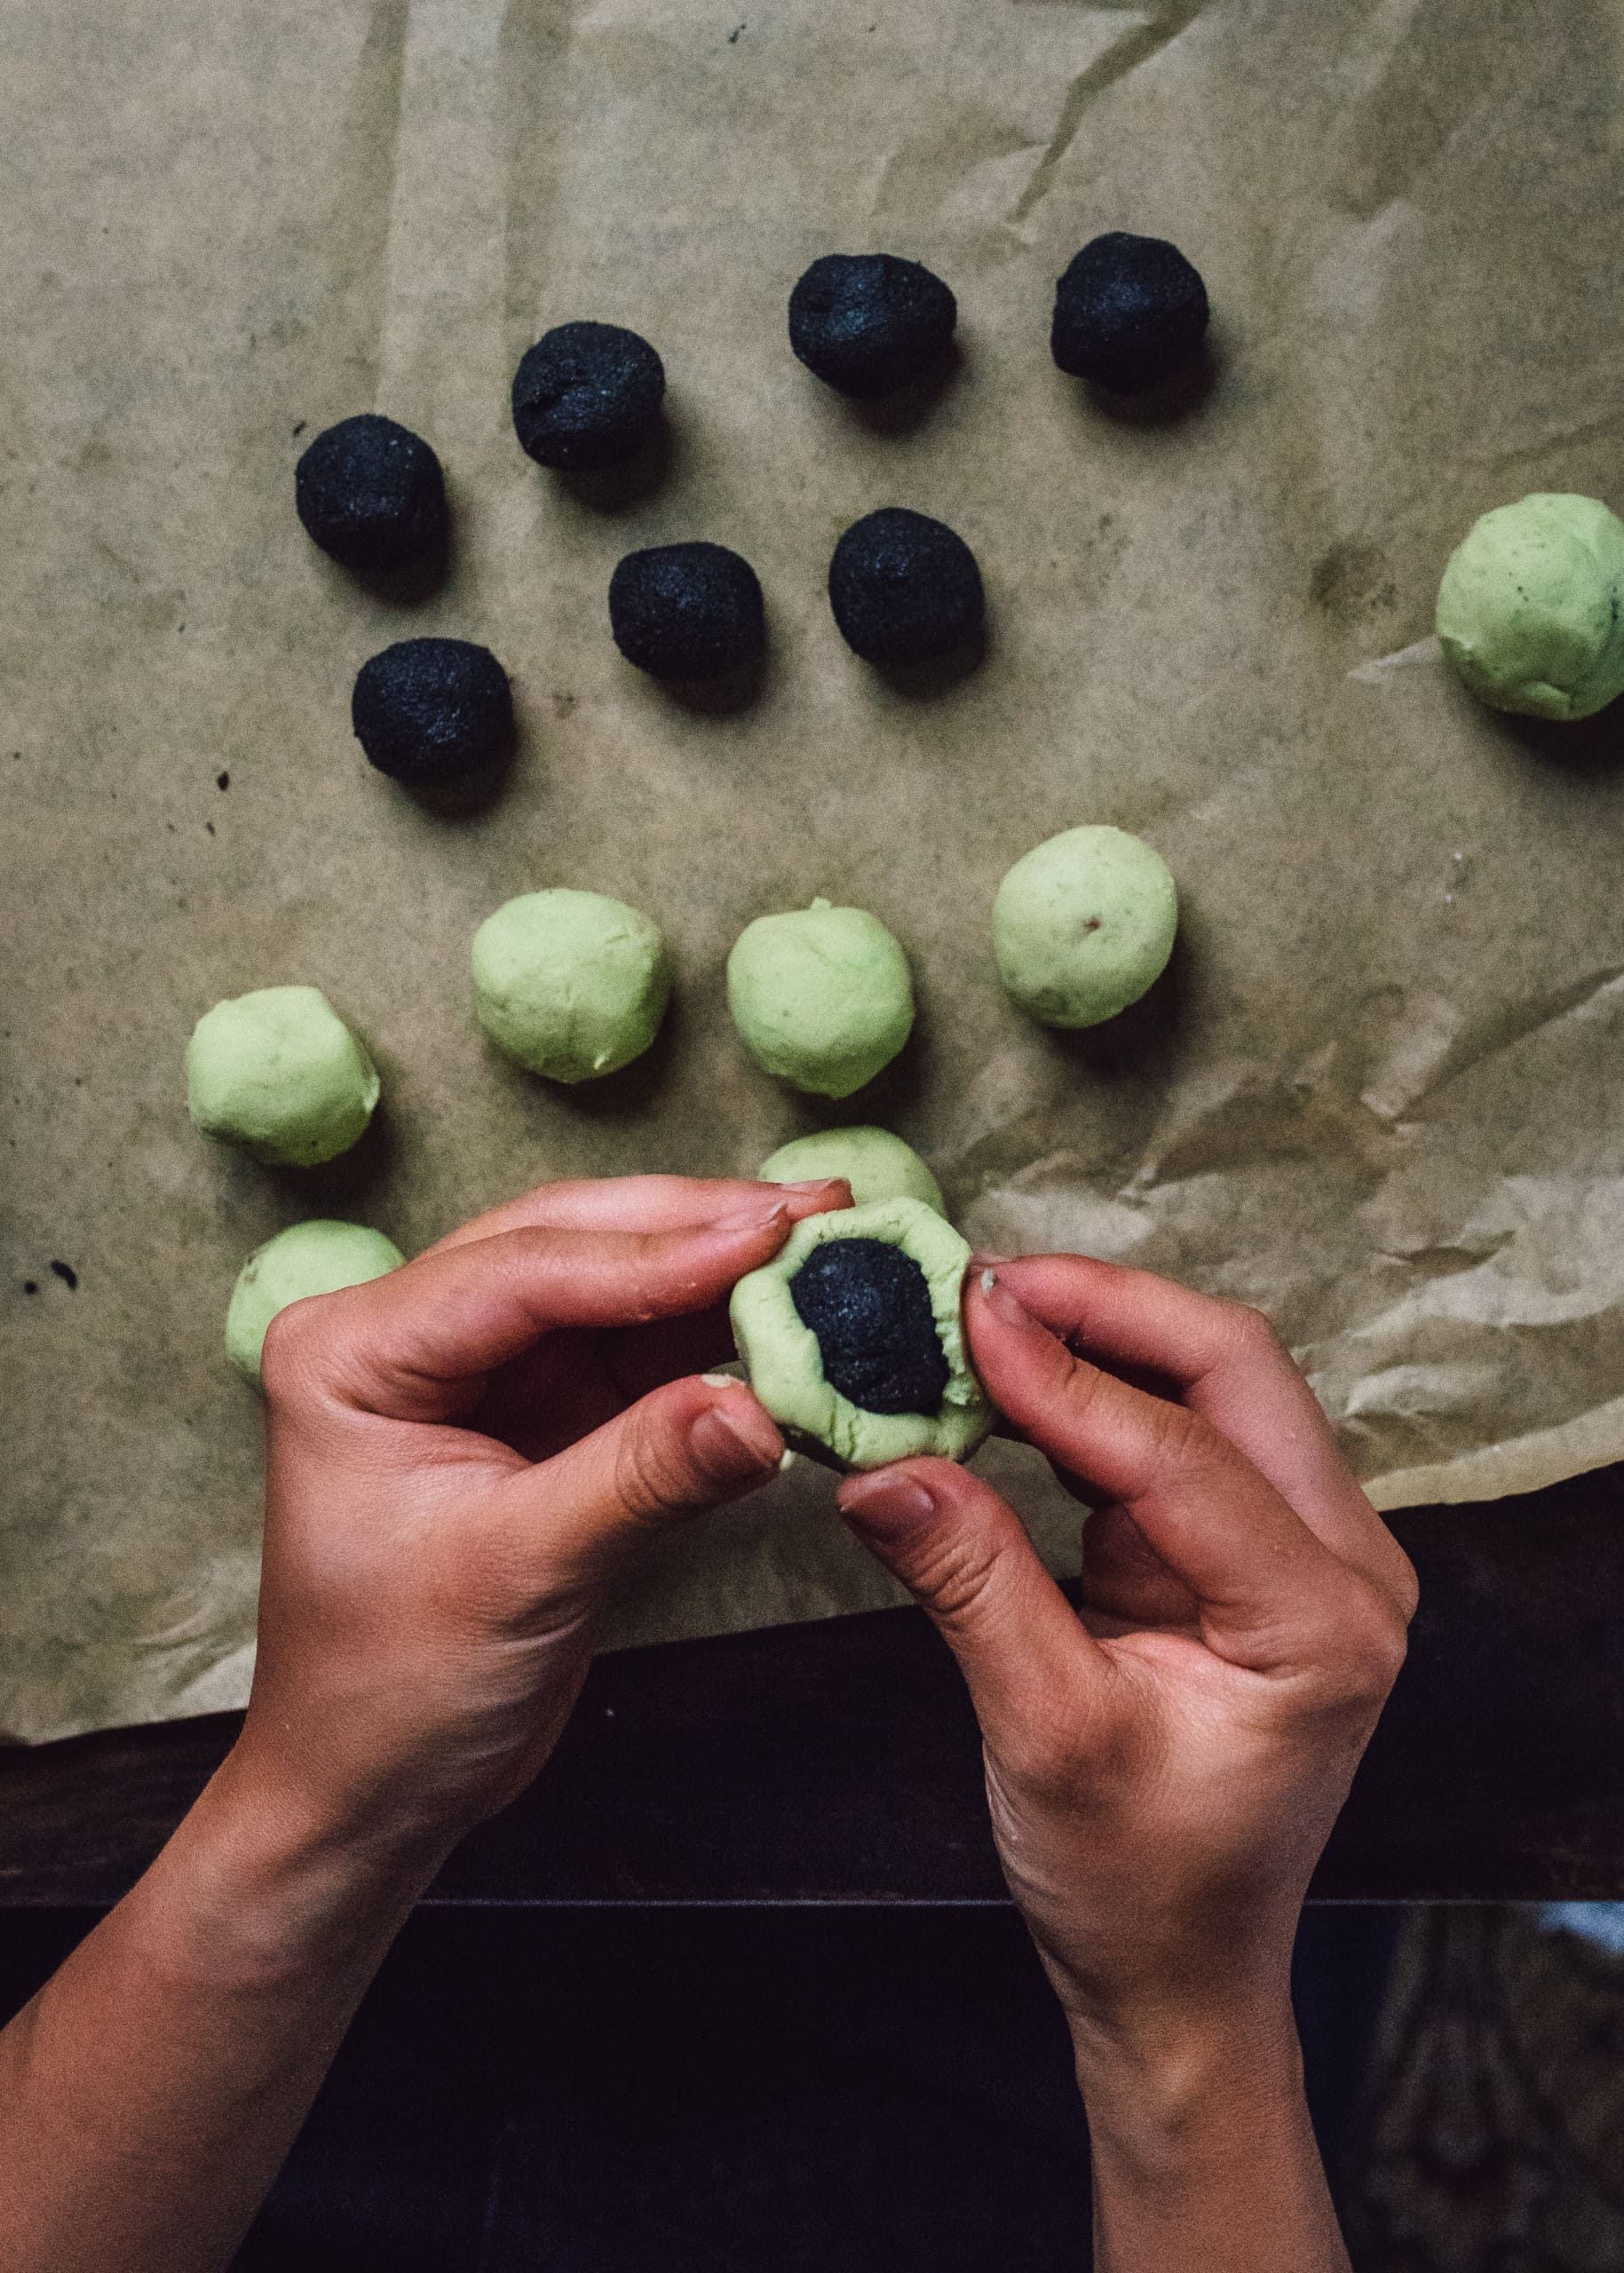
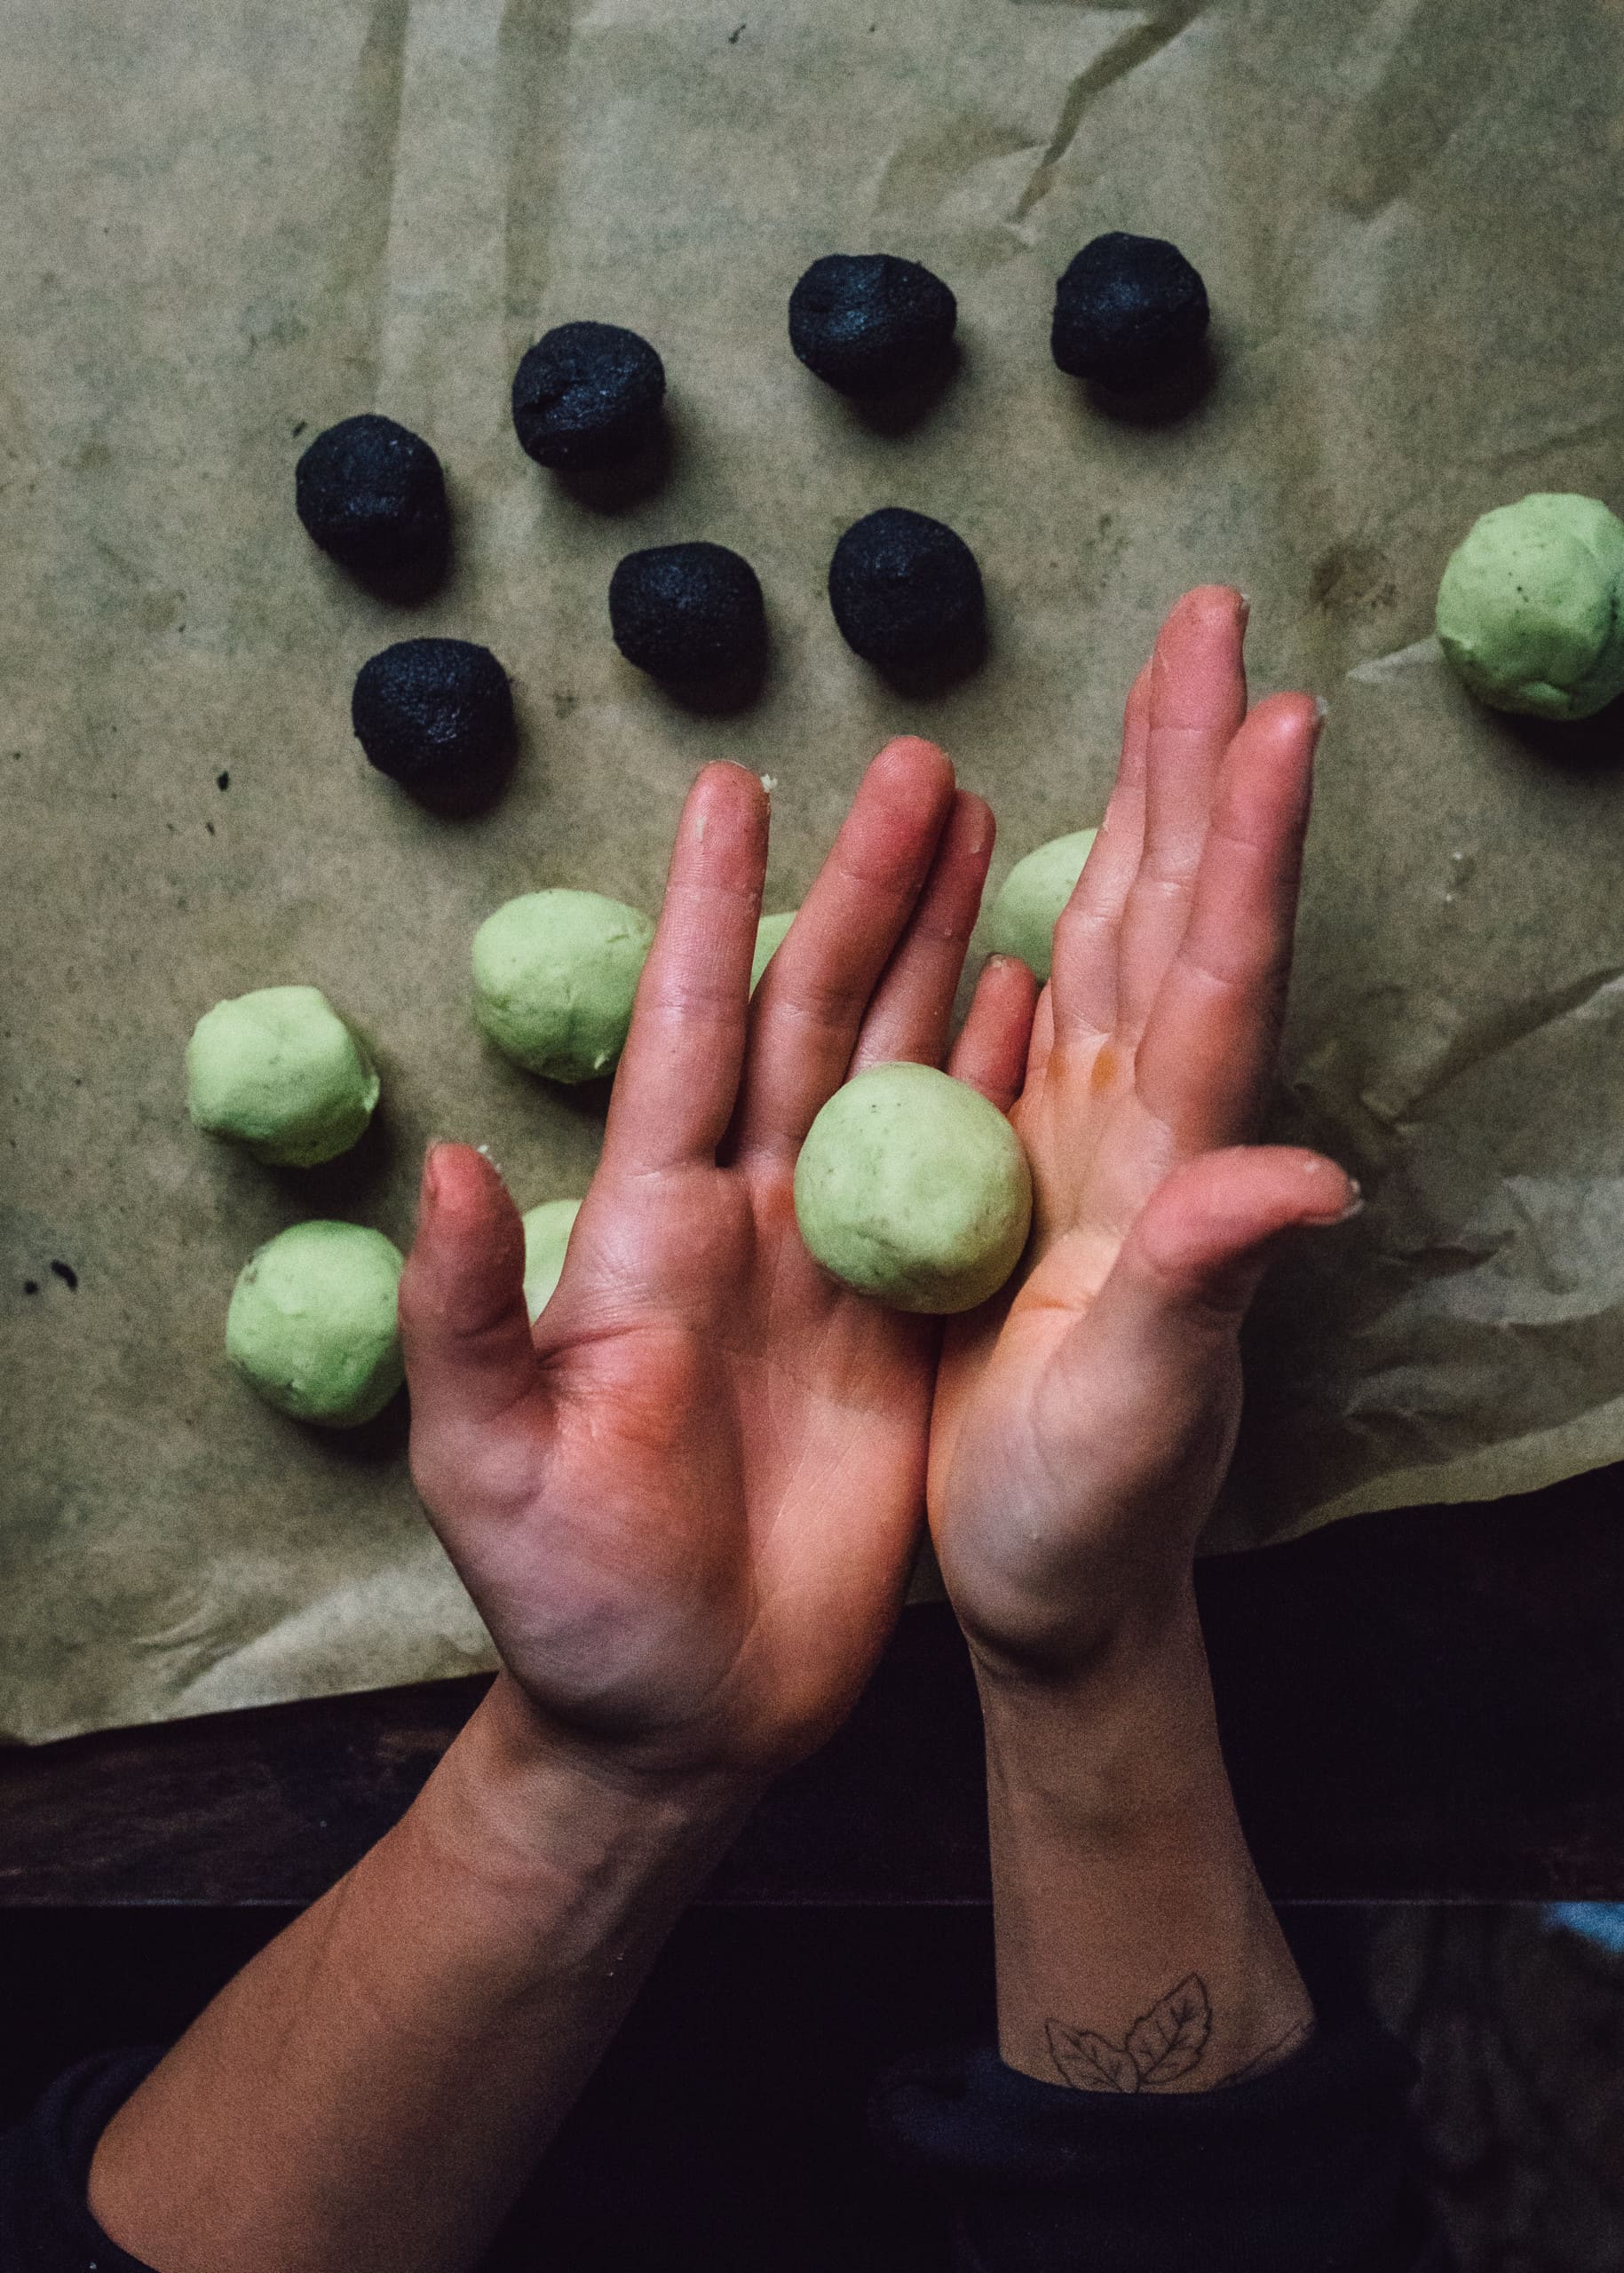
Divide the black sesame filling into 10g portions (you will have extra; save the rest for another use). Take a 20g portion of the prepared lotus seed paste, flatten into a disc, place the ball of black sesame filling in the center, and tuck and wrap the lotus seed paste around to enclose. The filling balls should be 30g each. Chill in the fridge until ready to use.
Option 3: Caramelized Pineapple Jam Filling
1 (14-ounce) can crushed pineapple, drained OR 1 medium pineapple, trimmed, flesh and core cut into 1-inch chunks
2 tablespoons (28 grams) vegan butter or refined coconut oil
½ cup (100 grams) brown or granulated sugar
½ teaspoon salt
1 tablespoon (8 grams) cornstarch, more if needed
If using fresh pineapple, pulse the chopped pineapple flesh in a food processor until it resembles crushed pineapple. In a heavy-bottomed saucepan, heat the vegan butter over medium low heat, stirring constantly, until it foams and then forms light brown specks at the bottom and smells fragrant, about 5 minutes. Add the brown sugar, crushed pineapple and salt, and cook over medium heat, stirring frequently, until the liquid has evaporated and the pineapple is thick and caramelized, about 20-30 minutes. Transfer to a heat-proof container and let cool.
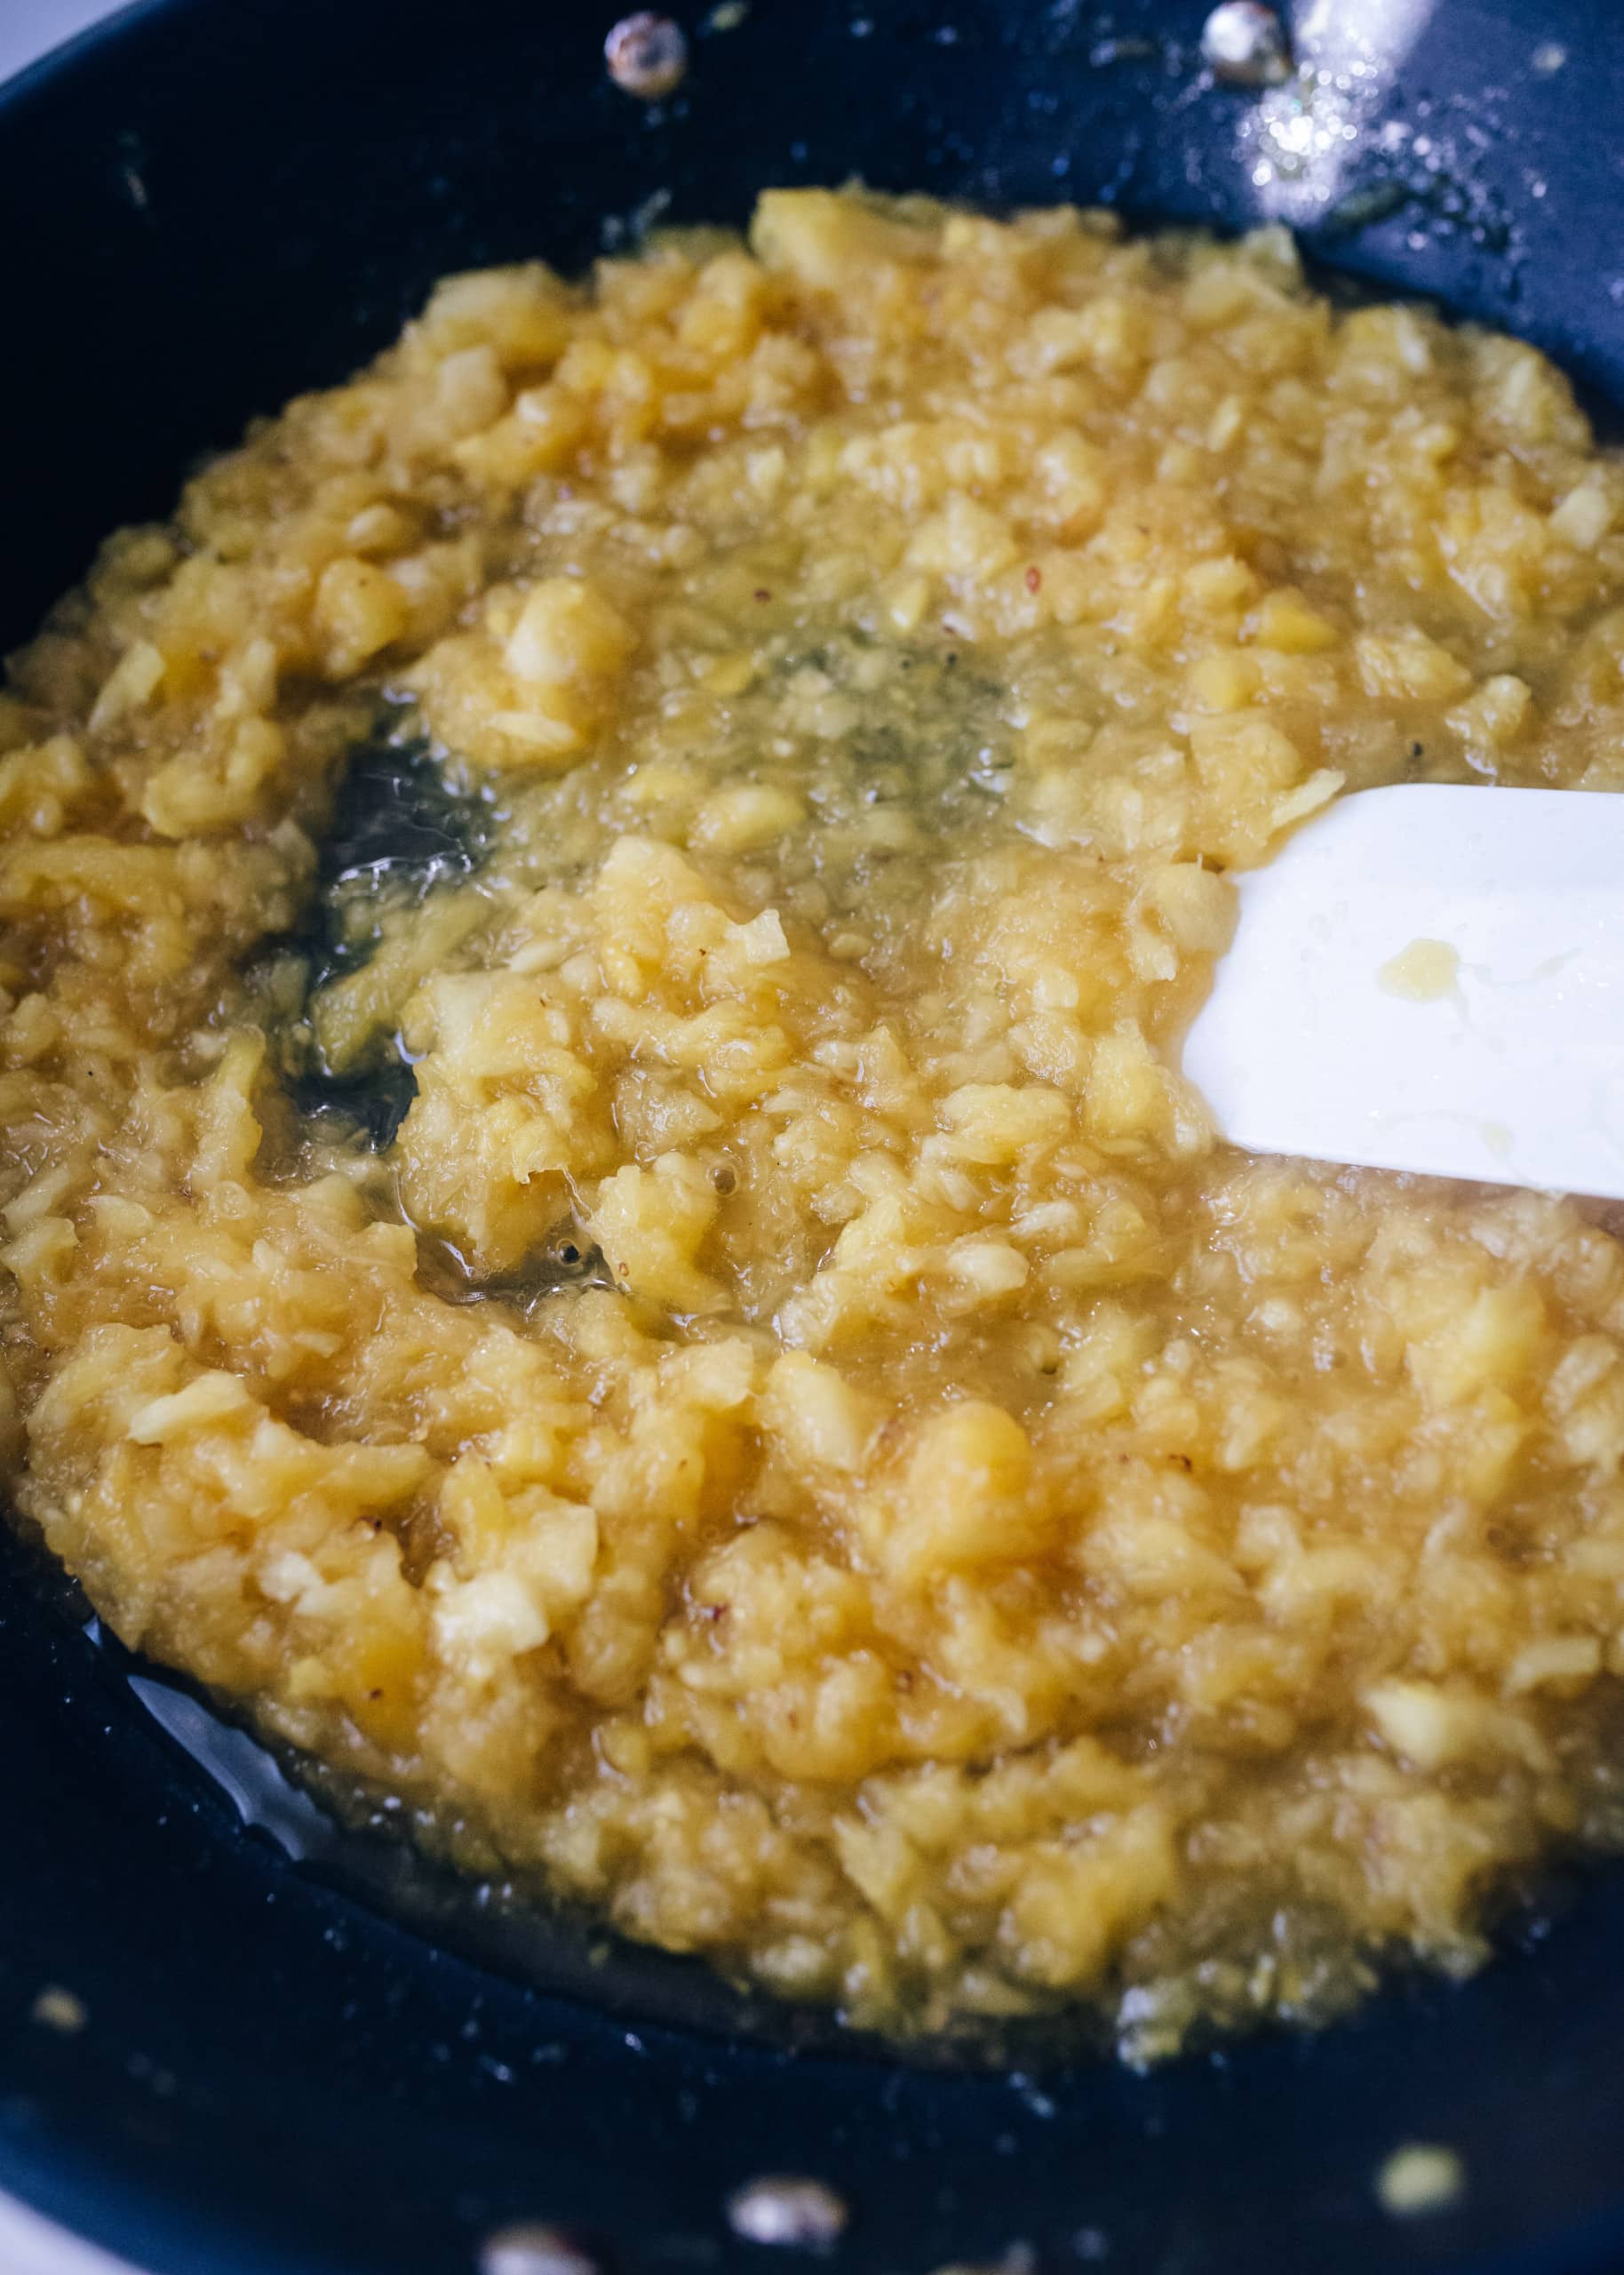
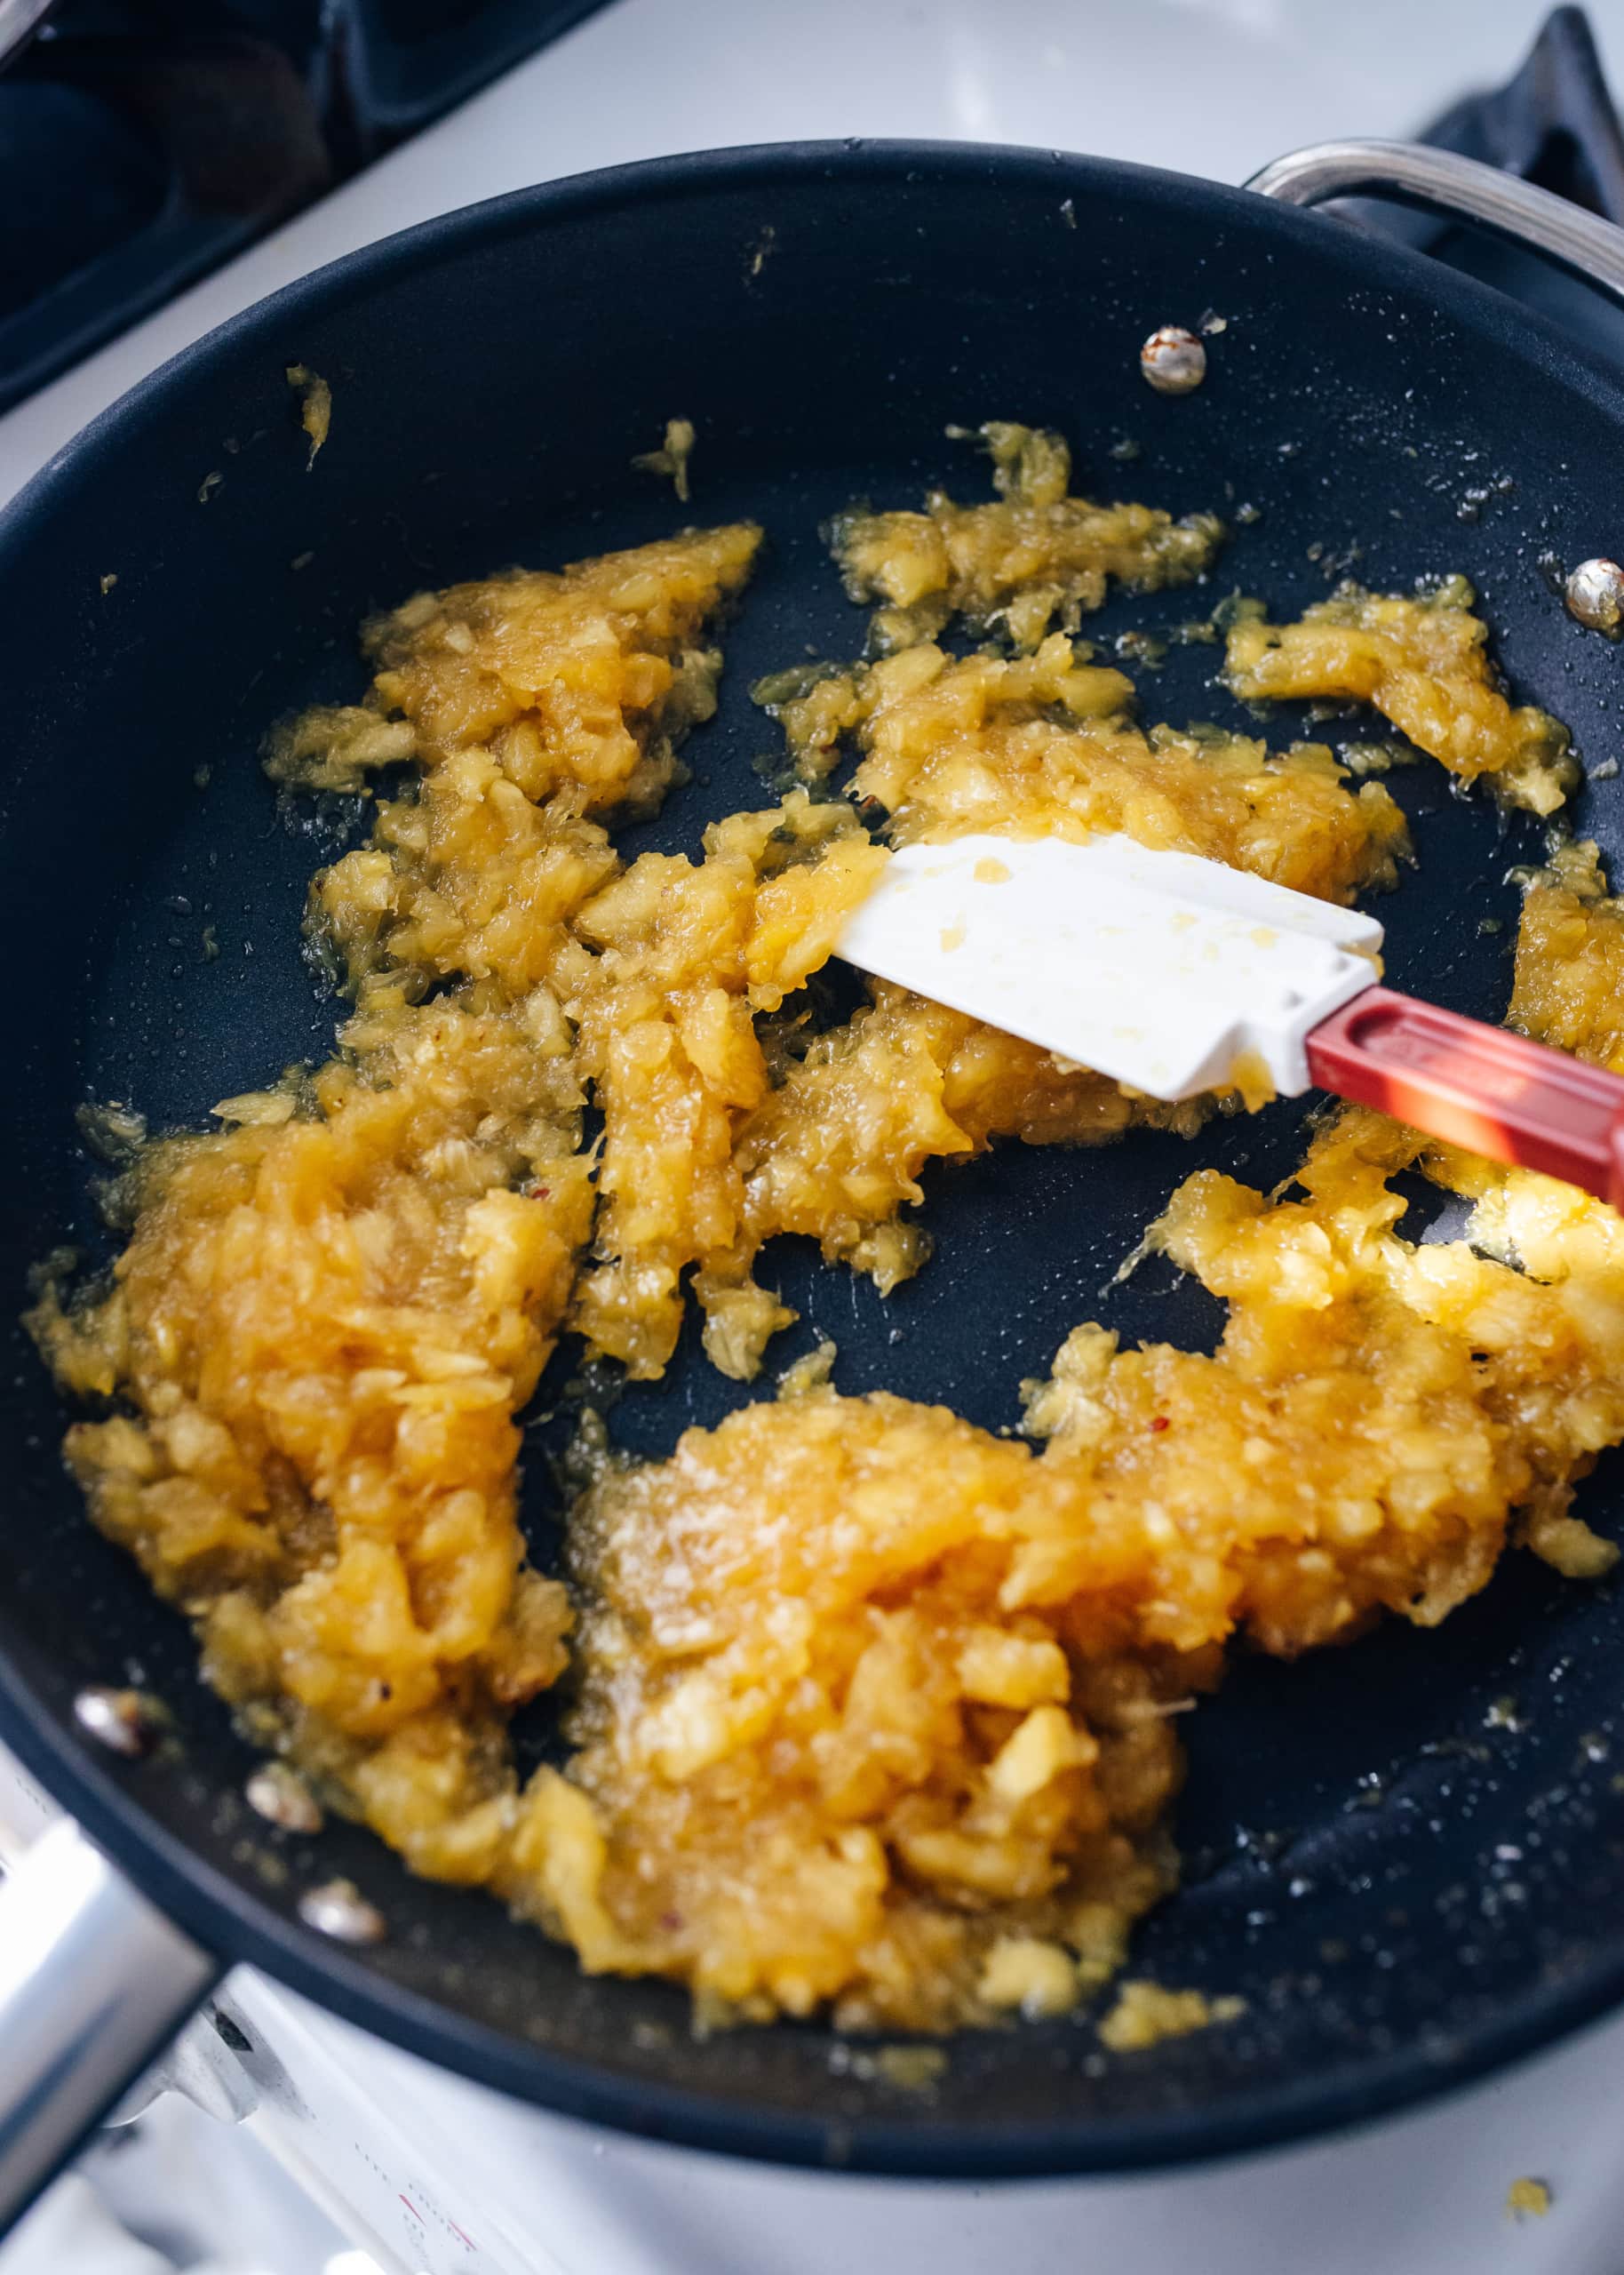
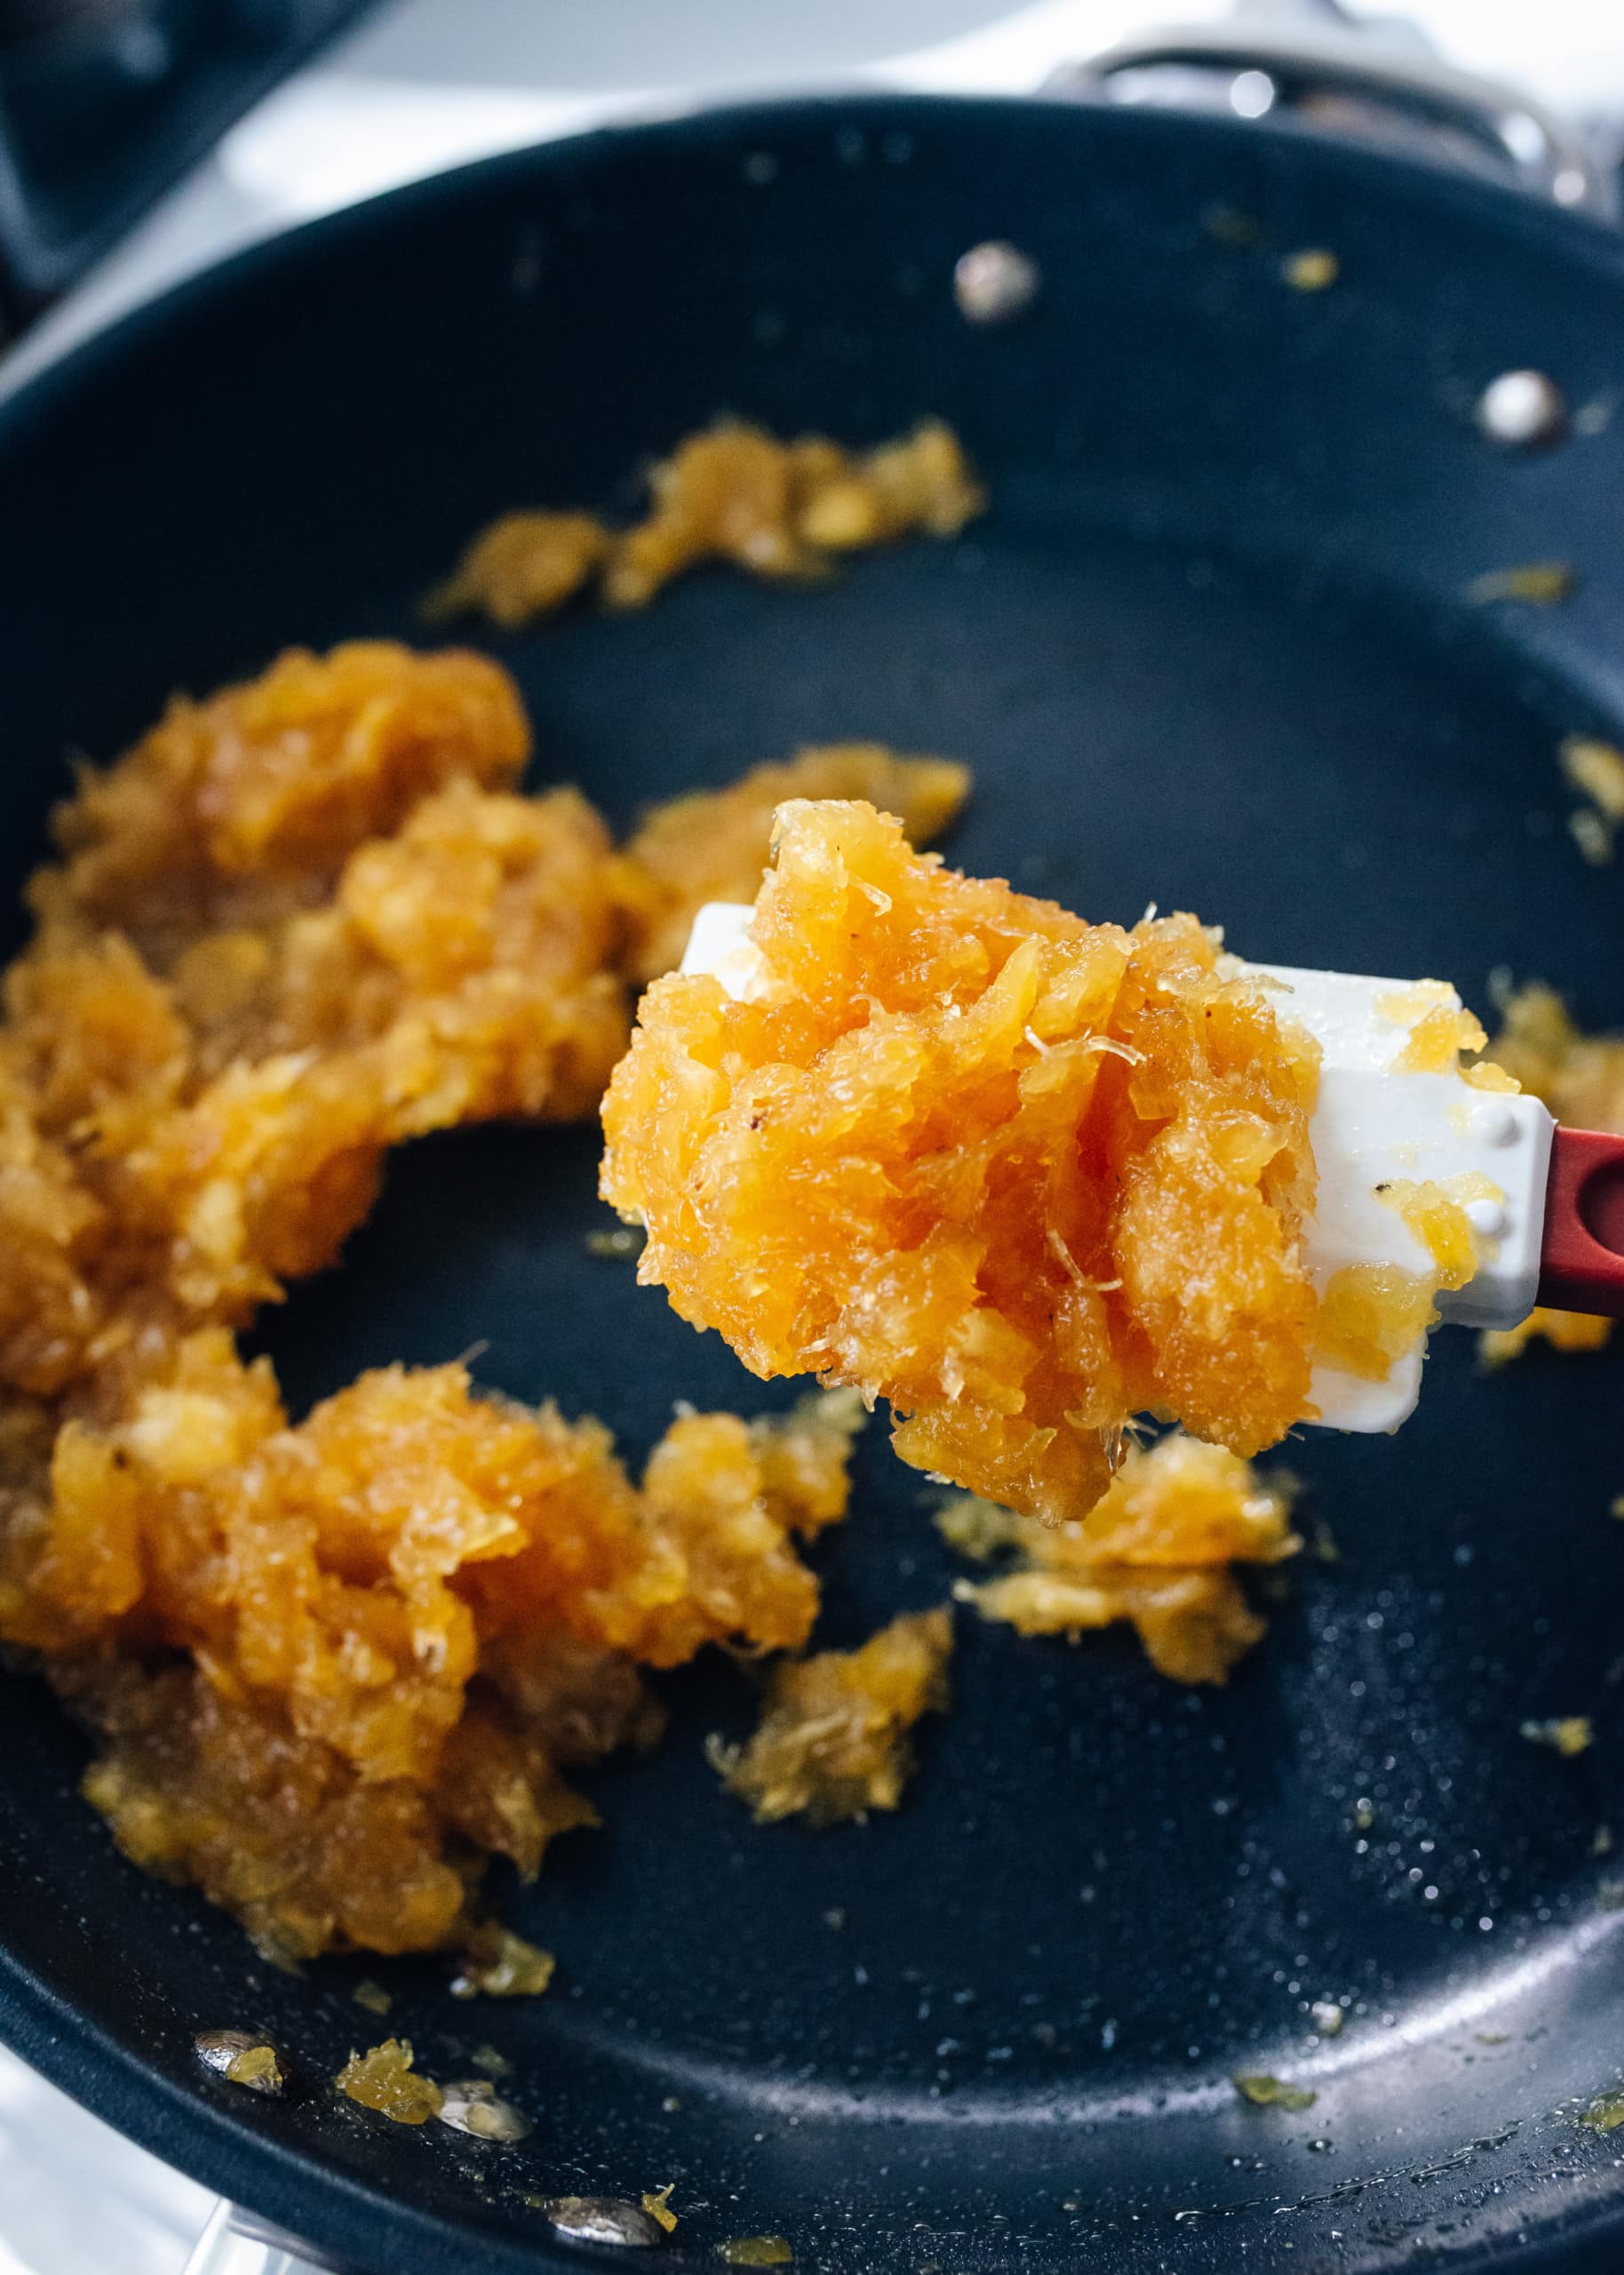
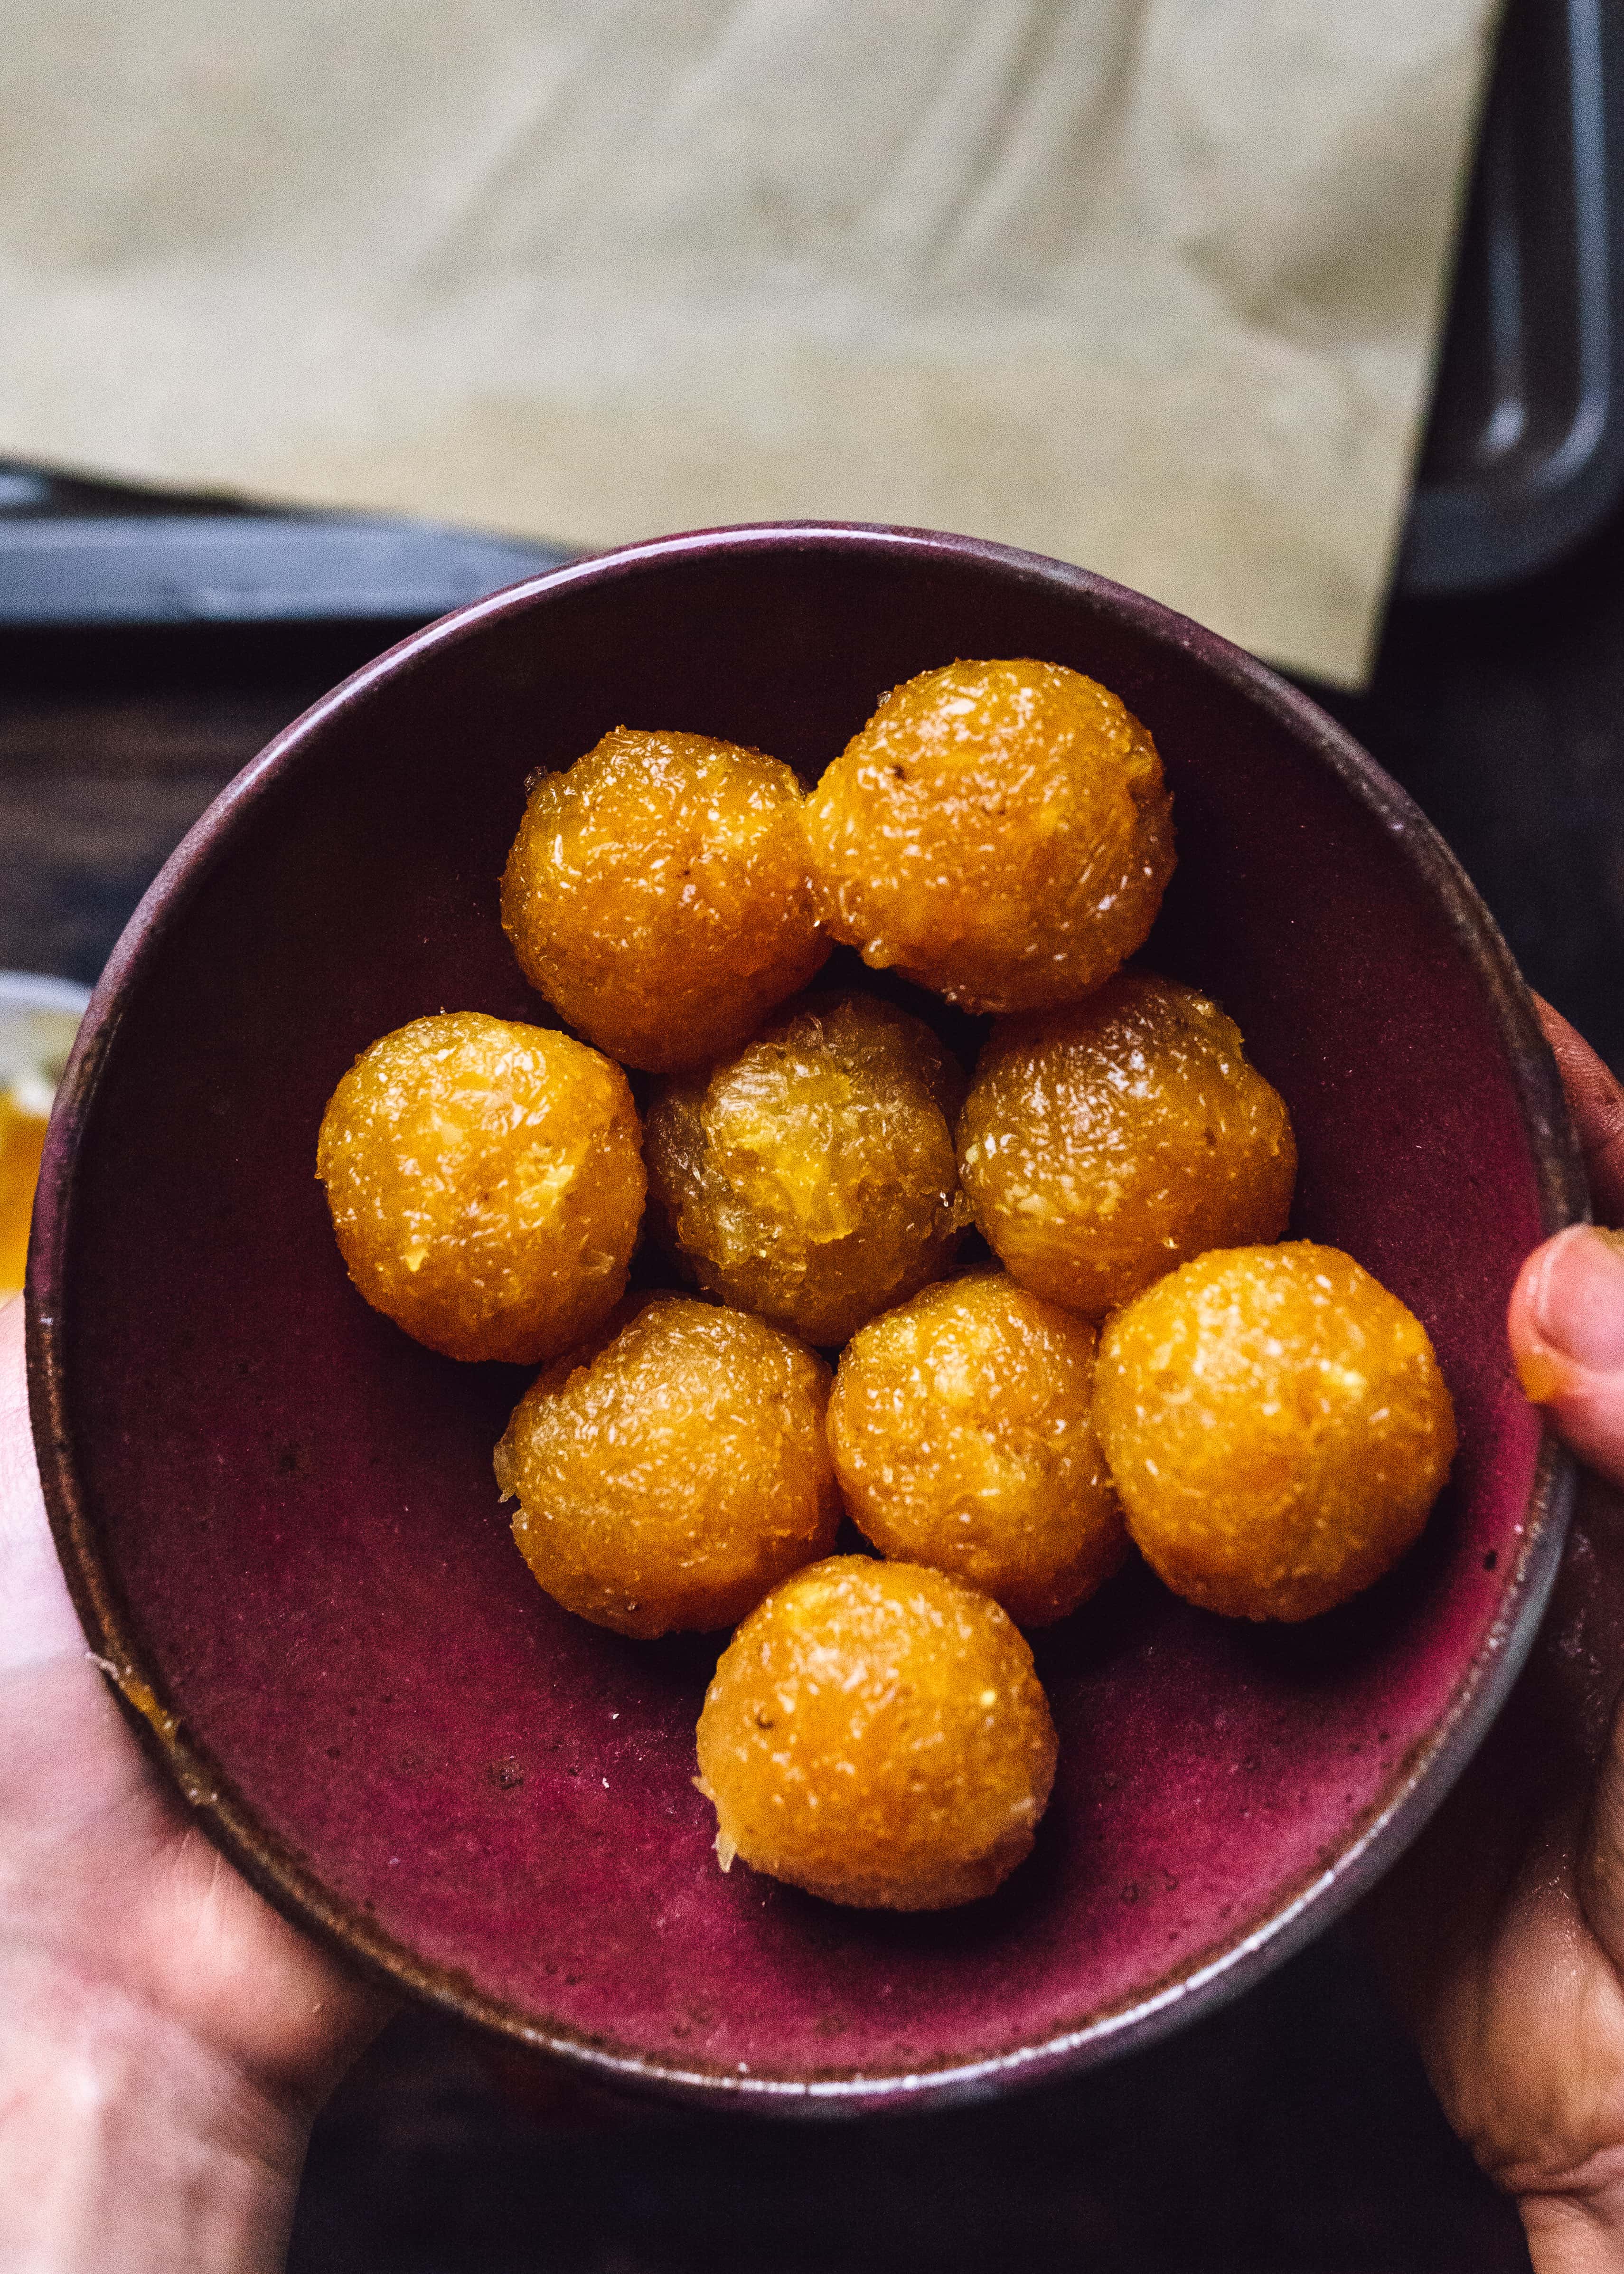
When cool enough to handle, portion into nine 30g balls (you will have lots of extra pineapple, reserve for another use). If the filling is too sticky to work with, add 1 tablespoon cornstarch. Chill the balls in the refrigerator until ready to use.
Option 4: Chinese Red Date Walnut and Chocolate Truffle Filling
For the jujube paste:
3.5 ounces (100 grams) dried jujube/red dates
¼ cup (25 grams) shelled and halved walnuts, toasted
1 tablespoon (8 grams) cornstarch or glutinous rice flour
1 tablespoon (14 grams) refined coconut oil
For the dark chocolate truffle centers:
1-3.5 ounce bar (100 grams) dairy-free dark or semi-sweet chocolate (I used 75%), very finely chopped
2 tablespoon (30 grams) full-fat coconut milk OR 2 tablespoon peanut butter
Make the red date walnut paste: Pit the dates. Place in a steamer and steam over boiling water on high heat until they’re softened and wrinkly, about 8-10 minutes. Add the dates to a food processor with the roasted walnuts and pulse until finely chopped. Transfer to a bowl and stir in the cornstarch and coconut oil, then form into nine 20g balls. You will have date paste leftover; reserve for another use. Transfer to a heat-proof container and cool completely in the refrigerator.
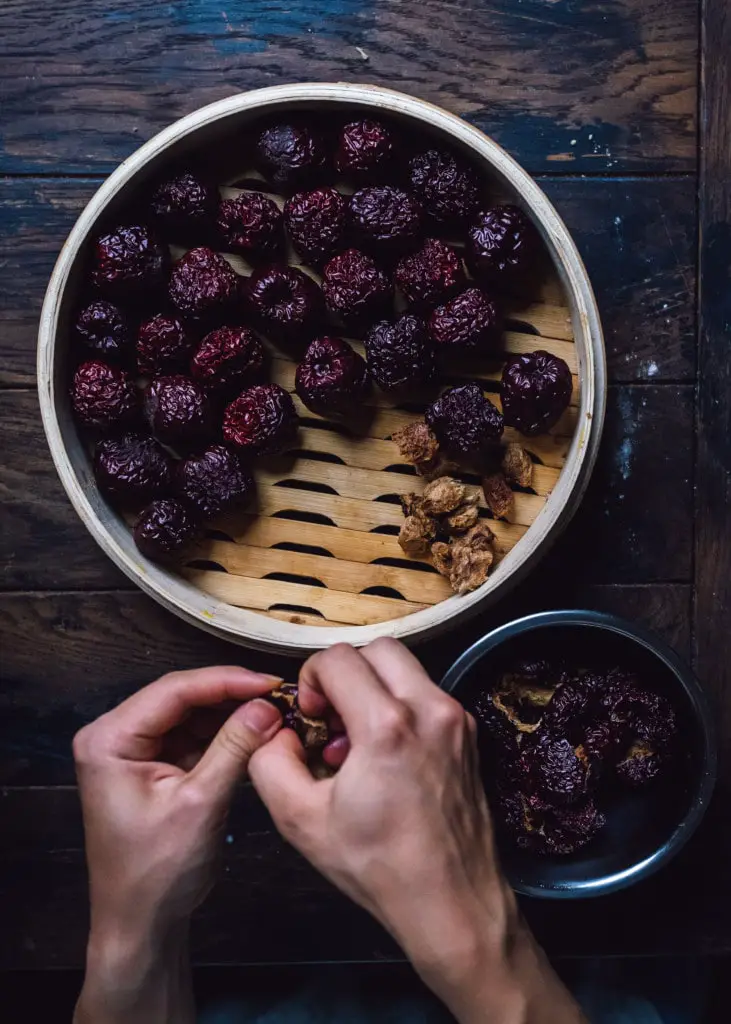
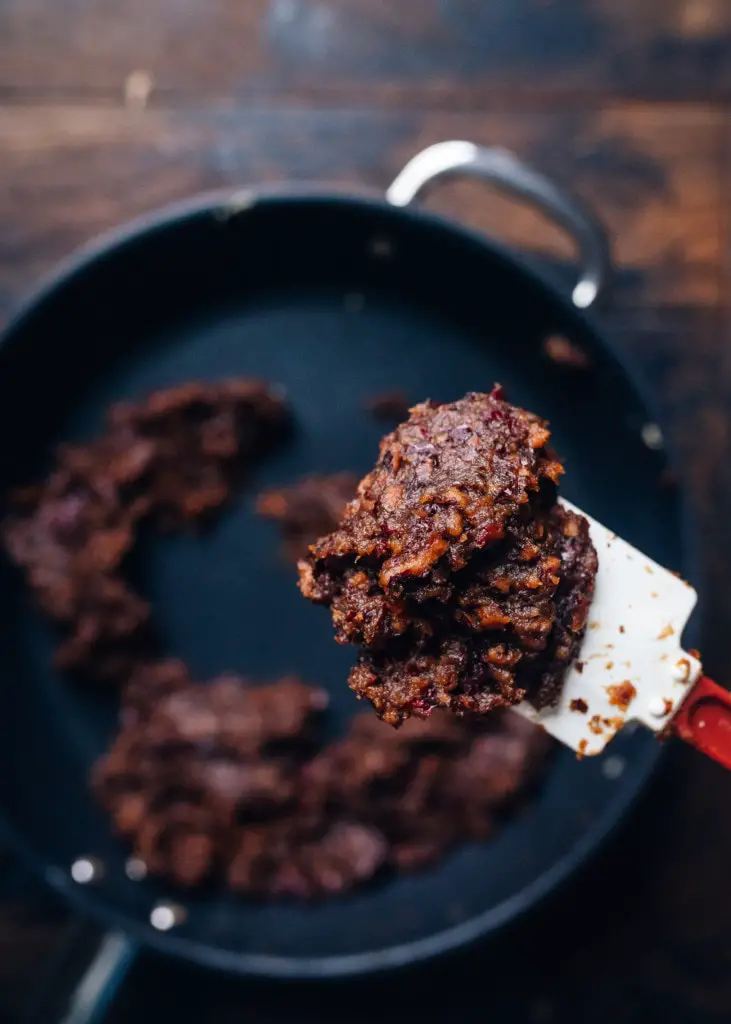
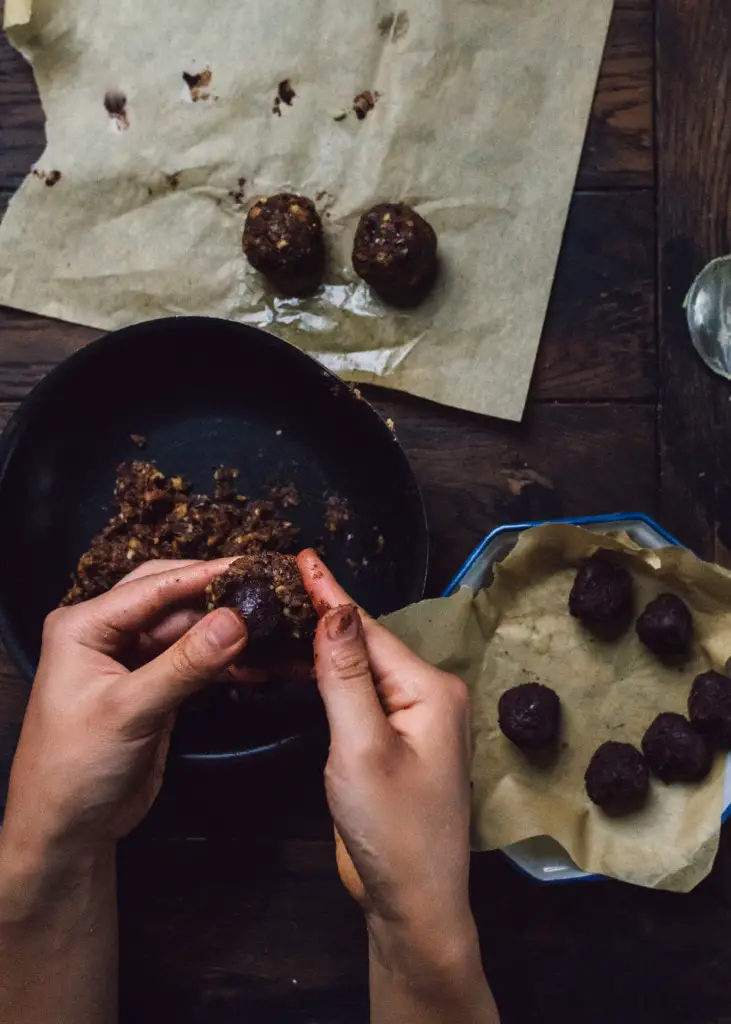
Make the chocolate truffles: Melt the chocolate either in the microwave in 30-second intervals or in a double boiler (place a saucepan on the stovetop with 1-inch of water, simmering, and a glass or metal bowl over top that rests high enough to not touch the water). When the chocolate is melted, remove from heat and stir in the coconut milk or the nut butter until the mixture is smooth. Transfer to a heat-proof container and cool completely in the refrigerator, then divide into 10g portions and shape into round ‘truffles’.
Take a 20g portion of date walnut paste, flatten into a disc, place the chocolate truffle in the center, and tuck and wrap the date paste around to enclose. The filling balls should be 30g each. Chill in the fridge until ready to use.
Option 5: Sichuan Peppercorn Peanut Sesame Filling
1 cup (140 grams) unsalted roasted peanuts
¼ cup (35 grams) white sesame seeds, toasted
2 tablespoons (18 grams) black sesame seeds, toasted
¼ cup (85 grams) honey, or ¼ cup agave nectar or maple syrup + 1 tablespoon sugar
½ teaspoon ground Sichuan peppercorn (toast and grind whole peppercorns for the best flavor) and ½ teaspoon black pepper
2 tablespoon (15 grams) cornstarch
¾ teaspoon salt
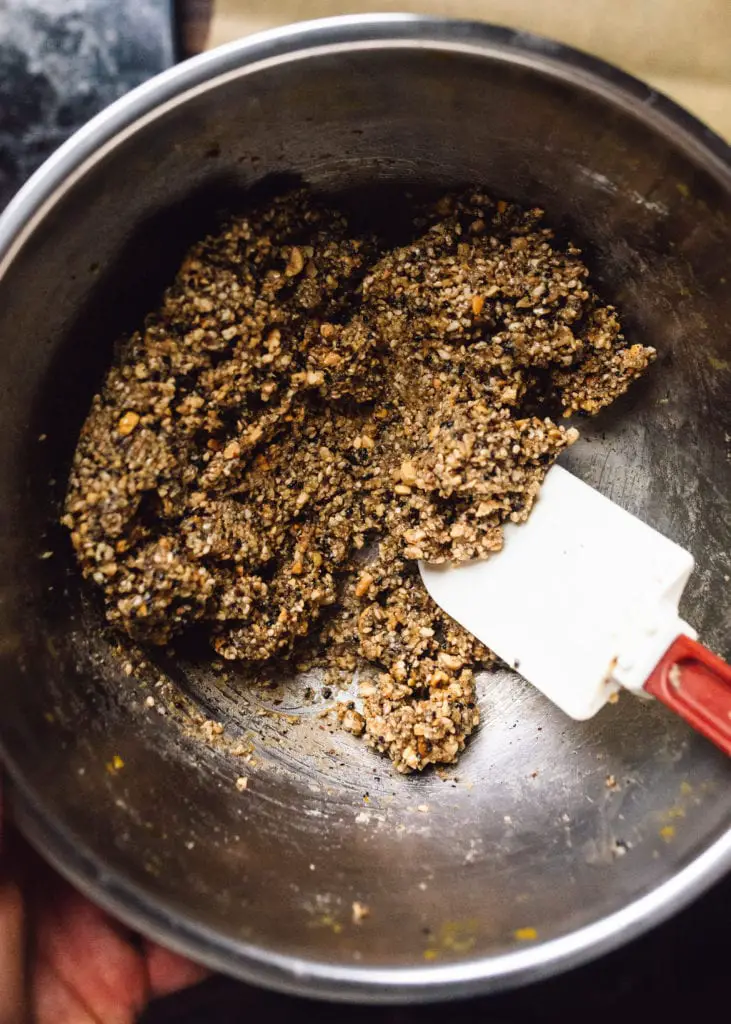
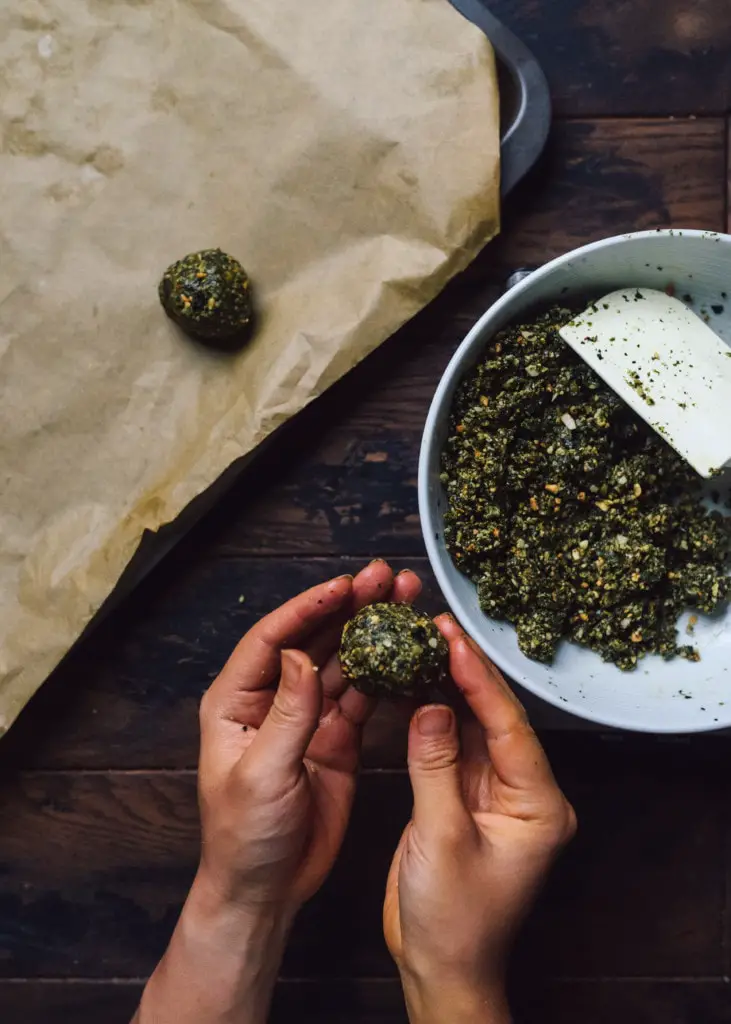
In a food processor, add the roasted peanuts and process until coarsely ground. Add the toasted sesame seeds, honey, ground Sichuan peppercorn, cornstarch and salt and pulse a few more times until the filling is still coarse but sticks together when pressed. Divide into nine 30g portions and shape into balls.
Option 6: Salty Seaweed Pistachio and Nut Filling (makes enough for 9 mooncakes)
1 cup (120 grams) shelled unsalted pistachios, toasted
¼ cup (35 grams) unsalted peanuts, roasted pumpkin seeds, or roasted sunflower seeds
¼ cup (18 grams) store-bought furikake seasoning OR 4 roasted nori sheets, torn into small pieces
¼ cup (85 grams) honey OR ¼ cup agave nectar/maple syrup + 1 tablespoon sugar
1 tablespoon (8 grams) cornstarch
½ teaspoon salt (omit if using furikake seasoning)
In a food processor, combine the pistachios, pumpkin/sunflower seeds/peanut, and process until coarsely ground. Add the roasted torn nori sheets or furikake, honey, cornstarch and salt and pulse a few more times until the filling is still coarse but sticks together when pressed. Divide into nine 30g portions and shape into balls.
Make the dough
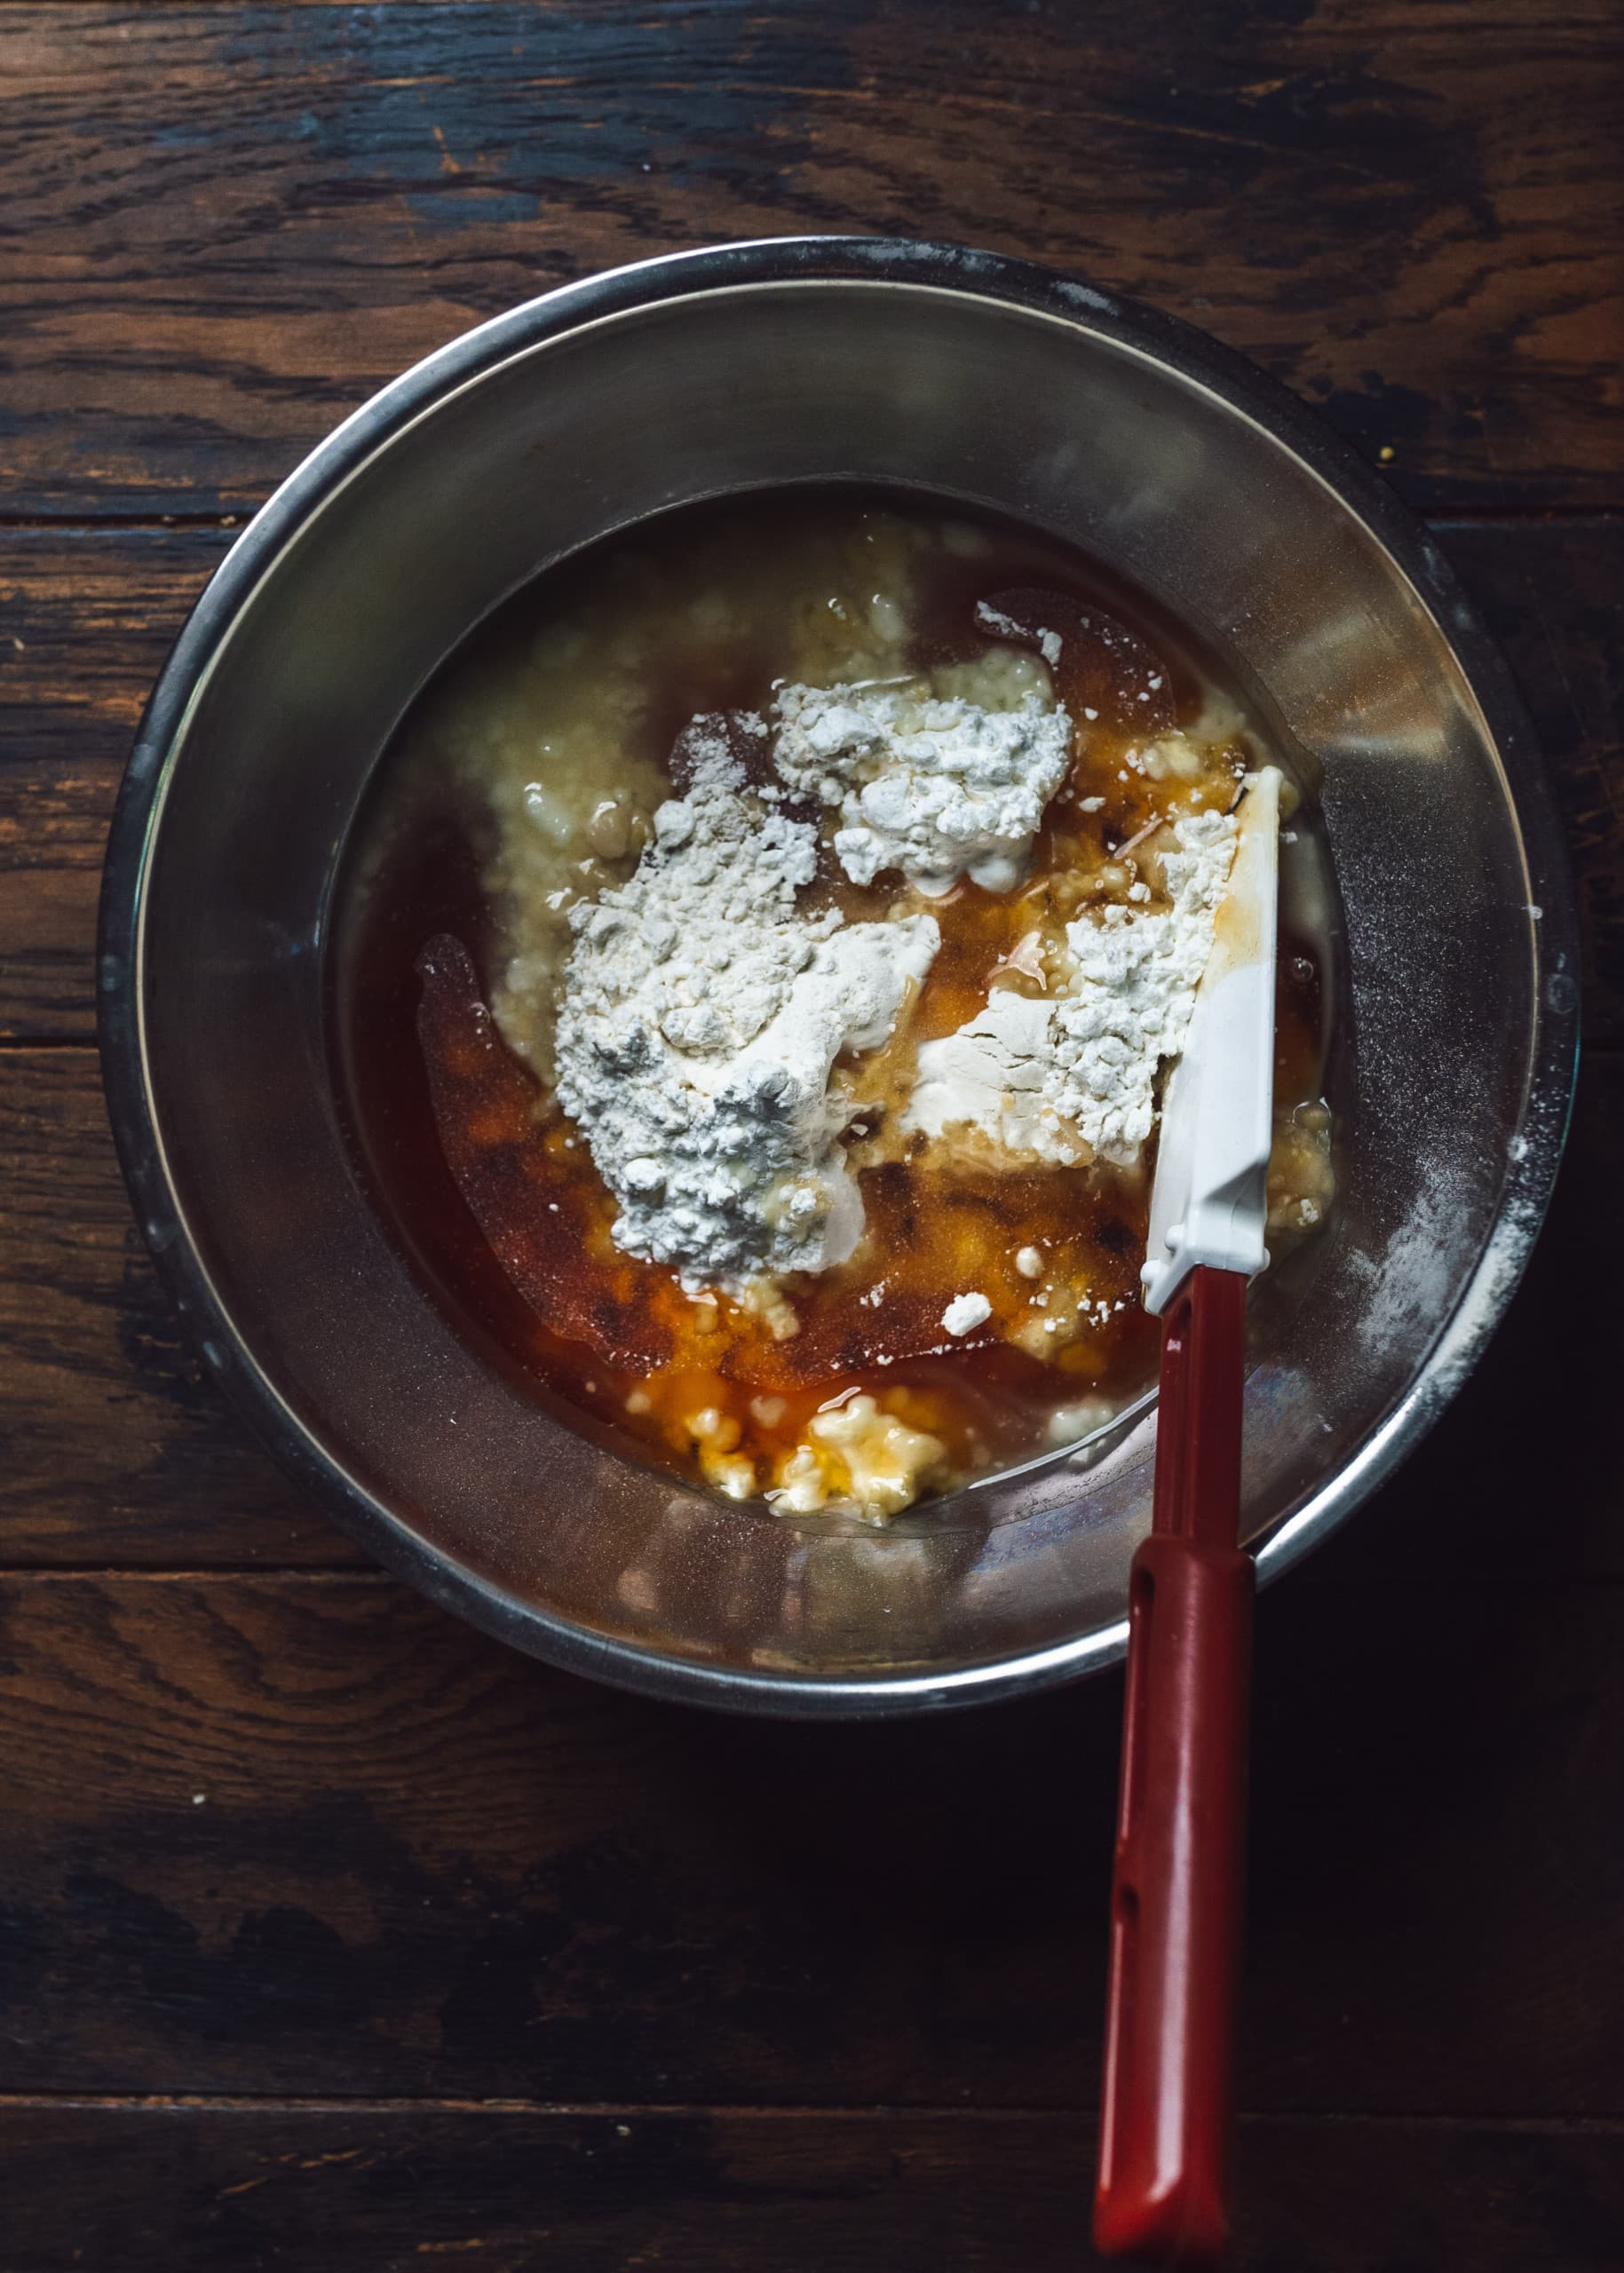
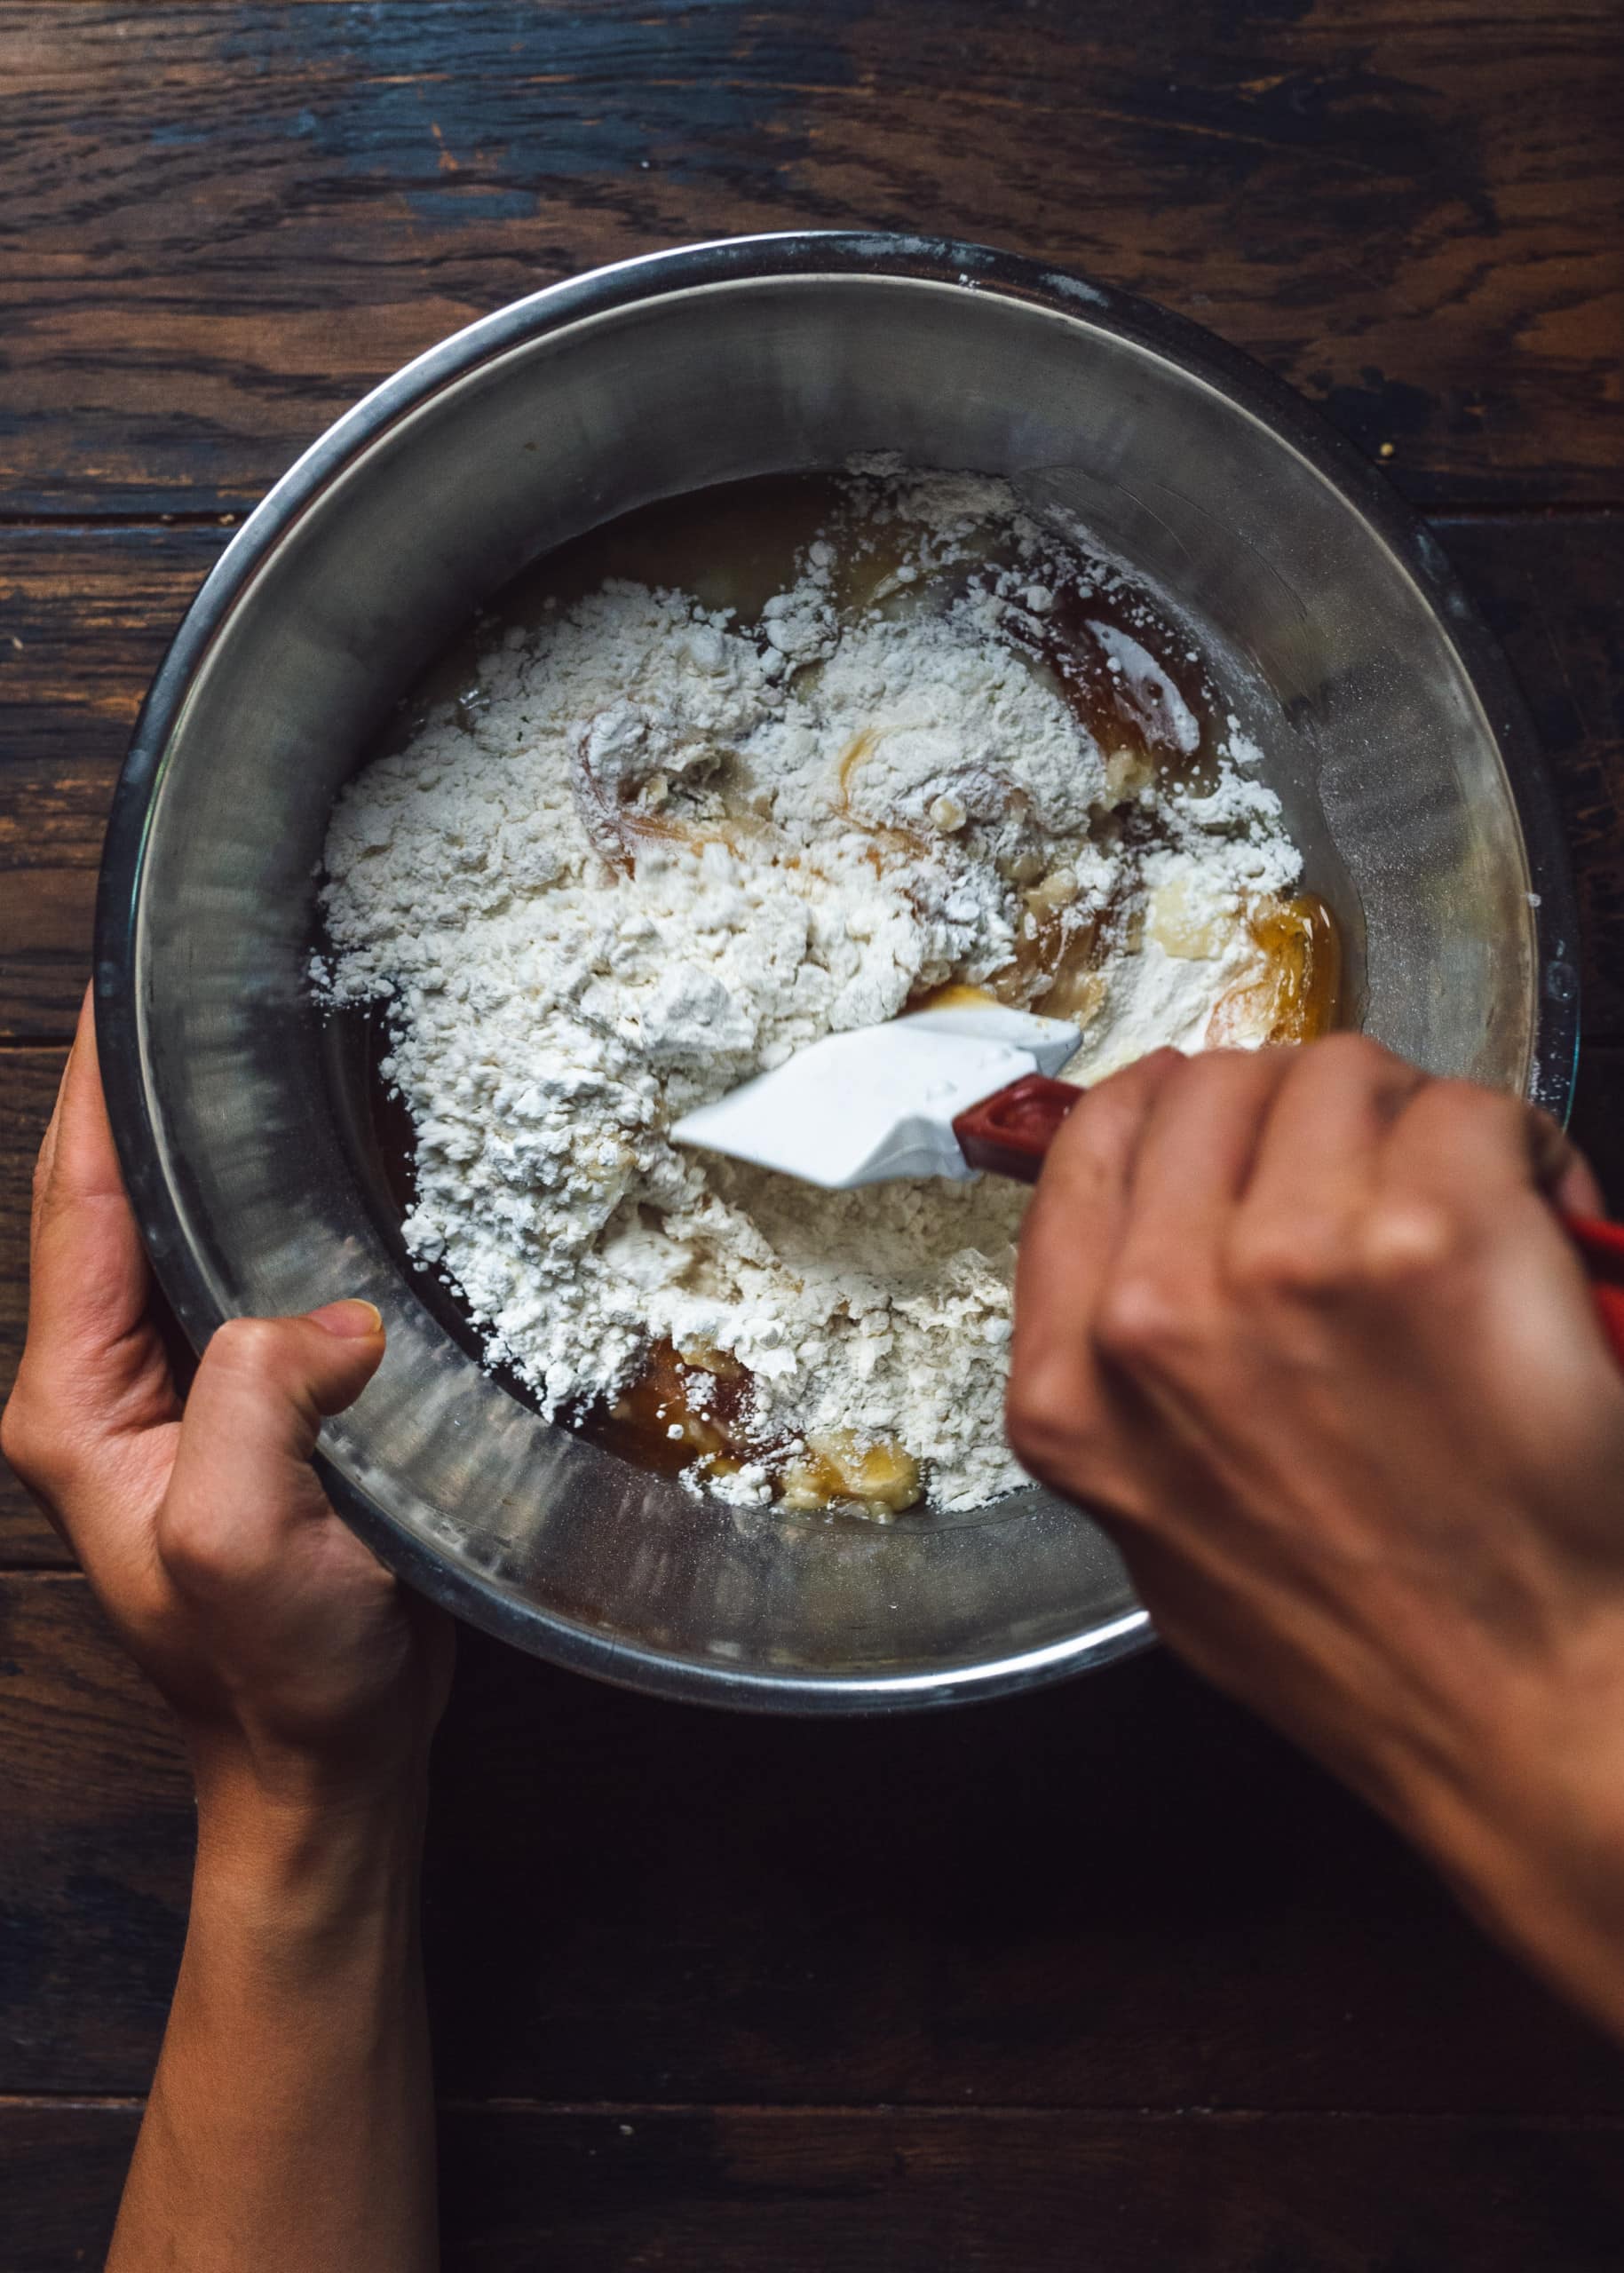
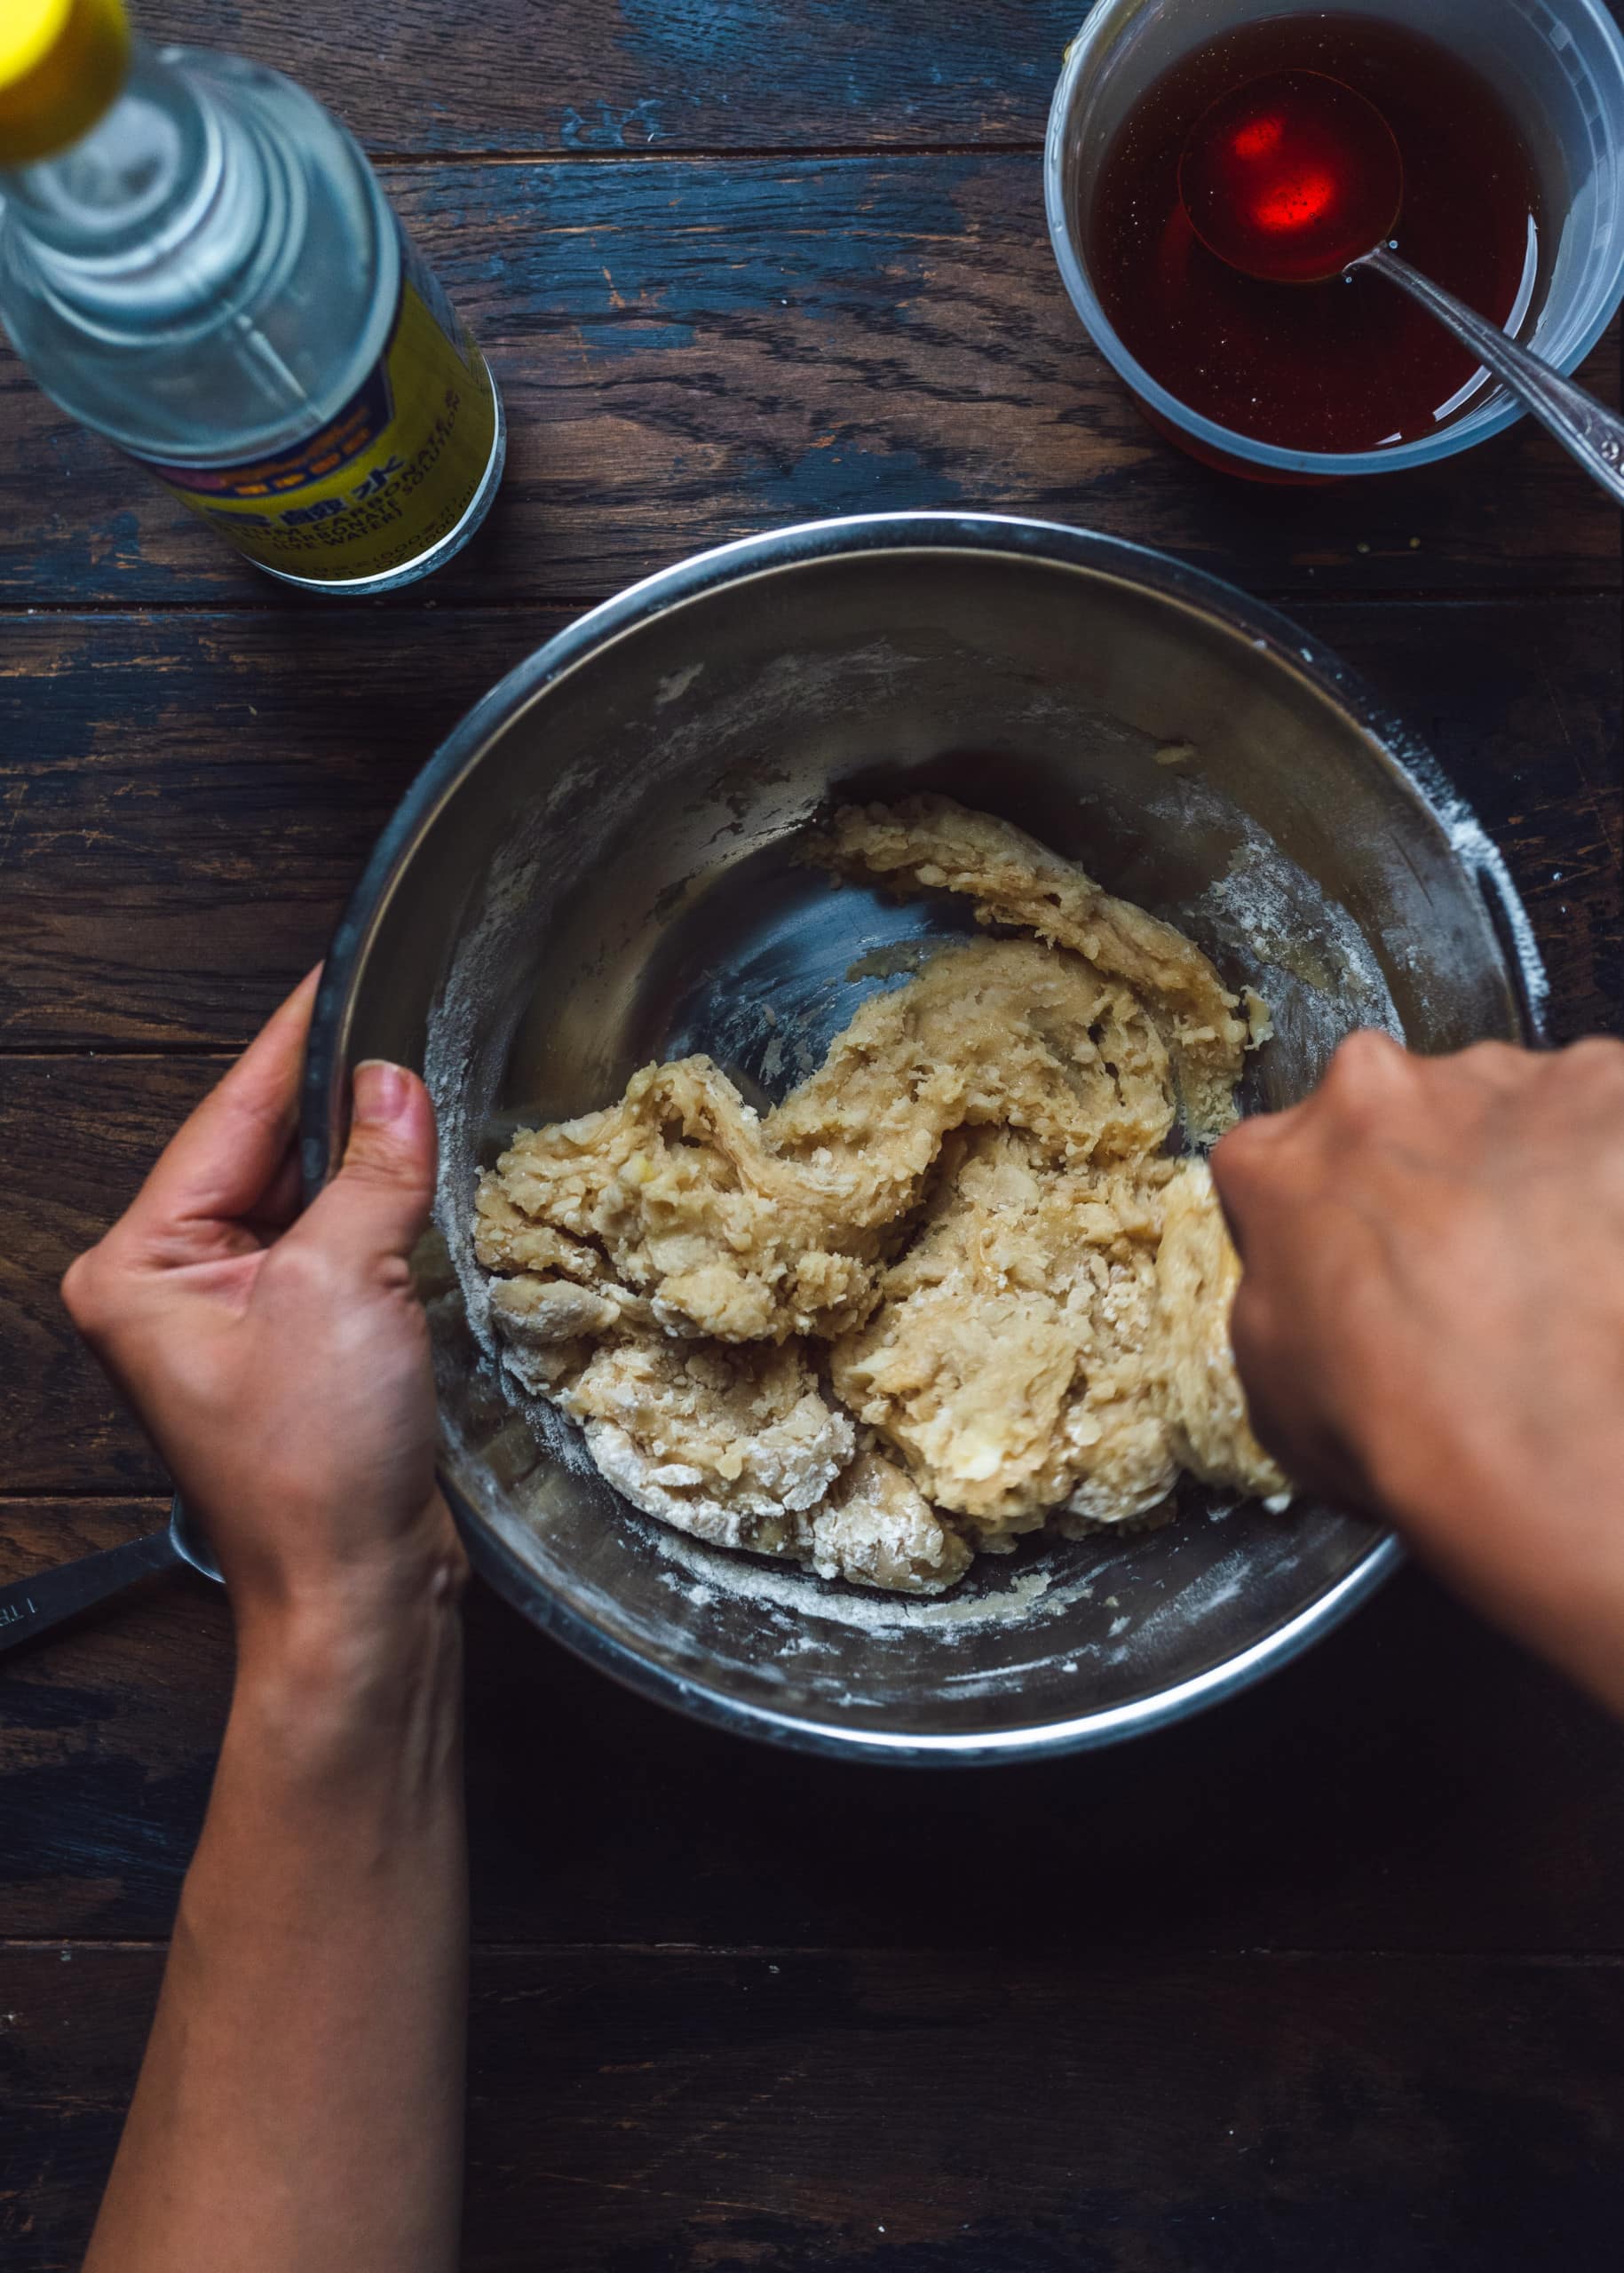
Combine the flour, oil, golden syrup, and lye or alkaline water in a large mixing bowl. I made my own golden syrup since I couldn’t find it in a store nearby (see Notes below).
You can also make your own alkaline water using baked baking soda, which I’ve done before to make pretzels. It’s very simple, although you have to make it in advance.
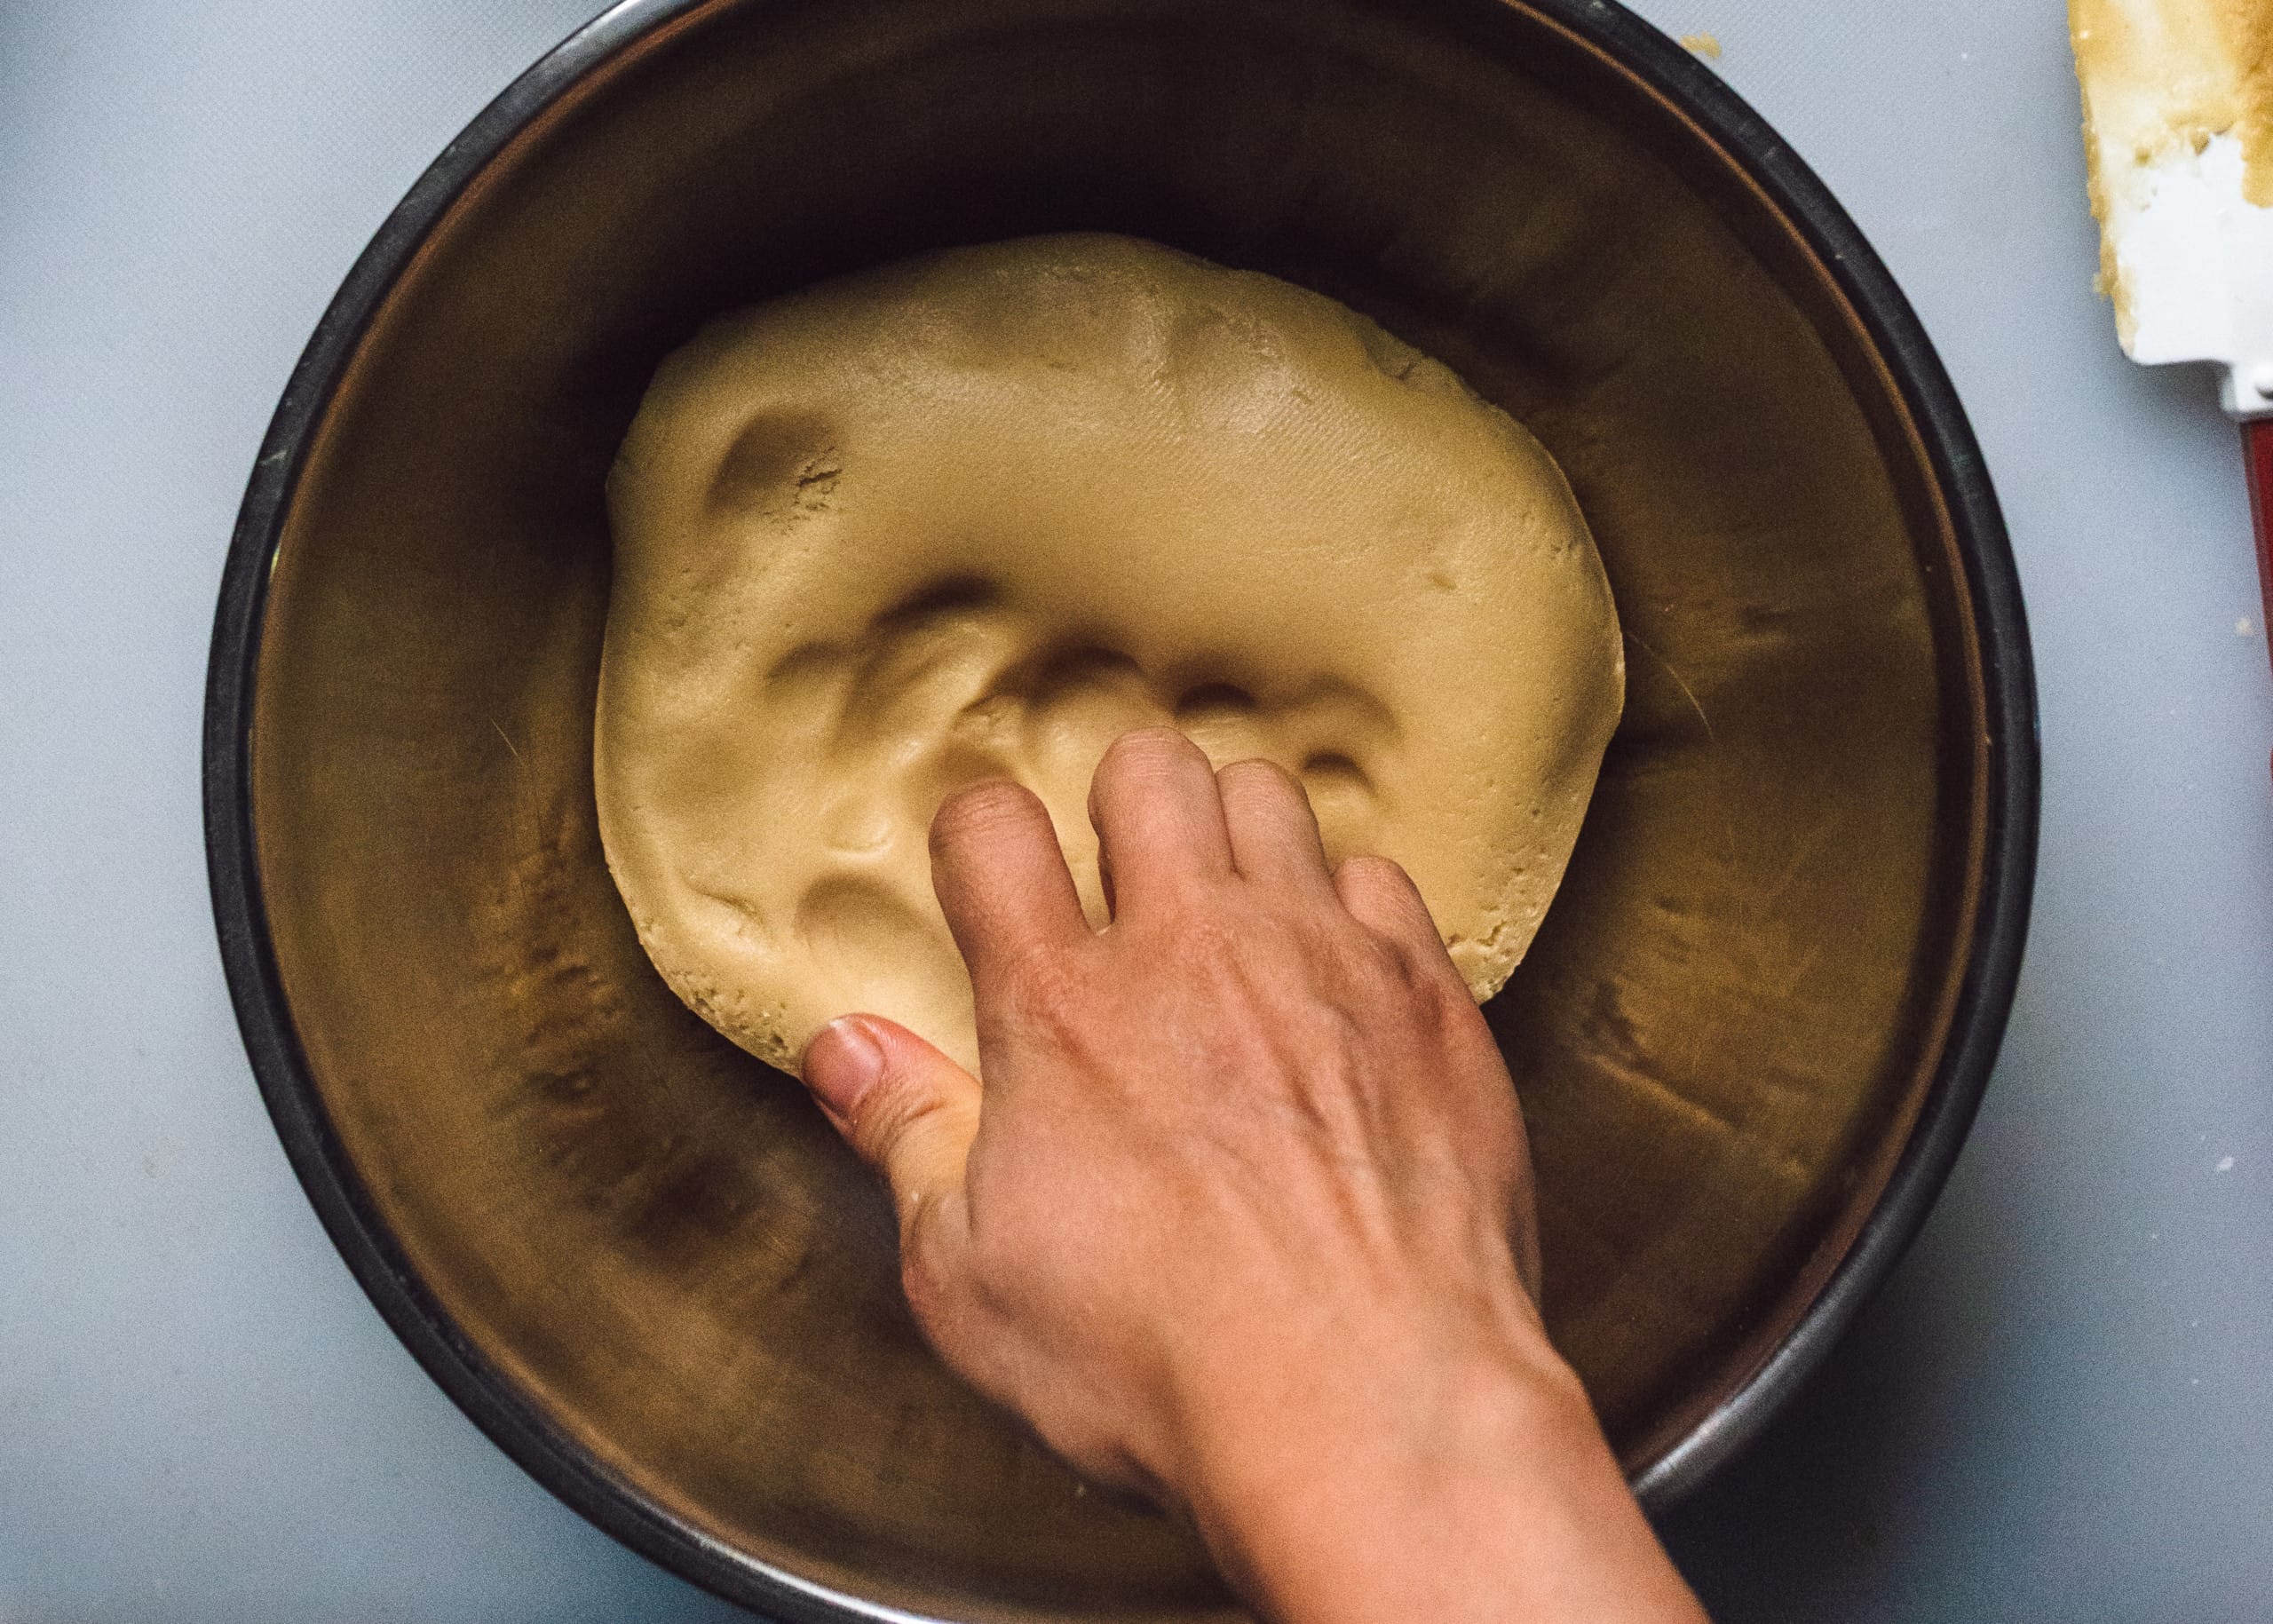
Stir to form a dough, then knead with your hands until smooth and glossy, about 5 minutes. Form into a disc and rest in a covered bowl at room temperature for an hour.
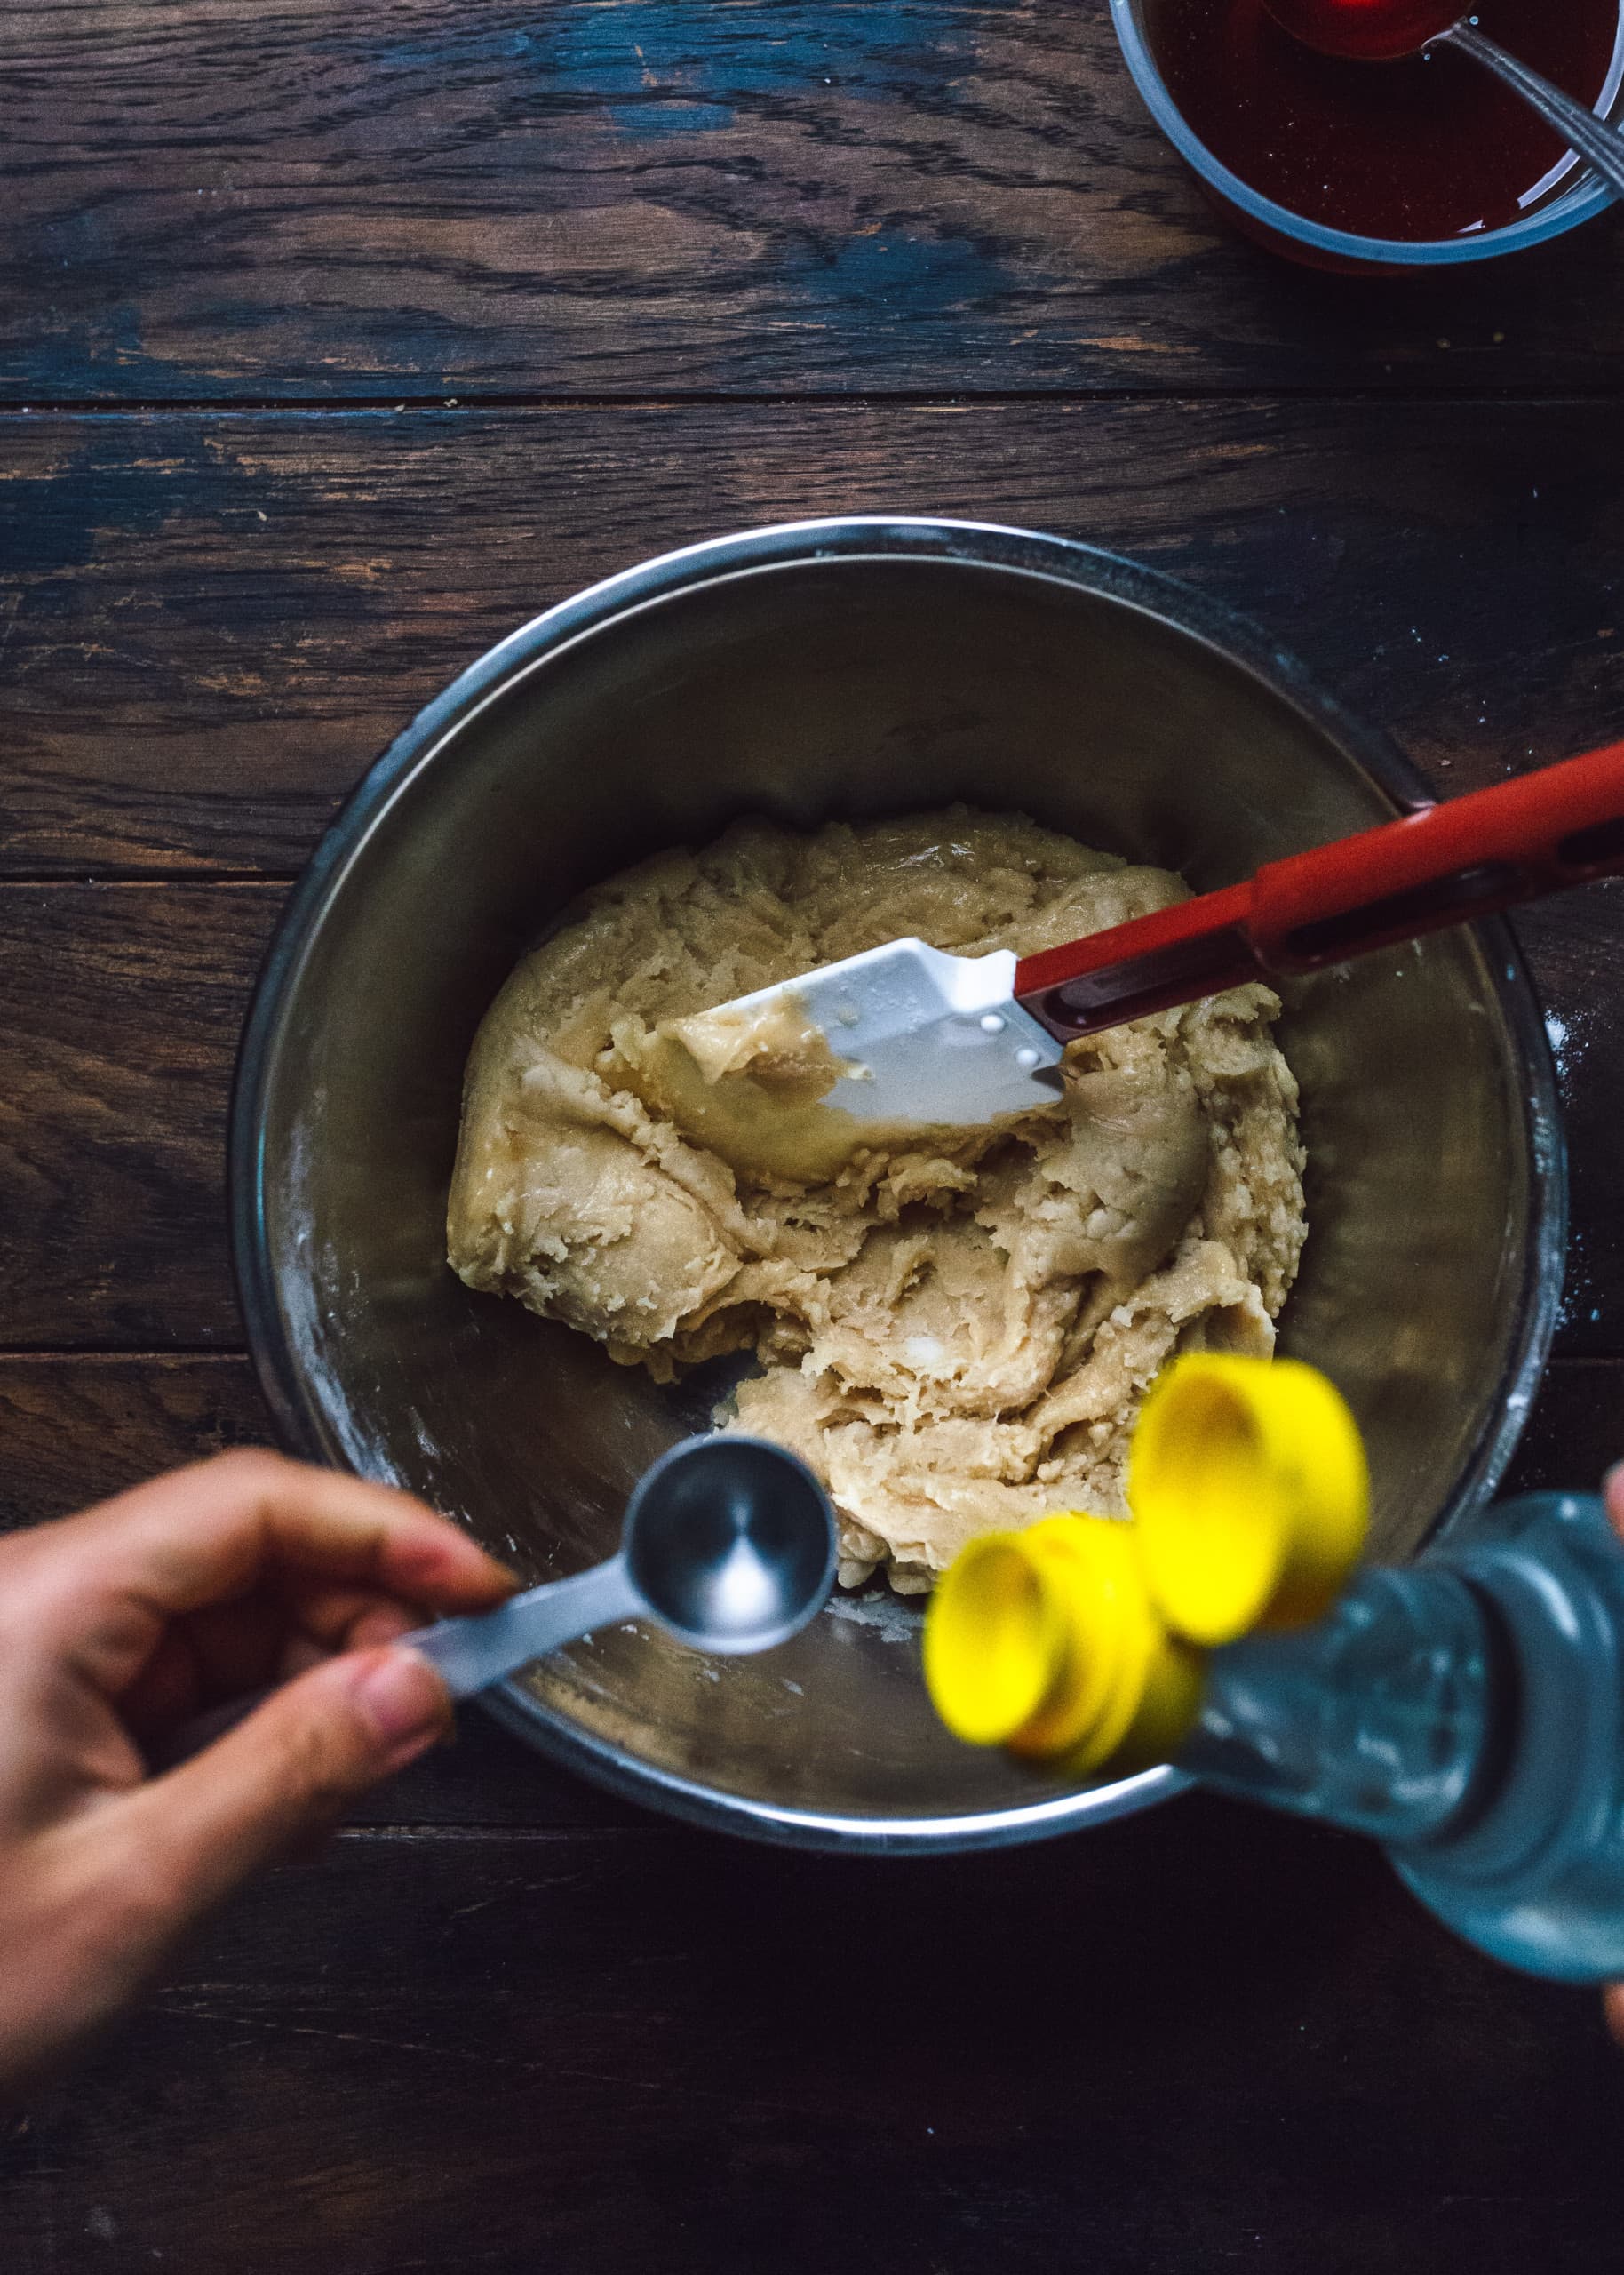
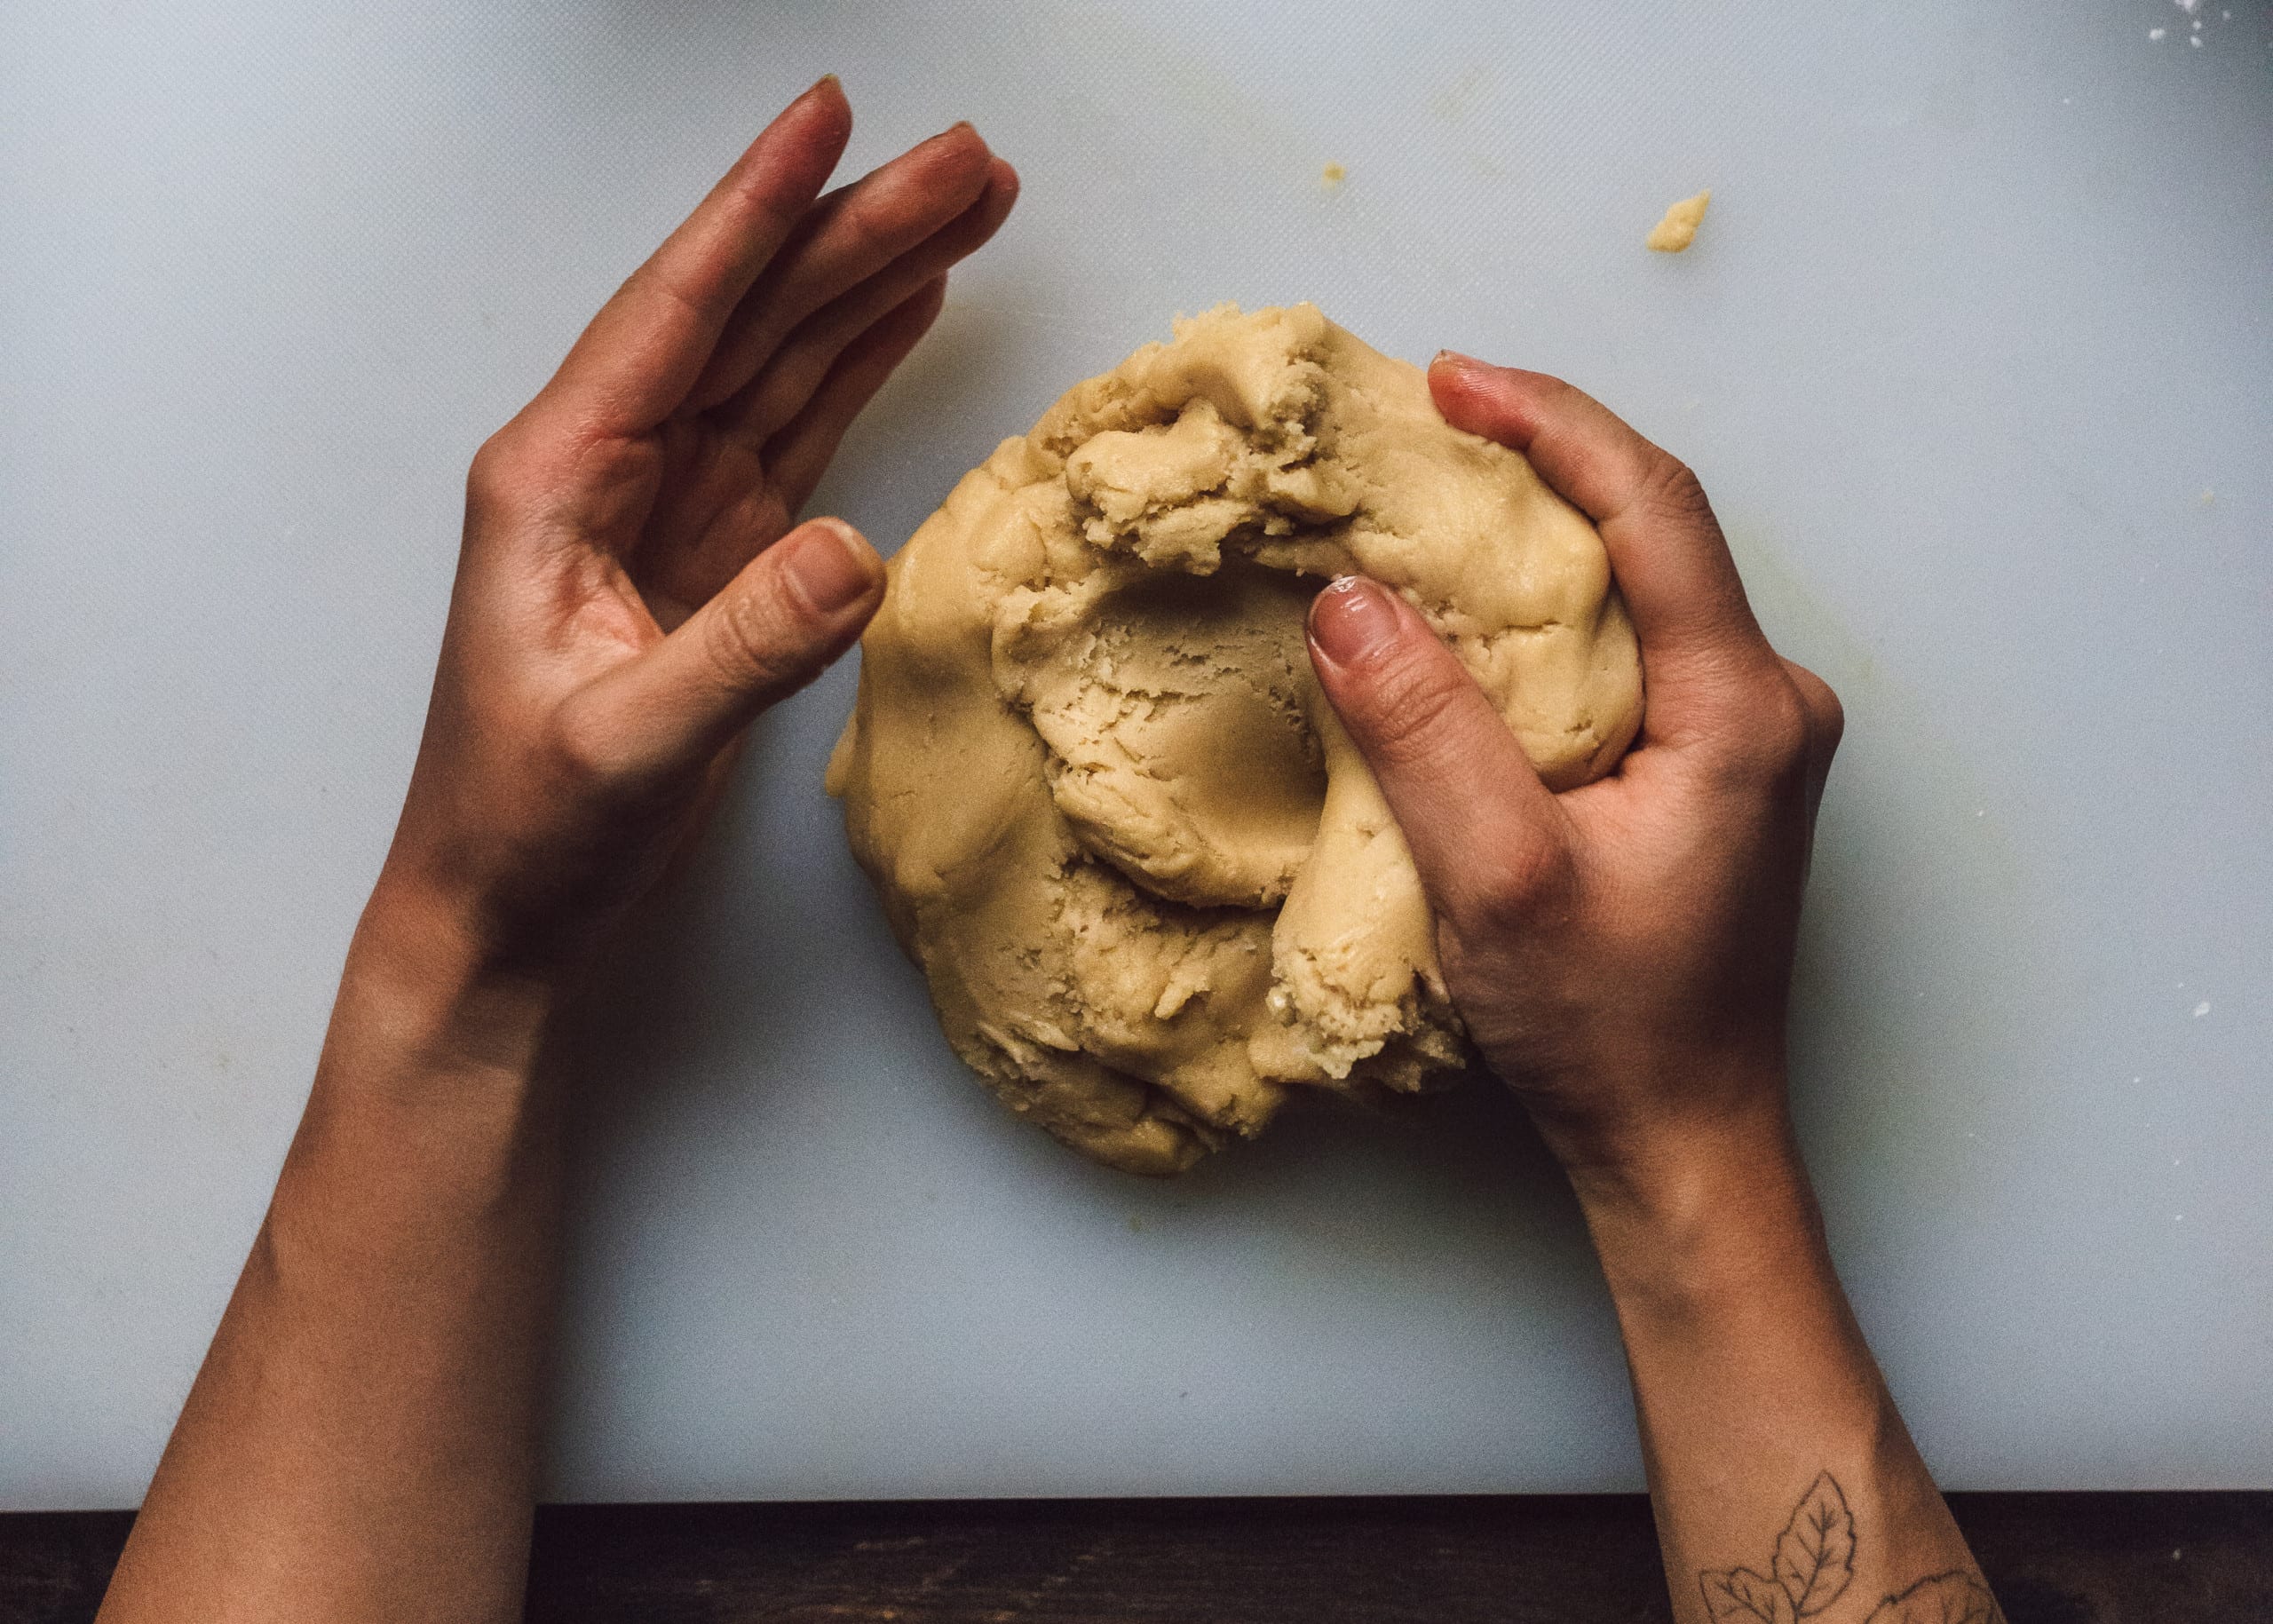
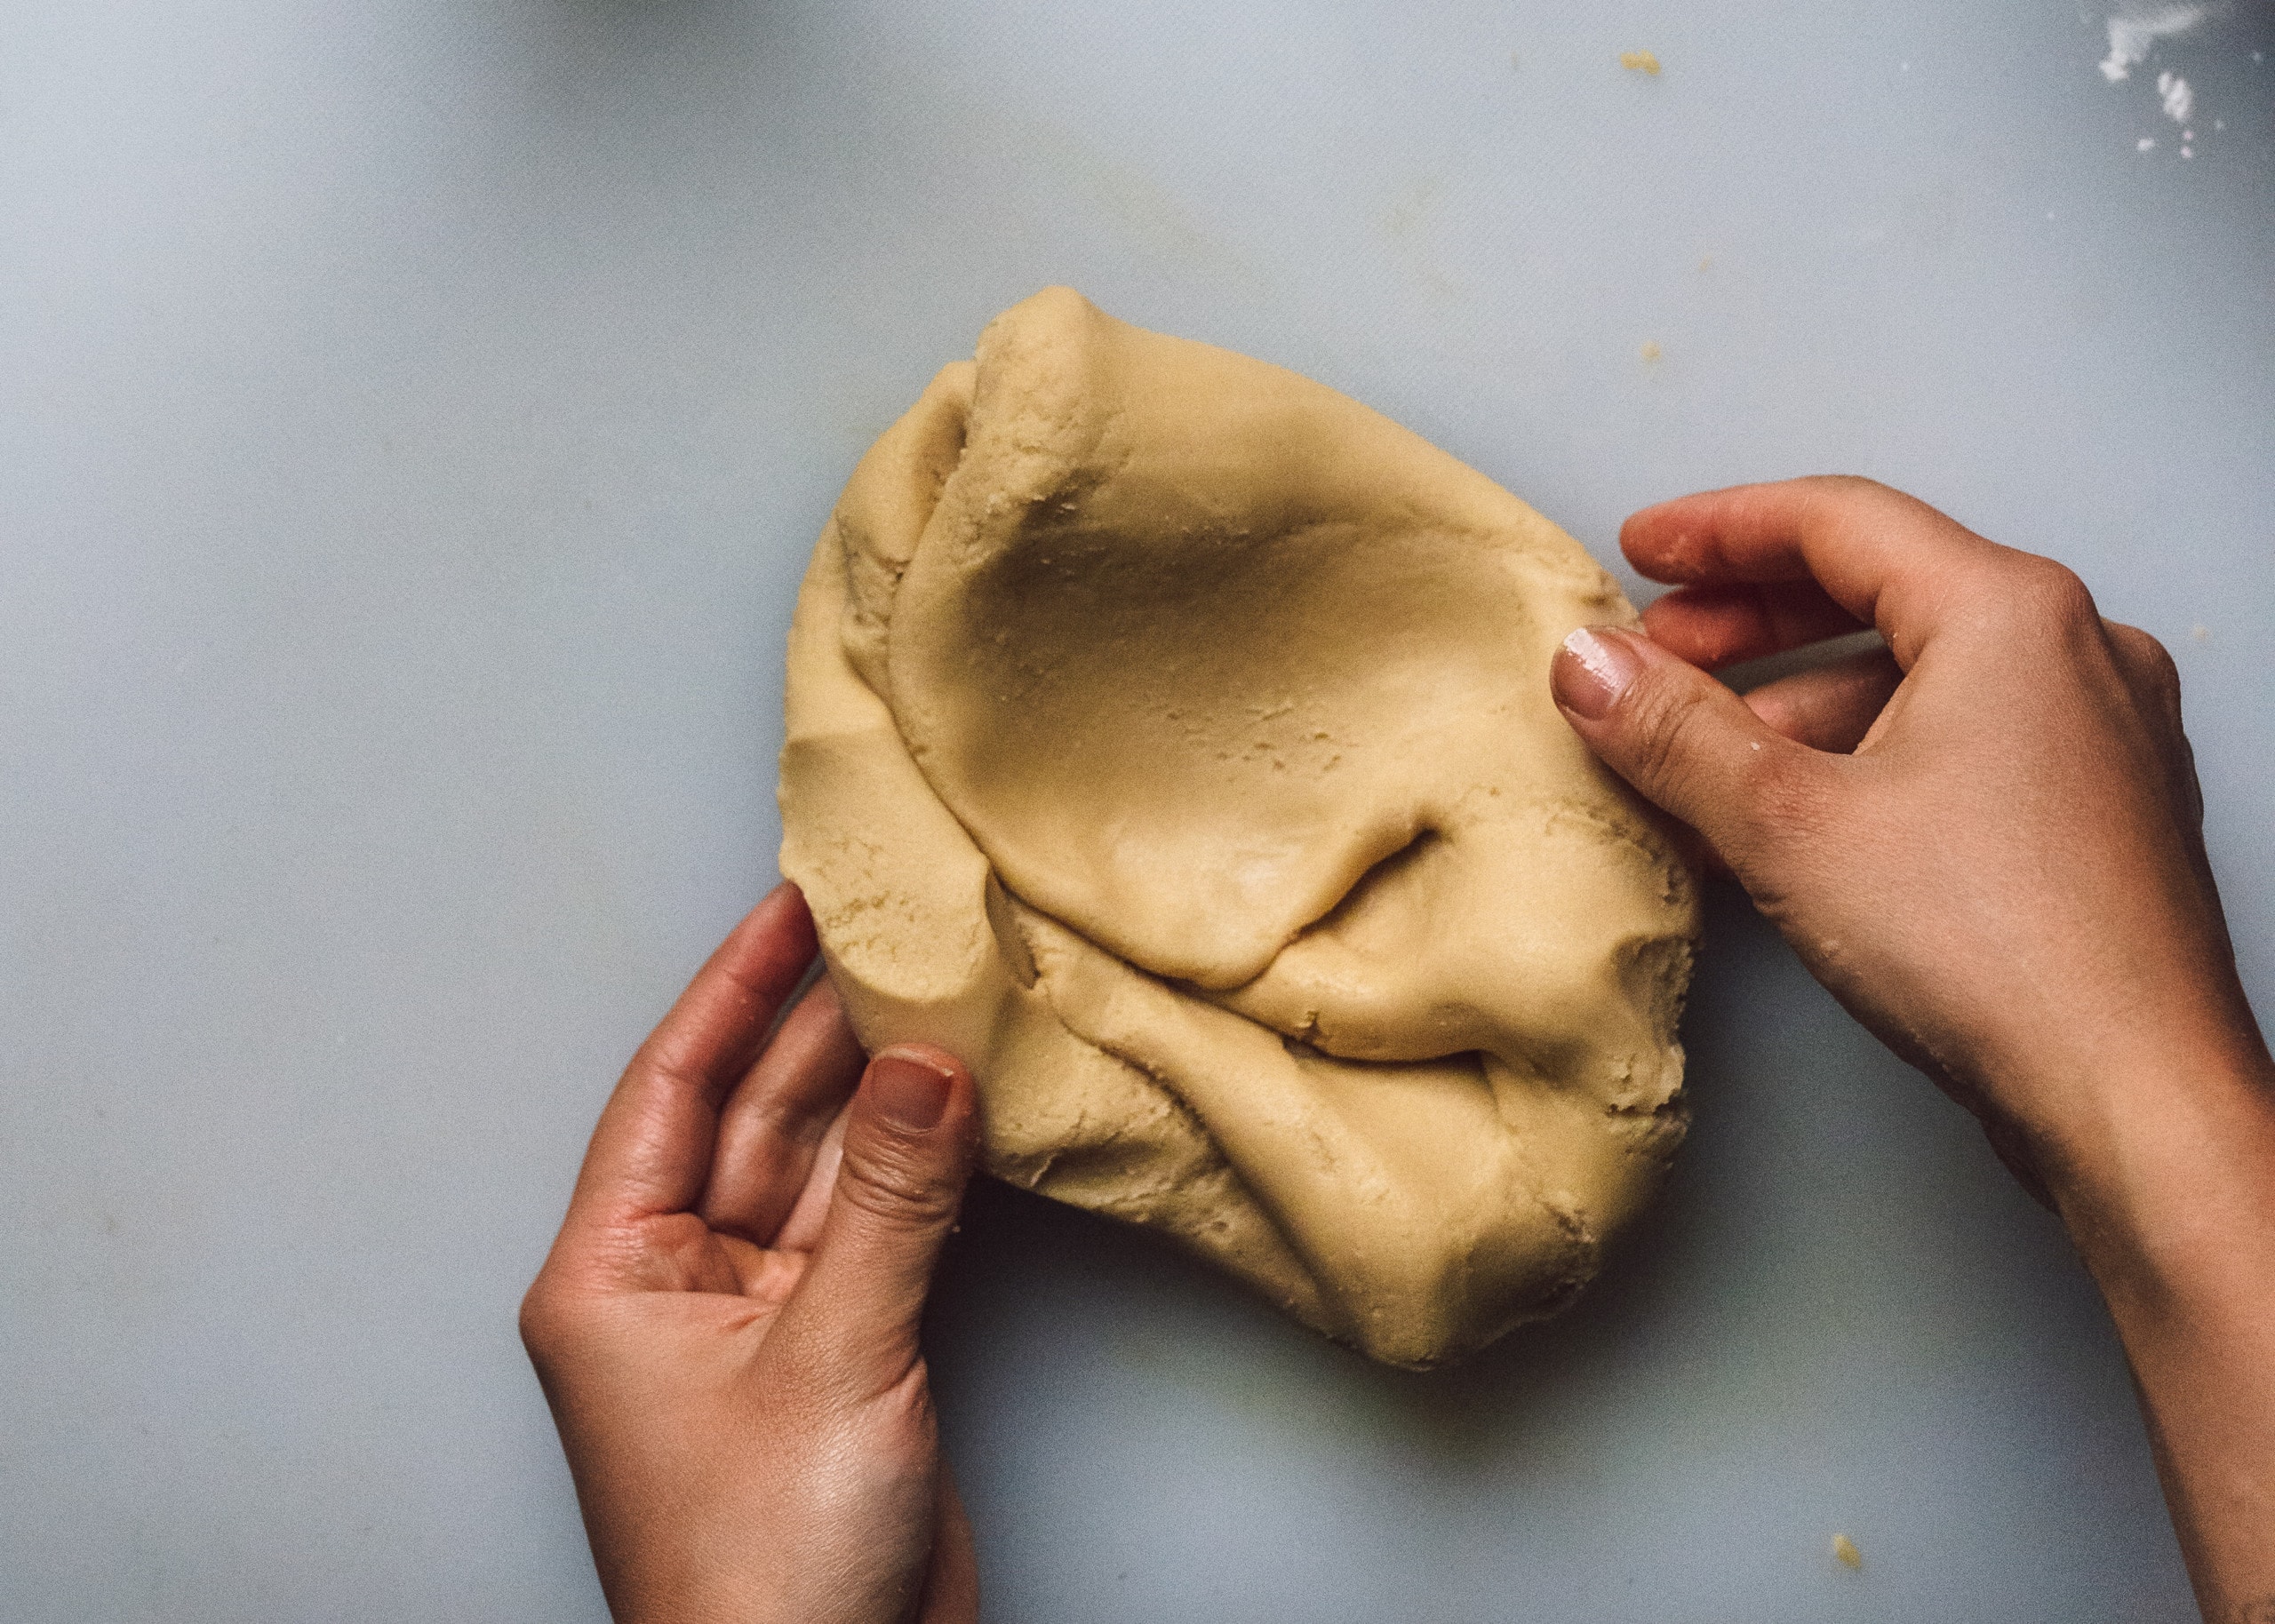
Divide the dough into 20g portions and roll into balls. Take one ball and place it in your palm, and use the heel of your other palm to flatten it into a 3 ½-inch round. Place the 30g filling in the center and wrap the edges of the dough up around the filling. Continue to pinch the dough to completely enclose the filling. It might take some squeezing and smoothing and maneuvering to completely wrap the filling in. It’s okay if some cracks form, just pinch them together. Roll between your palms into a smooth ball, then roll it gently into an oblong shape.
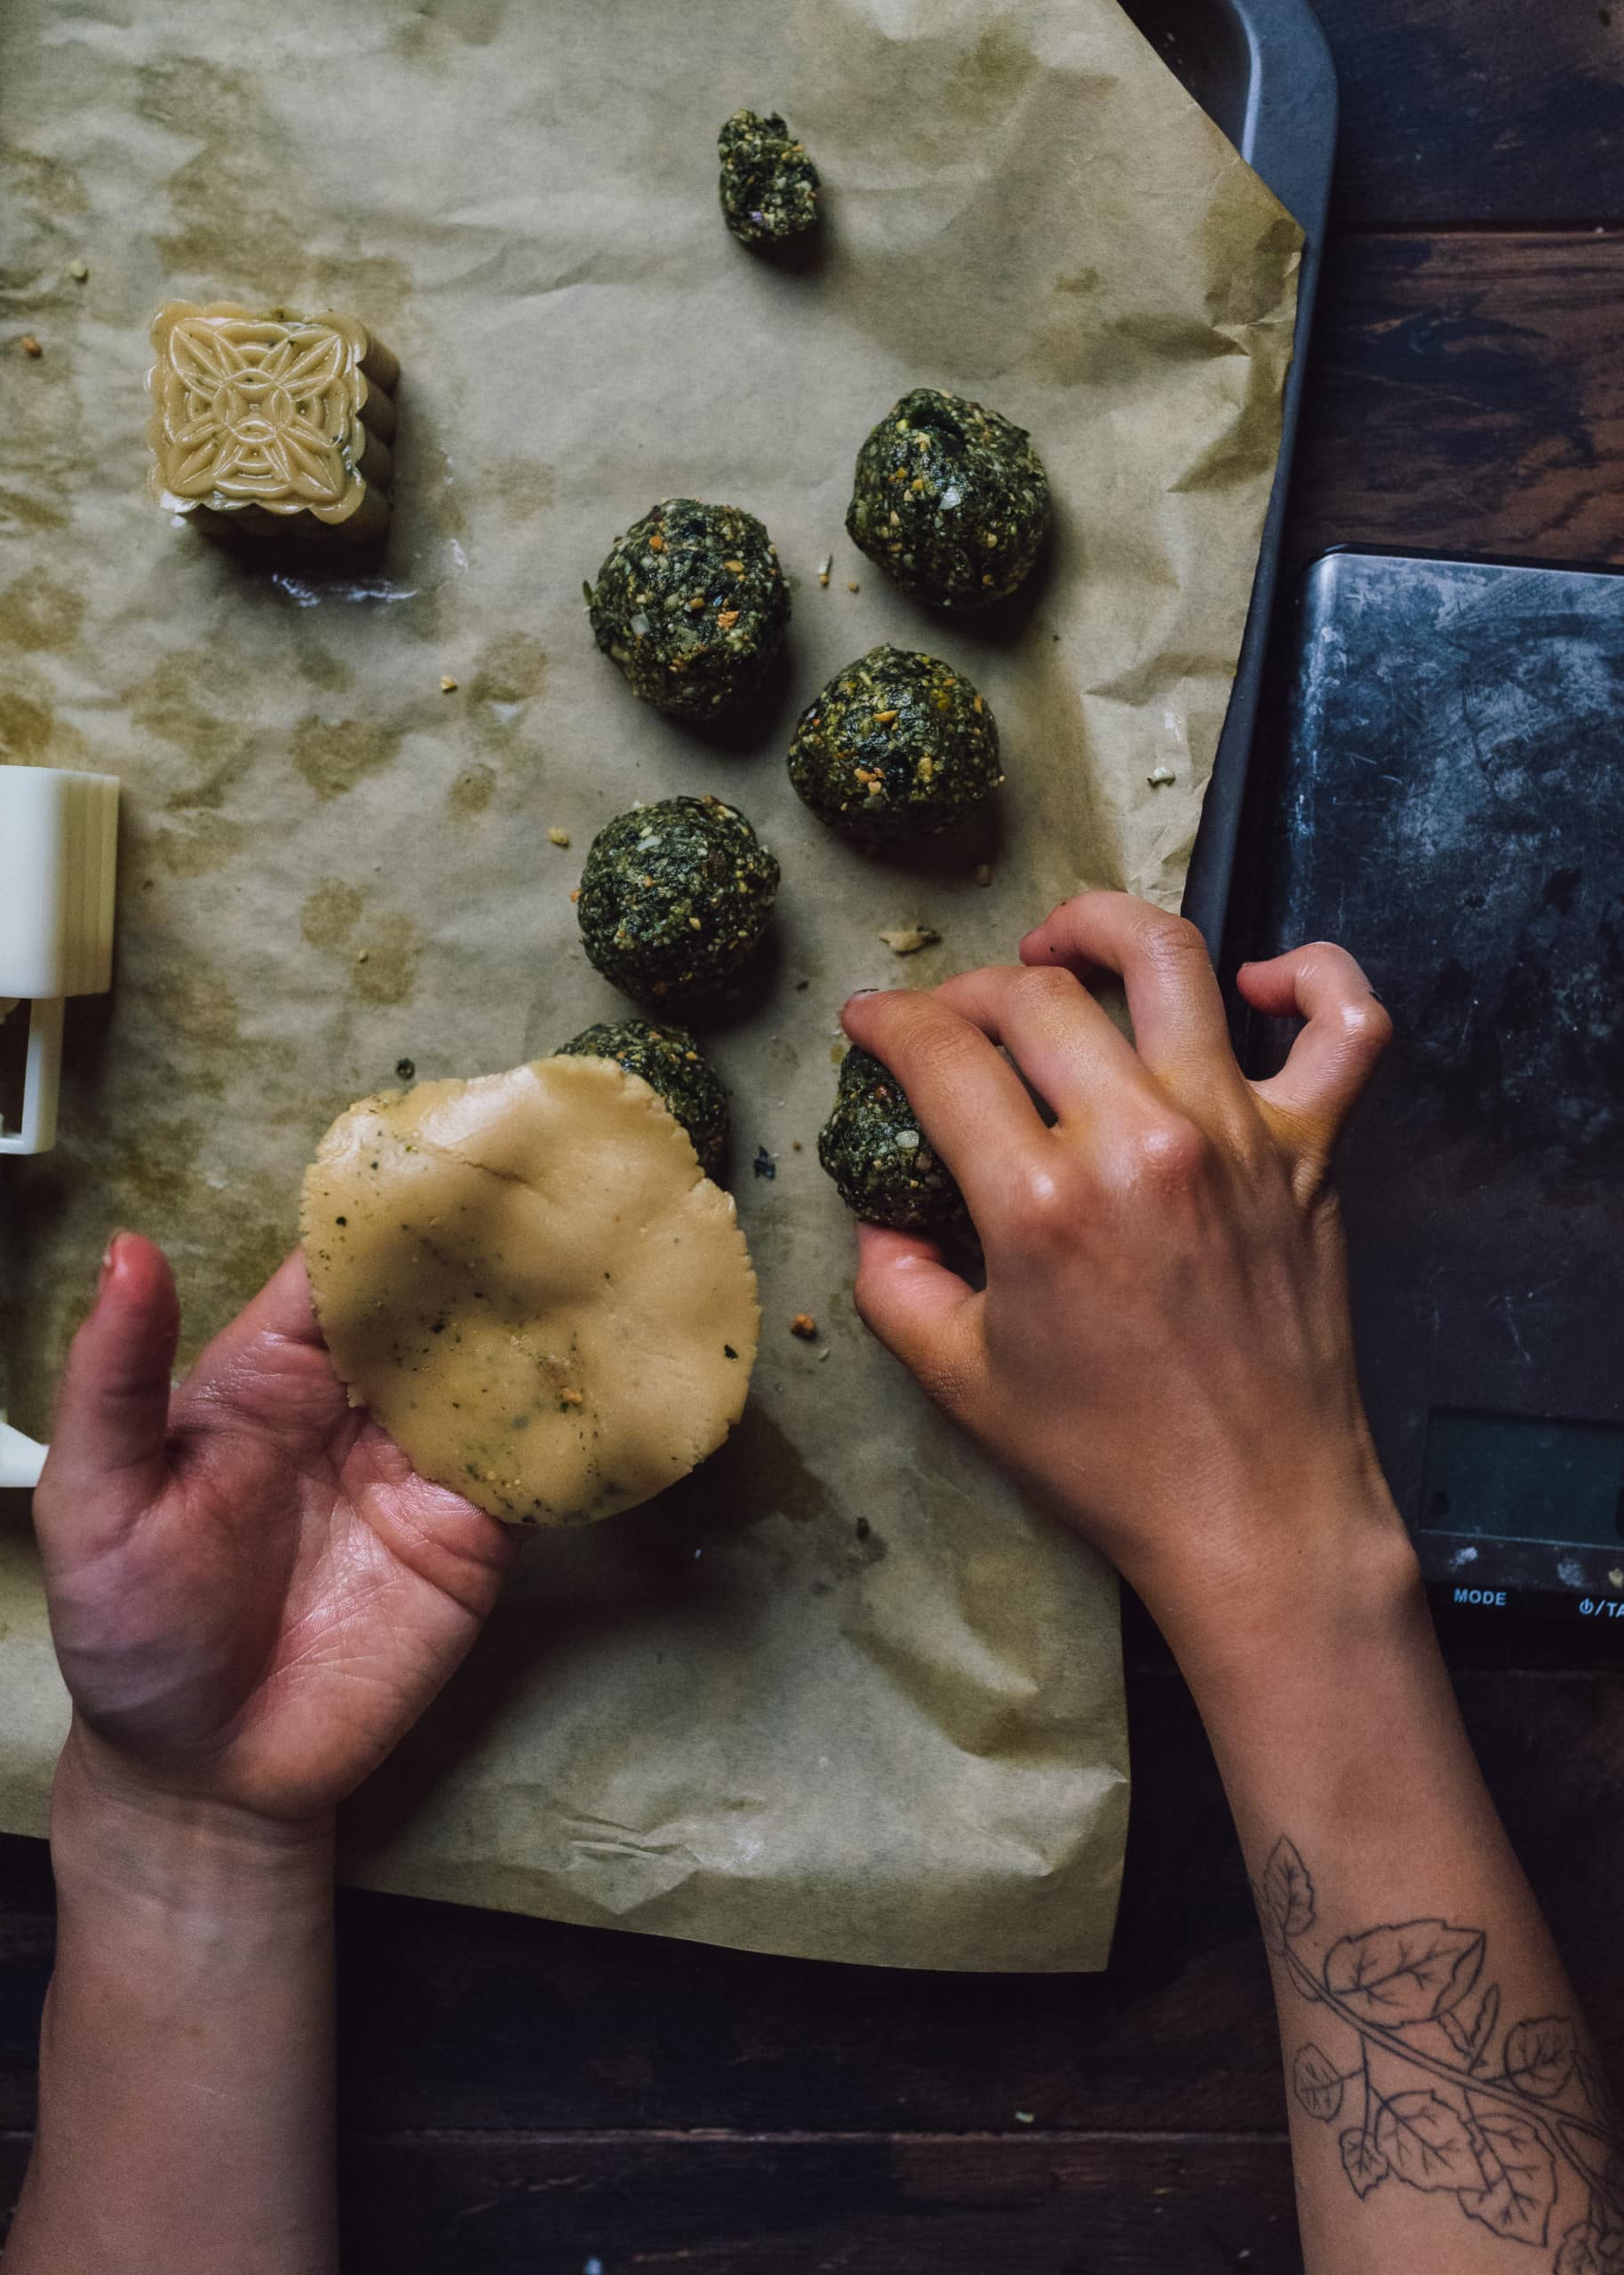
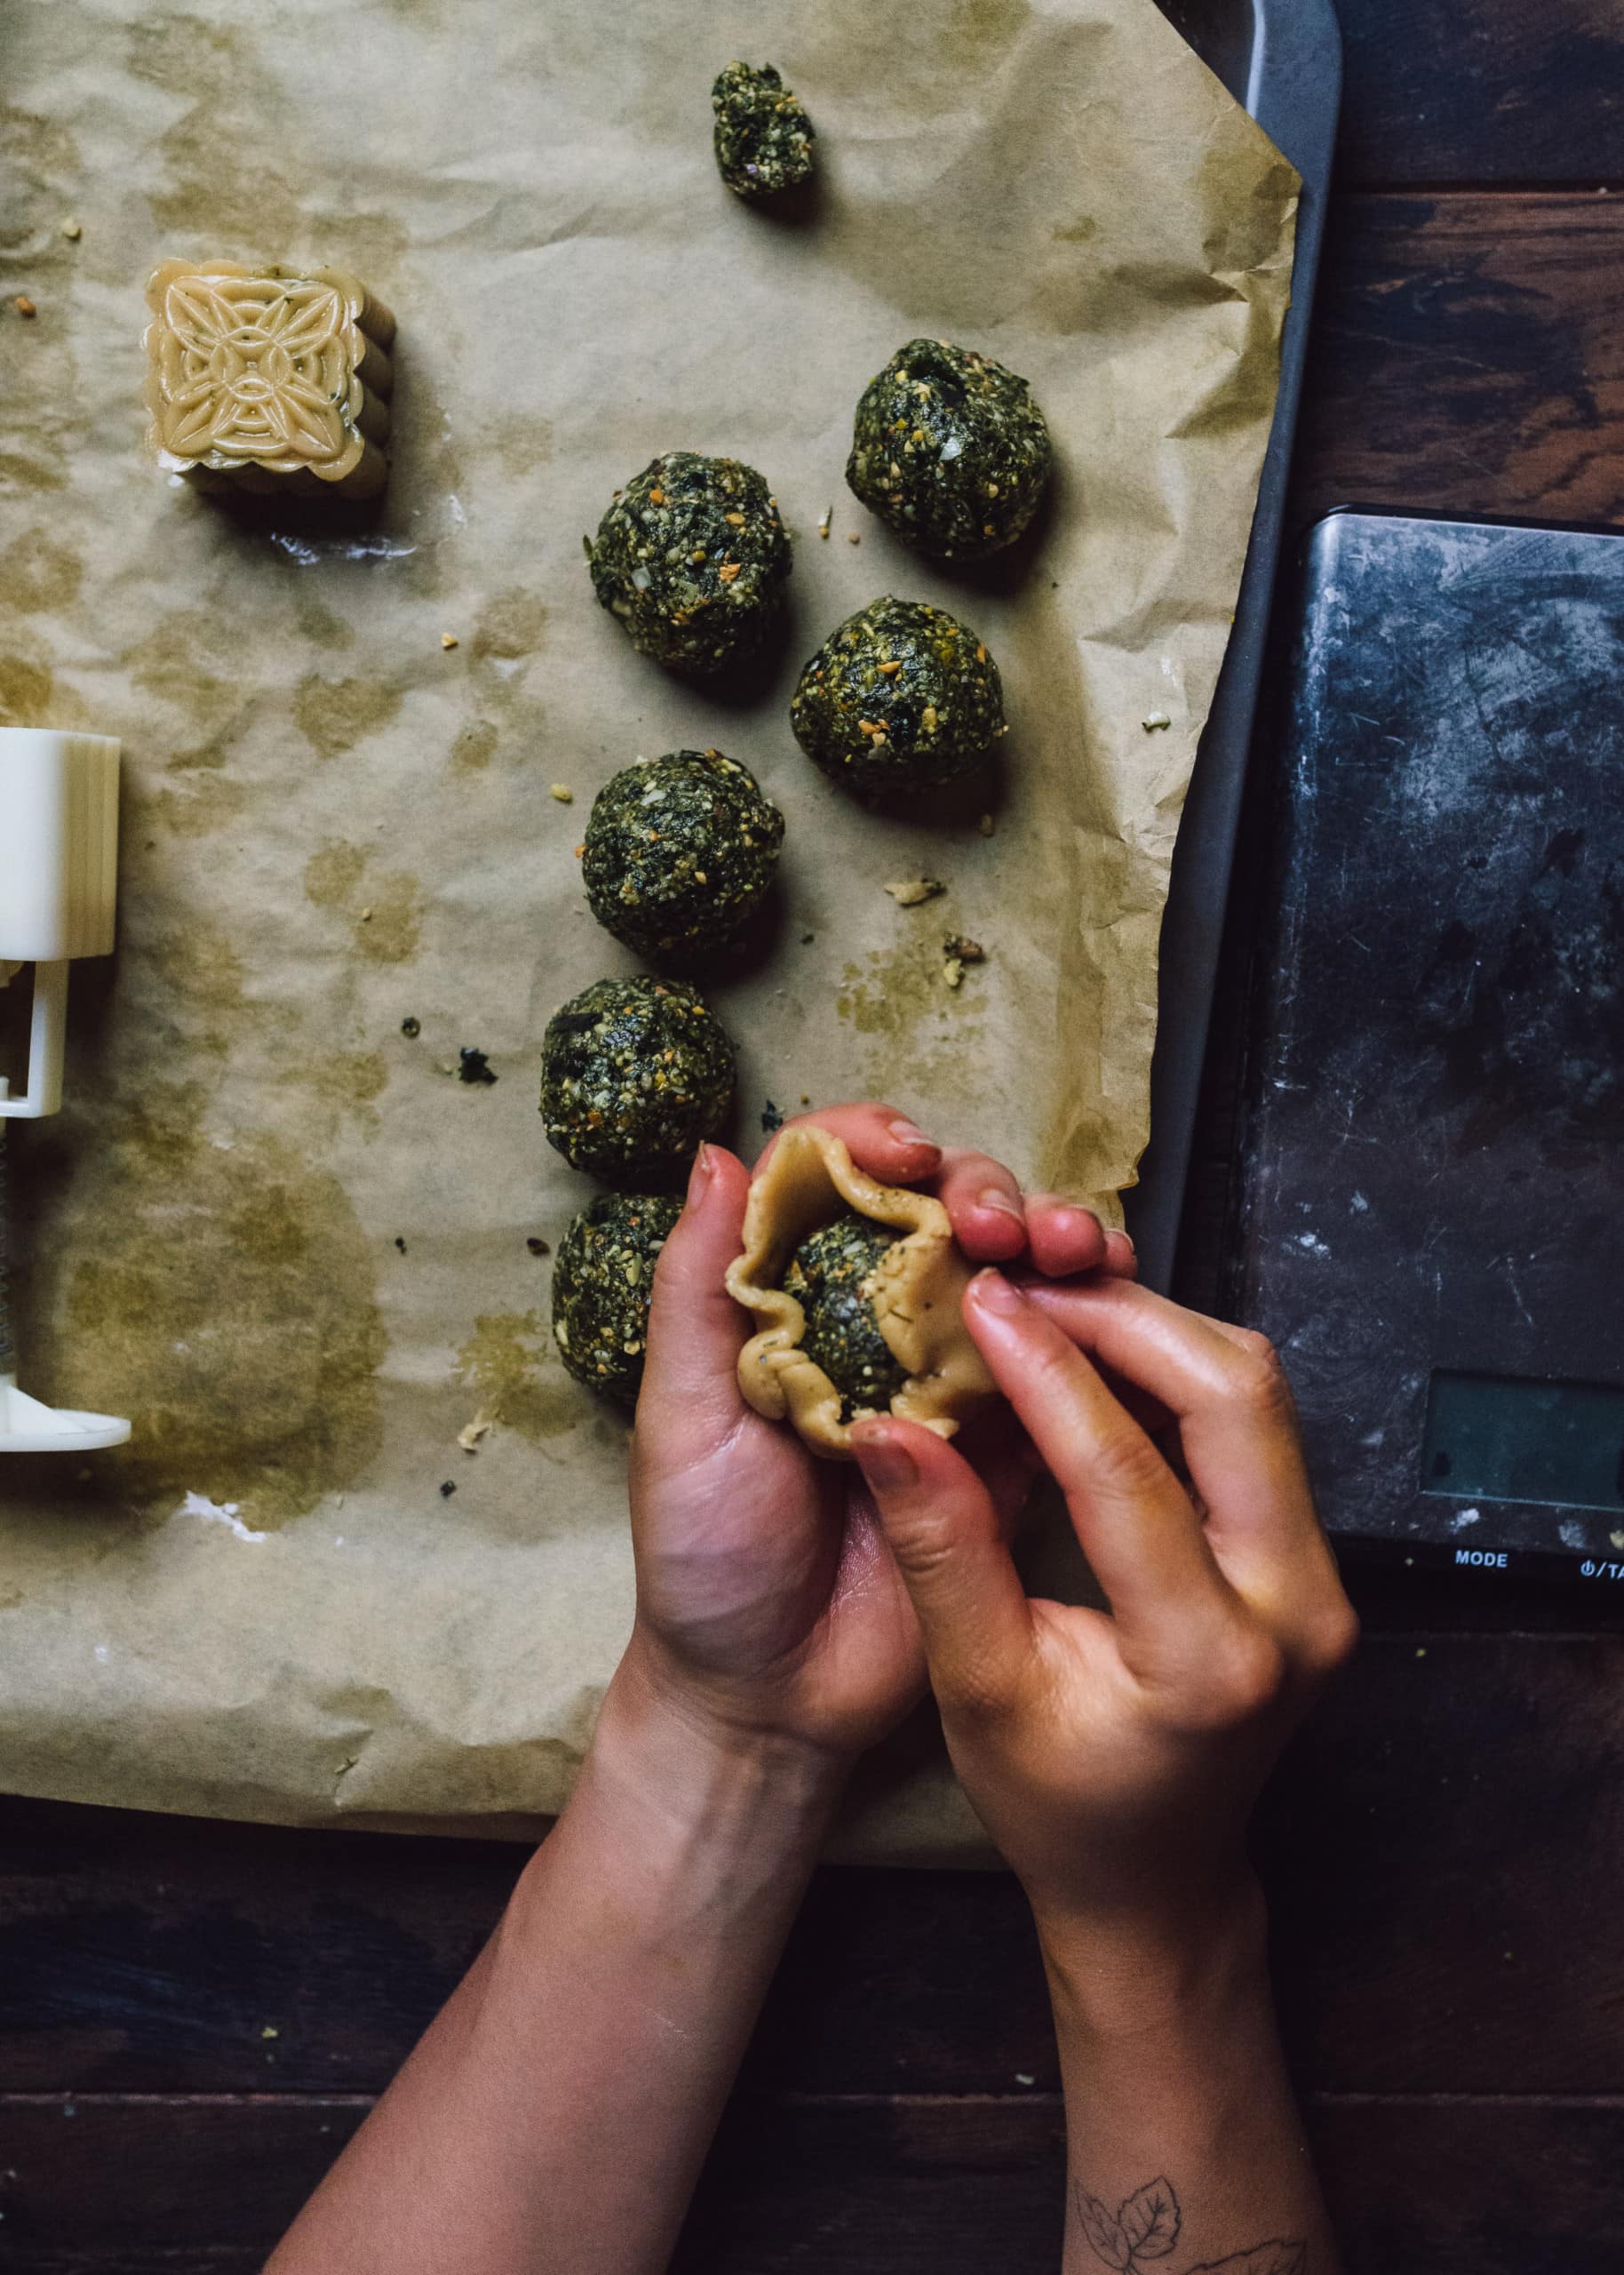
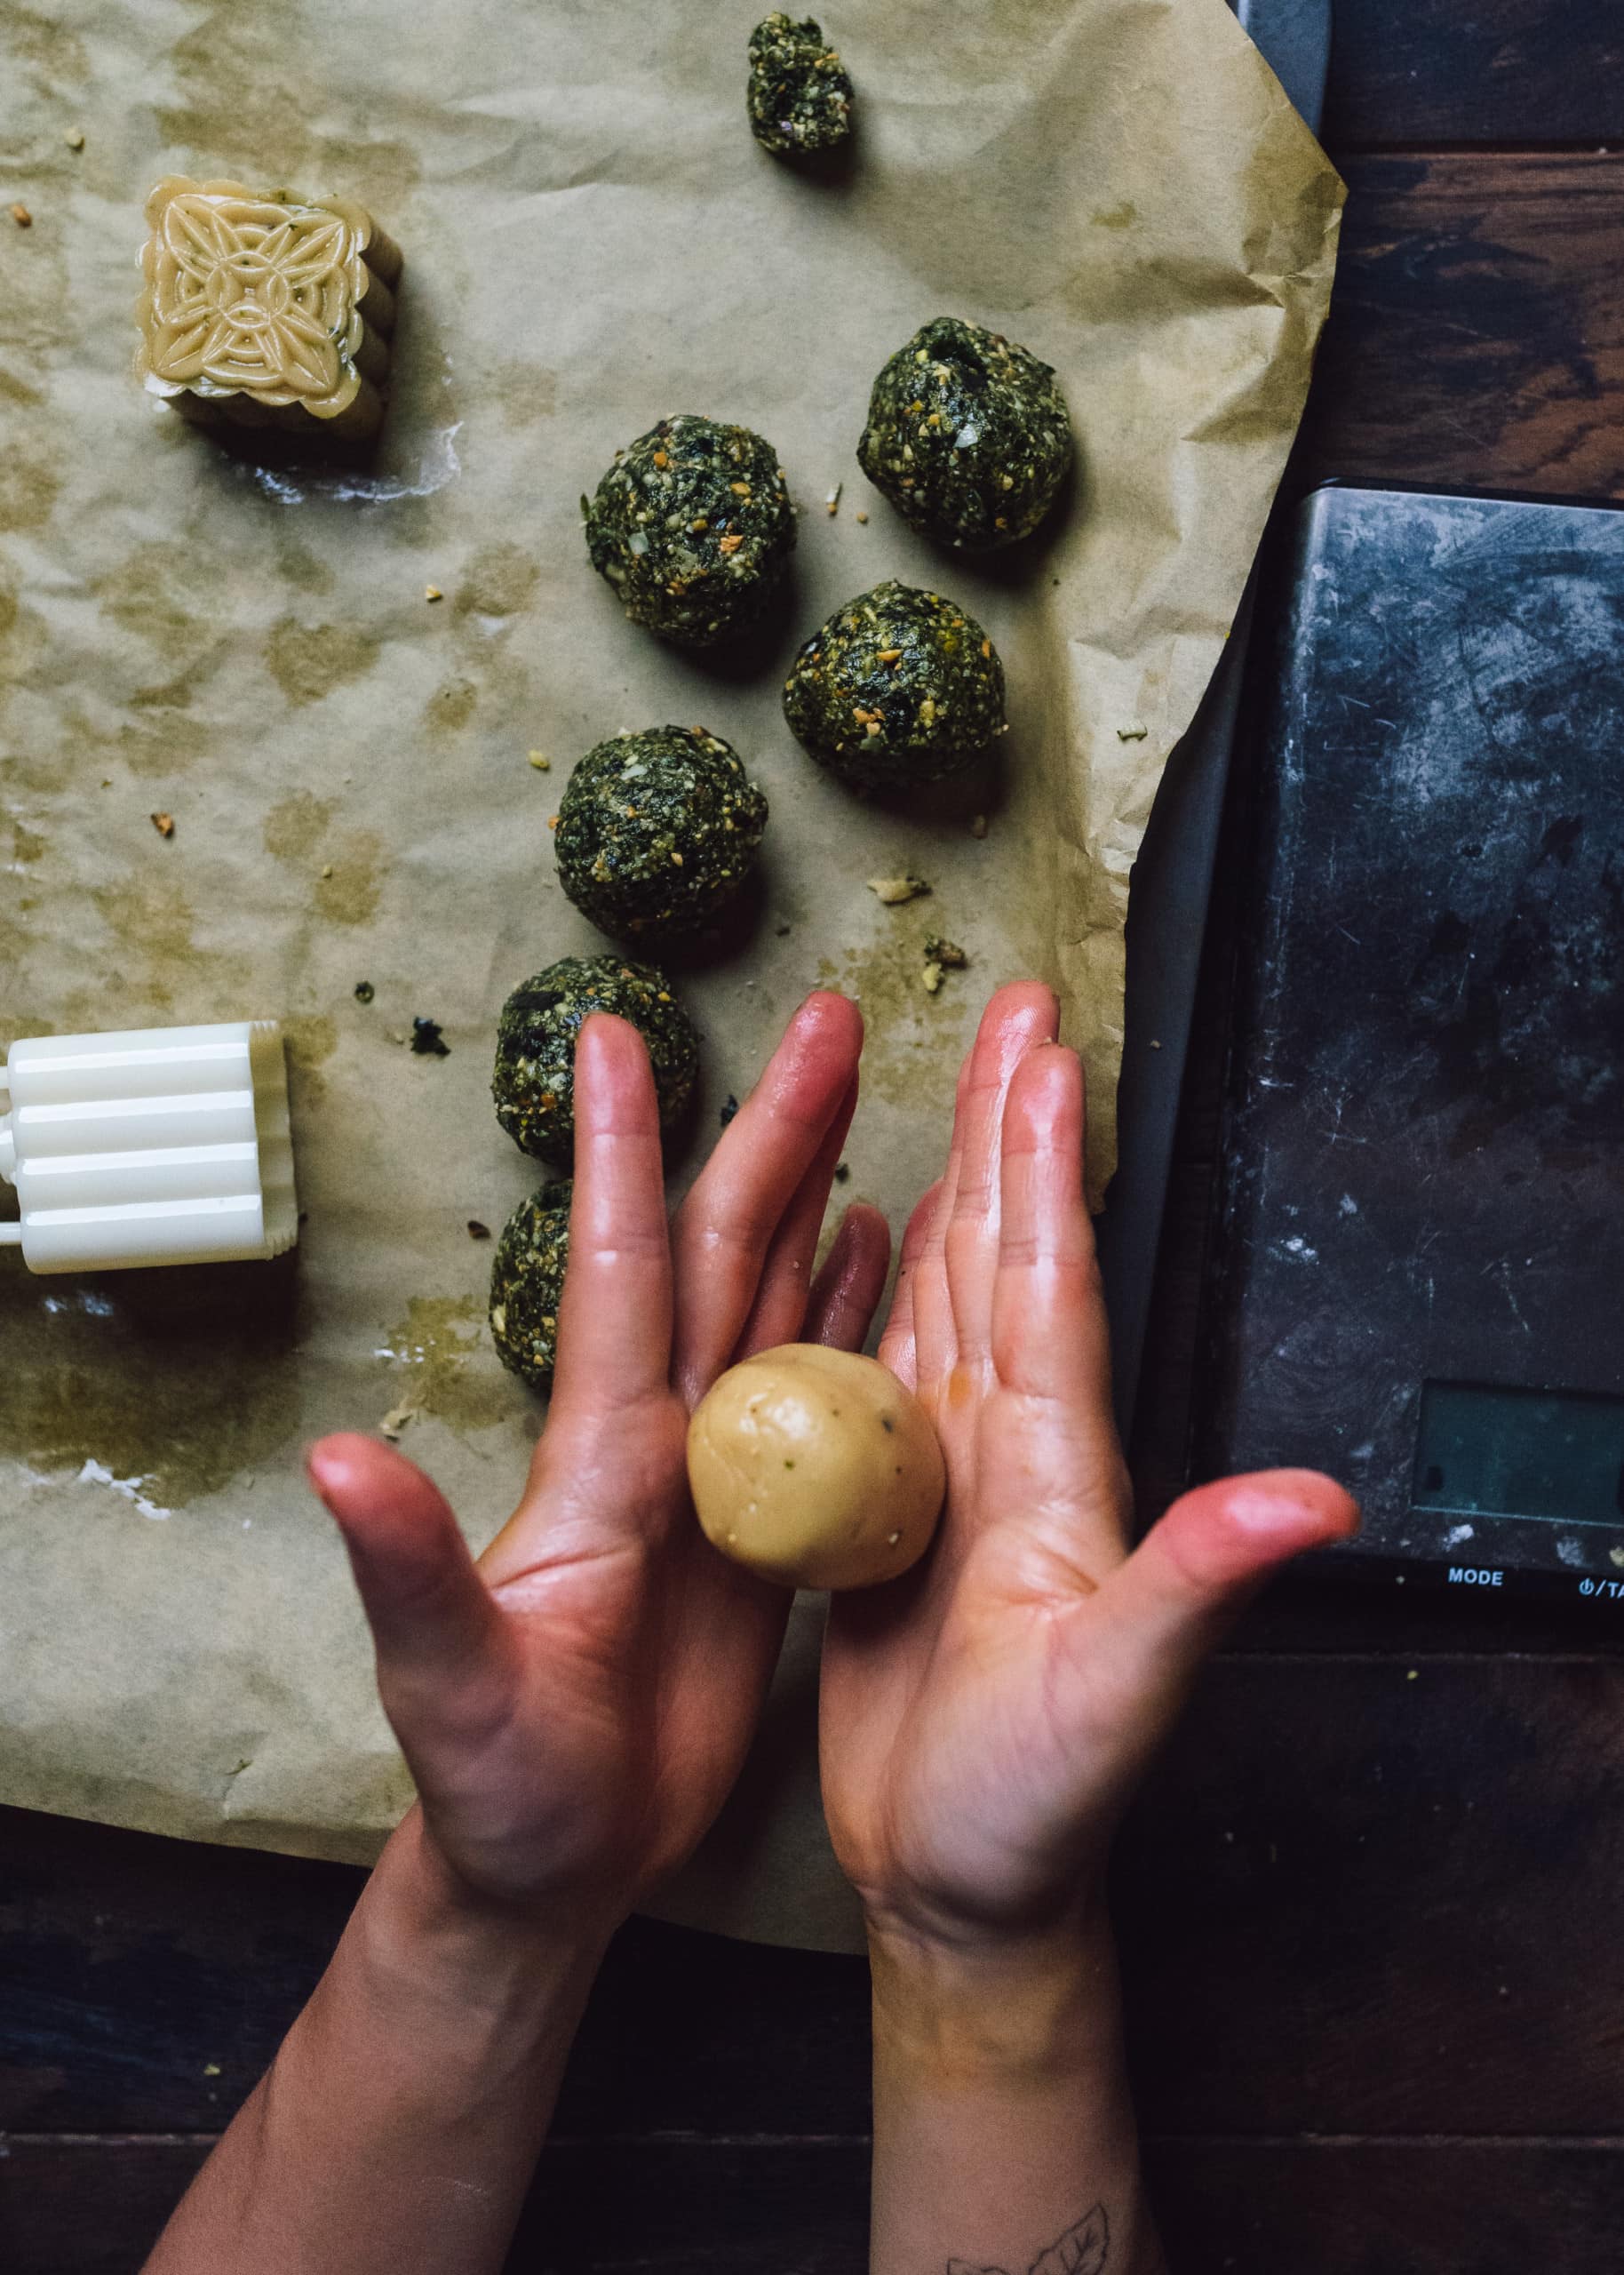
Press/shape the mooncakes:
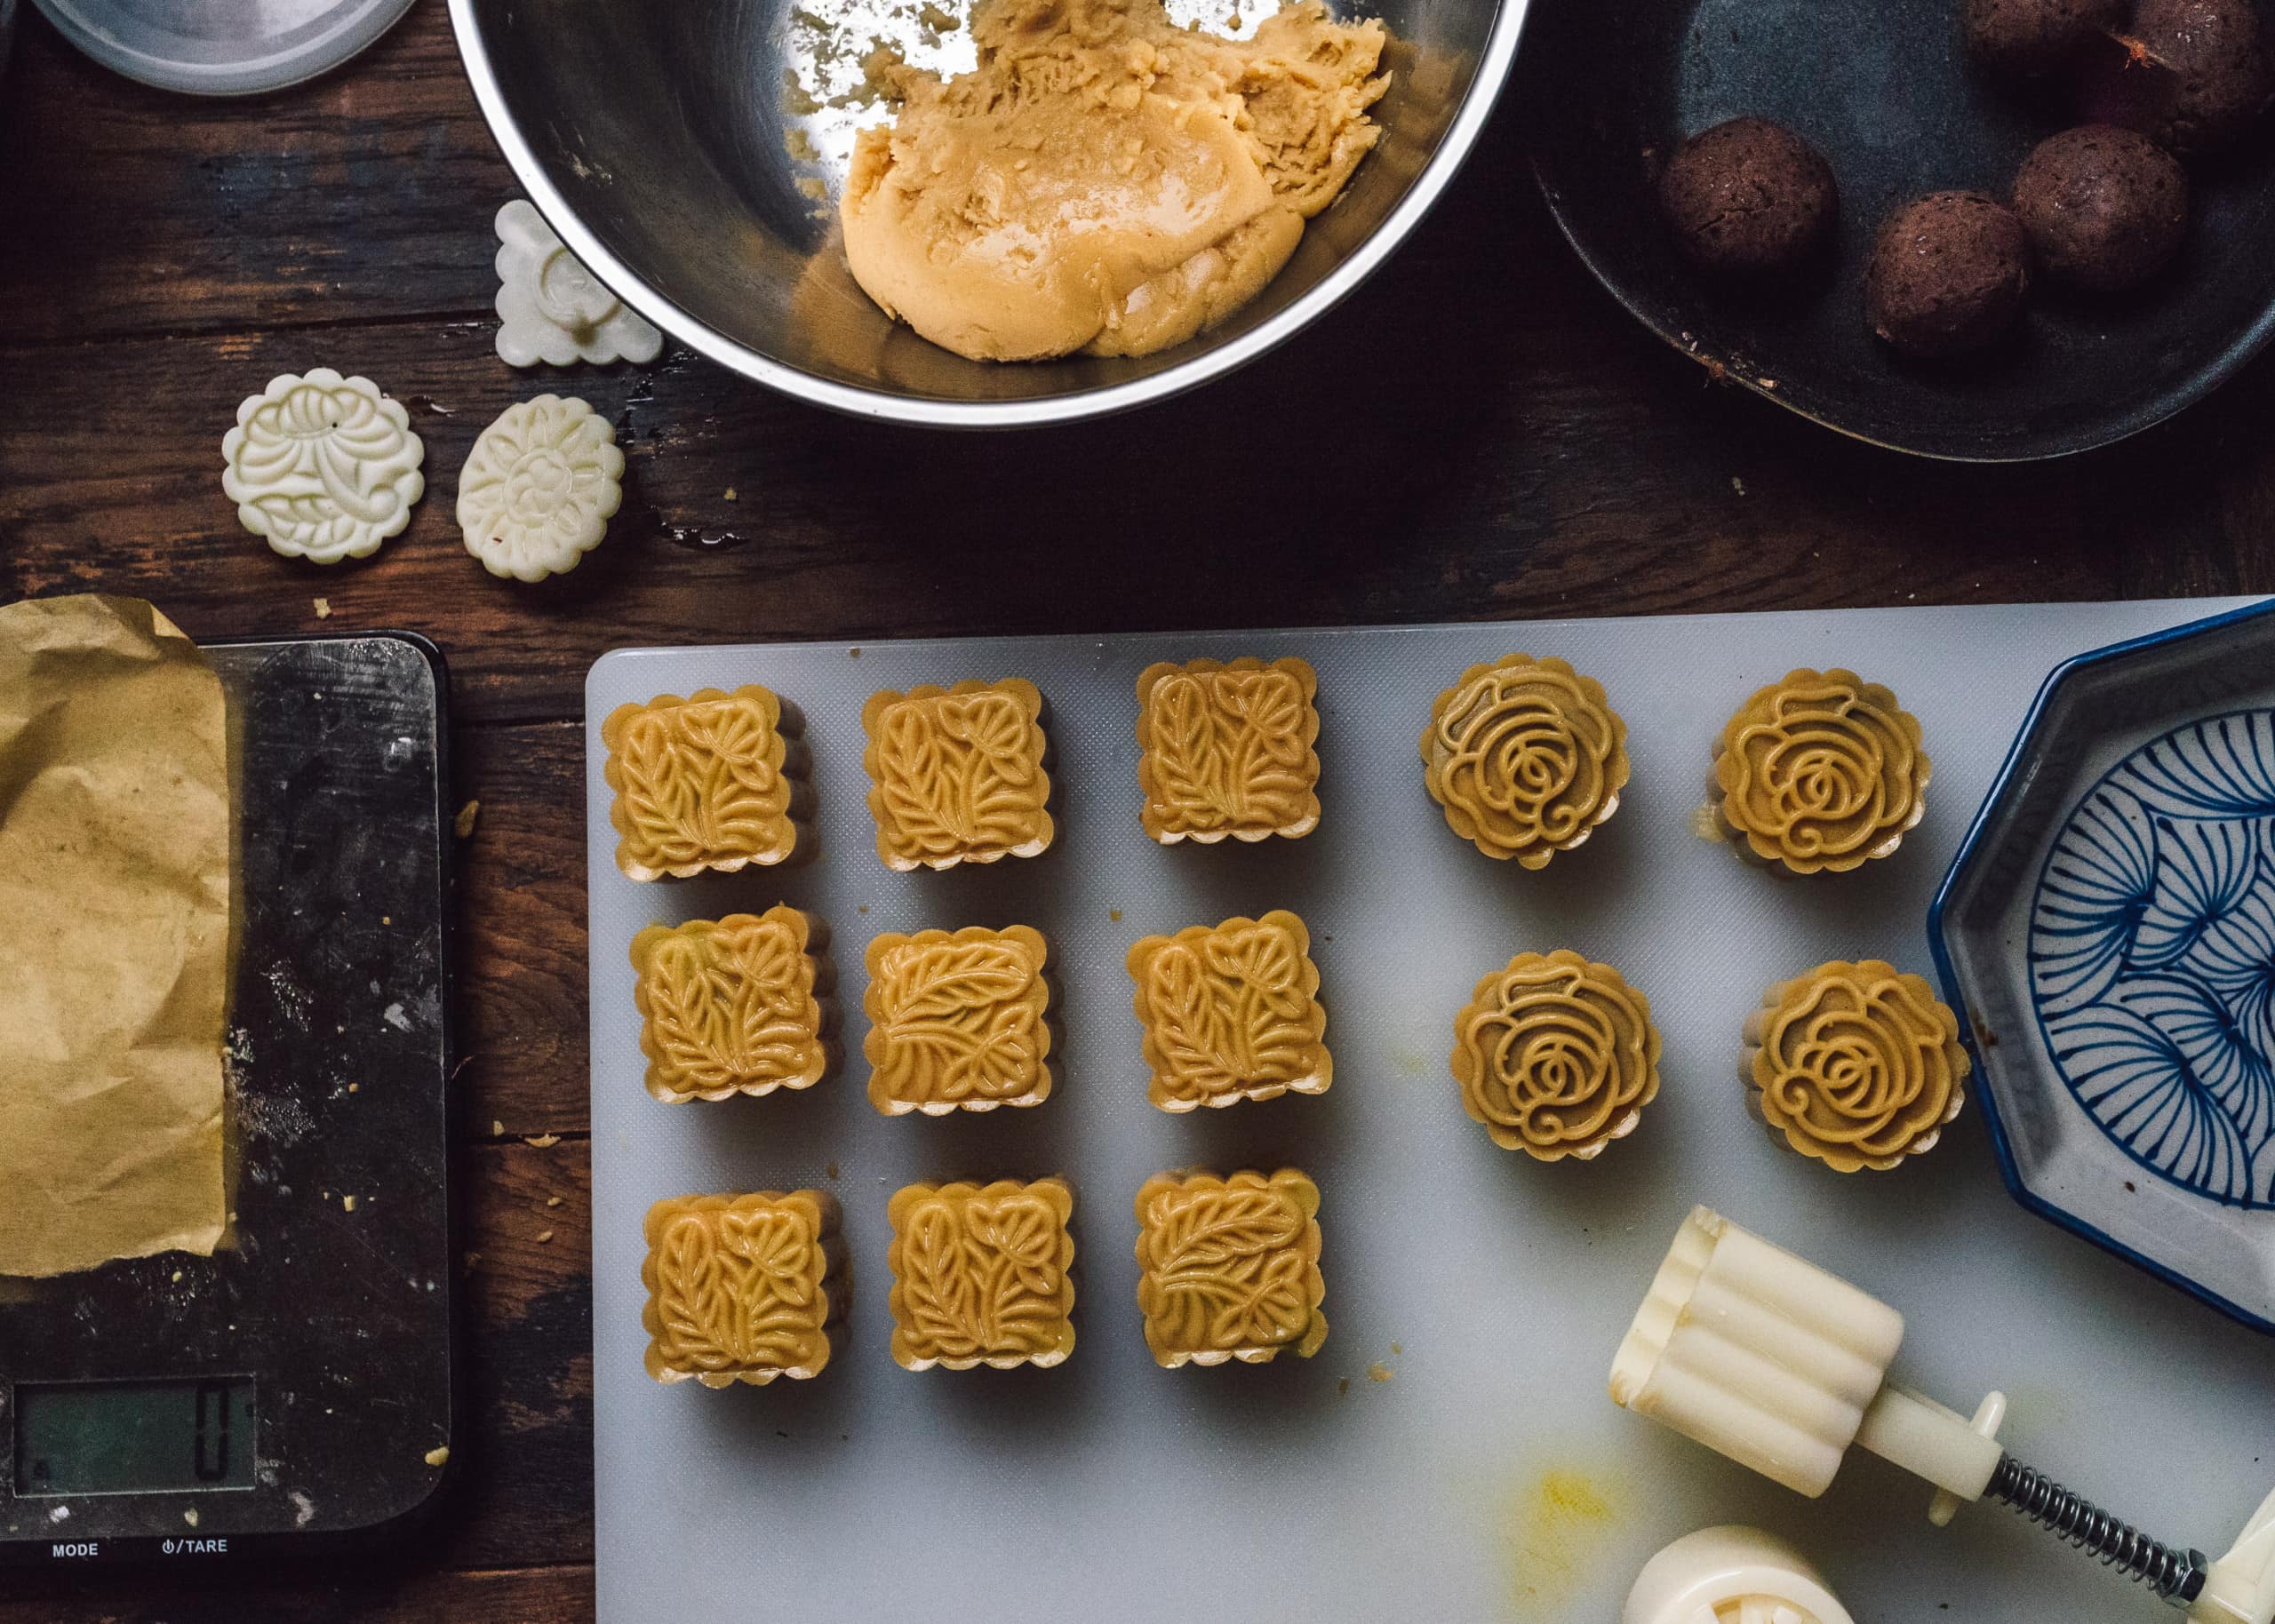
Prepare a 50g mooncake mold of choice— I used this set that I bought online. It came with three square designs and three round designs, which was perfect for 6 kinds of mooncakes.
Tuck the oblong ball (see photo below) into the mold, invert it, and press down firmly but gently to imprint the design. You may need to dust the inside of the mold with flour but I didn’t find it necessary, as the dough has quite a bit of oil.
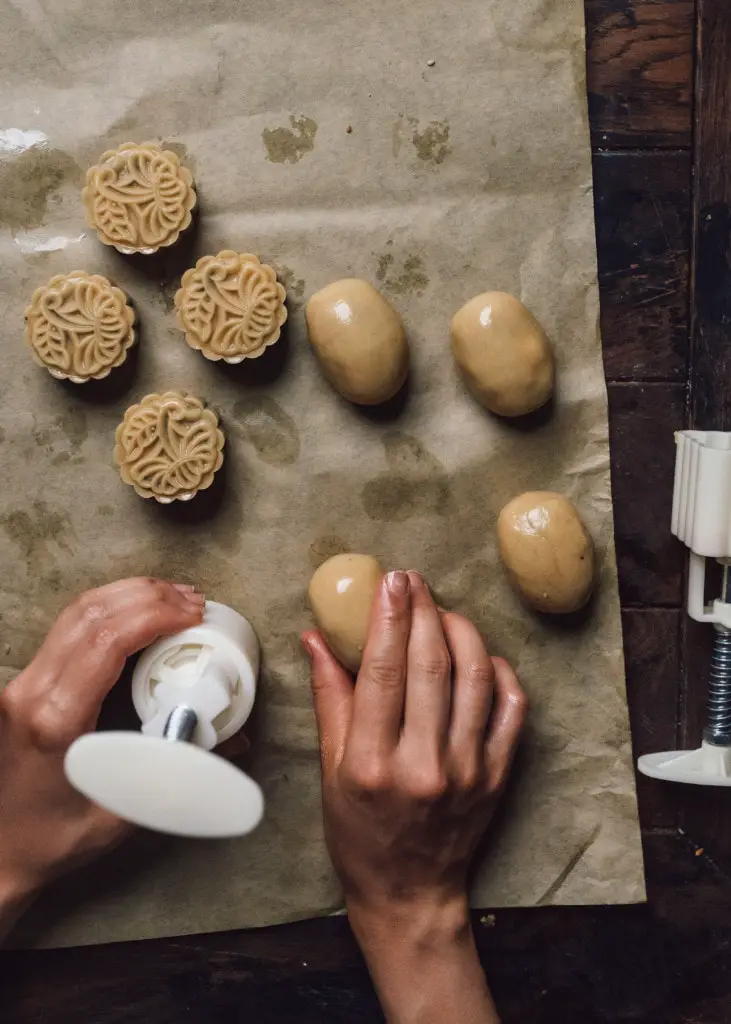
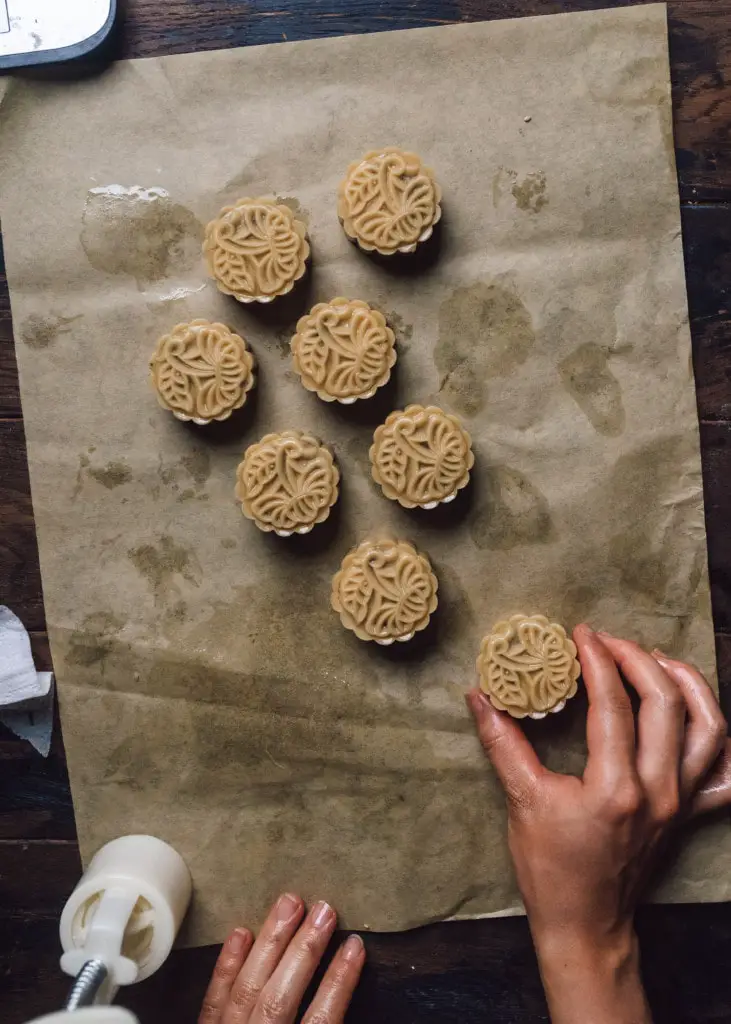
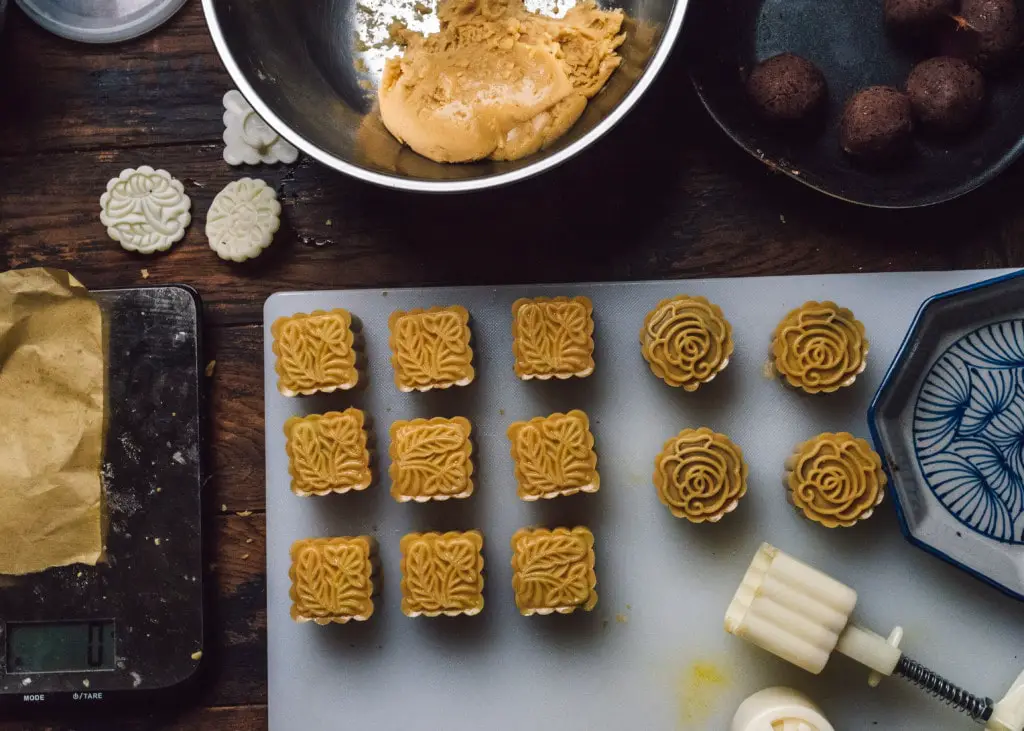
Release the mooncake from the mold and arrange it on a parchment-lined baking sheet. Repeat for all mooncakes, placing them at least 2 inches apart.
Bake the mooncakes:
In the meantime, preheat the oven to 350°F/177°C. Bake the mooncakes for 9-10 minutes until the edges are lightly golden. Remove the mooncakes from the oven and allow to cool on the sheet for 10 minutes.
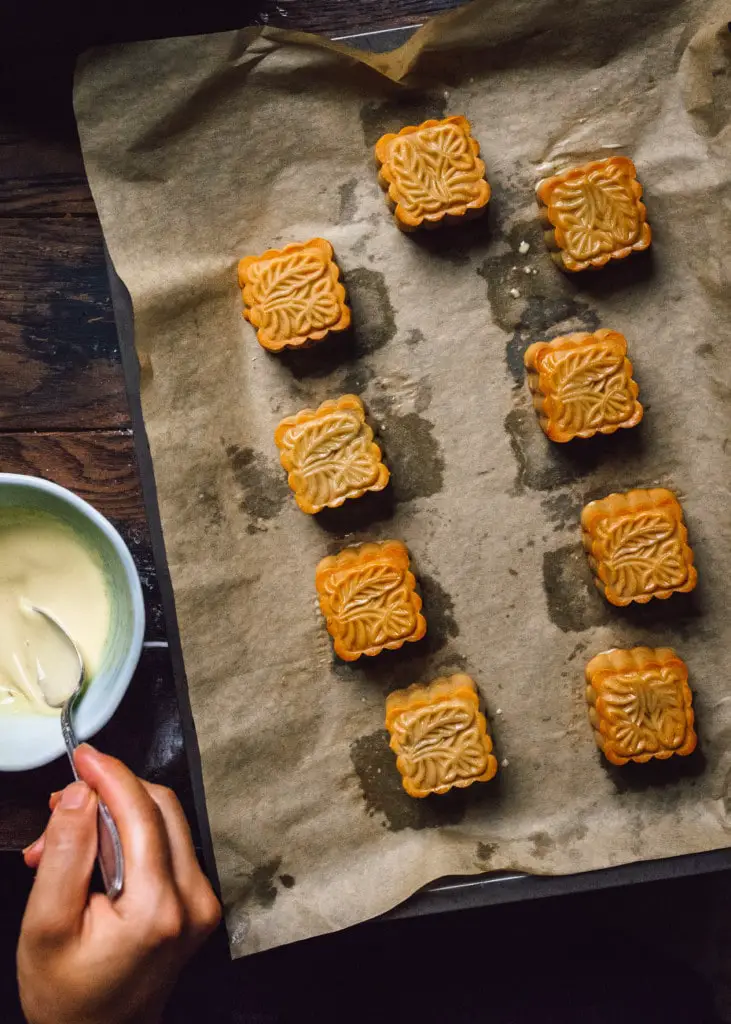
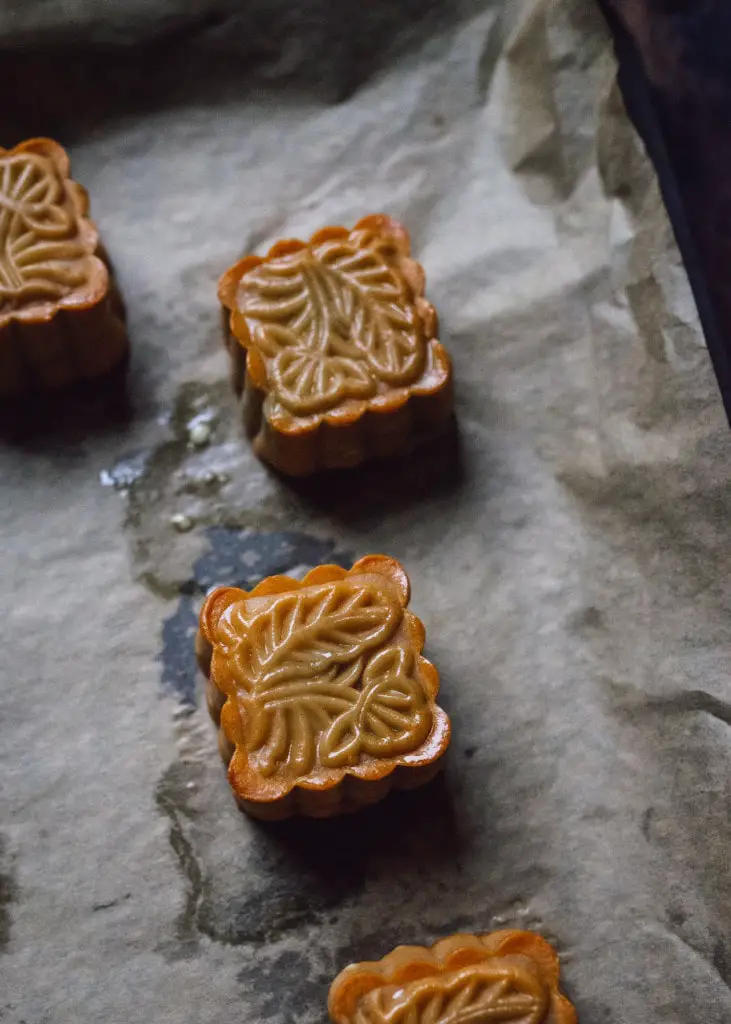
Allow to cool for 10 minutes.
Then, brush on the egg wash (I used a mixture of Just Egg and water) with a pastry brush (or a rolled up paper towel), on both the top and sides. Be careful not to add too much egg wash, as the pattern on top won’t be as distinct after baking.
Bake a second time:
Return the sheet to the oven and bake until the mooncakes are a deep, caramel brown color, about 8-10 more minutes.
Cool and Store the Mooncakes
Place the baking sheet to cool on a wire rack, then carefully transfer the mooncakes to an airtight container. Store at room temperature for up to a week. The dough will soften over time and fully absorb the oil, achieving a beautiful glossy shine and a softer exterior after 1-2 days.
Tips for Making Mooncakes
- I recommend using a digital kitchen scale to weigh the ingredients. It’s so much easier to add everything to one bowl (tared to zero each time) than it is to scoop and measure everything by volume, and the dough will turn out a lot better because of the precise ratios.
- The filling should be pretty solid— if the filling is too soft, or if there’s too little of it in the pastry, the center will drop as it bakes and your mooncake will sag. I like a ratio of 20 grams dough to 30 grams filling for a 50g mooncake— you get a thin pastry skin (a sign of a good mooncake) and a nice, substantial filling.
- Don’t omit the ‘egg’ wash (see photo above). But don’t brush on too much of it either— you don’t want the egg to bake over the grooves and conceal the intricate, beautiful design.
- On the second round of baking, make sure the mooncake is nice and deep in color. I pulled one batch of mooncakes out too early, when they were still on the lighter golden-brown side, and after cooling overnight I realized they were too soft. I had to bake them again the next day for a sturdier crust. This is especially important if you’re planning to box or ship the mooncakes.
Results
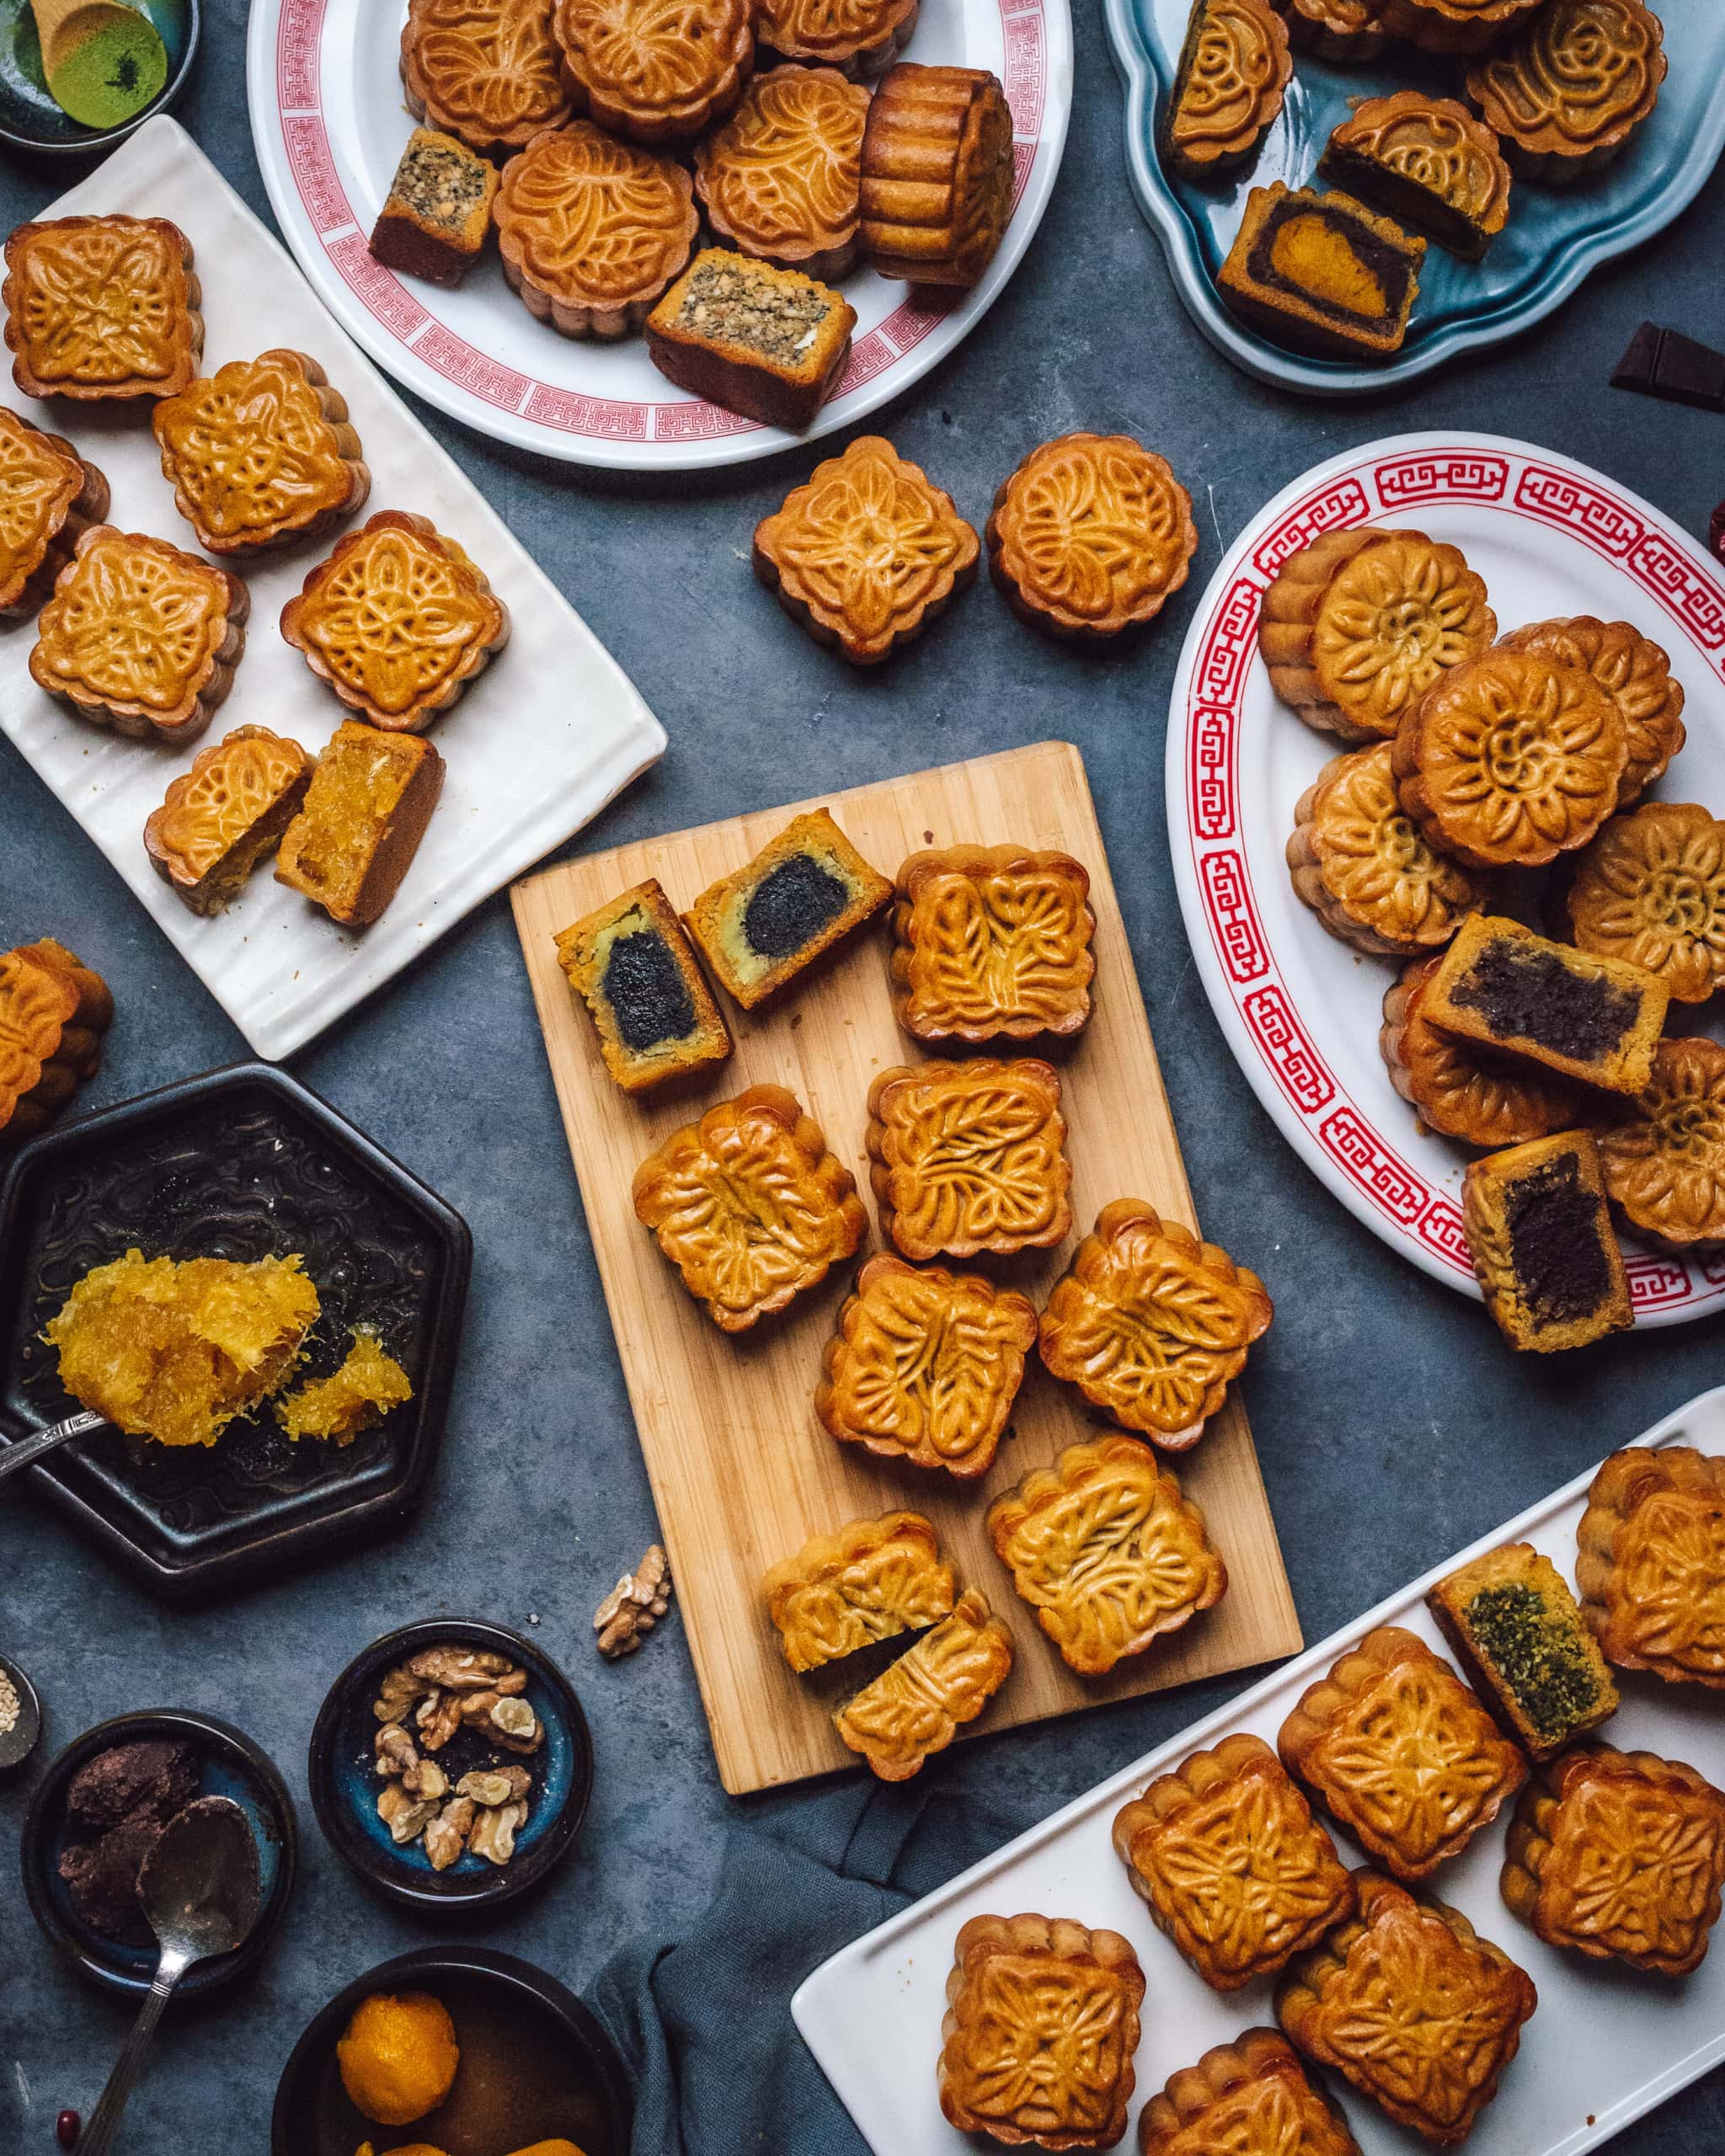
Here’s the breakdown of the six flavors with my personal rankings!
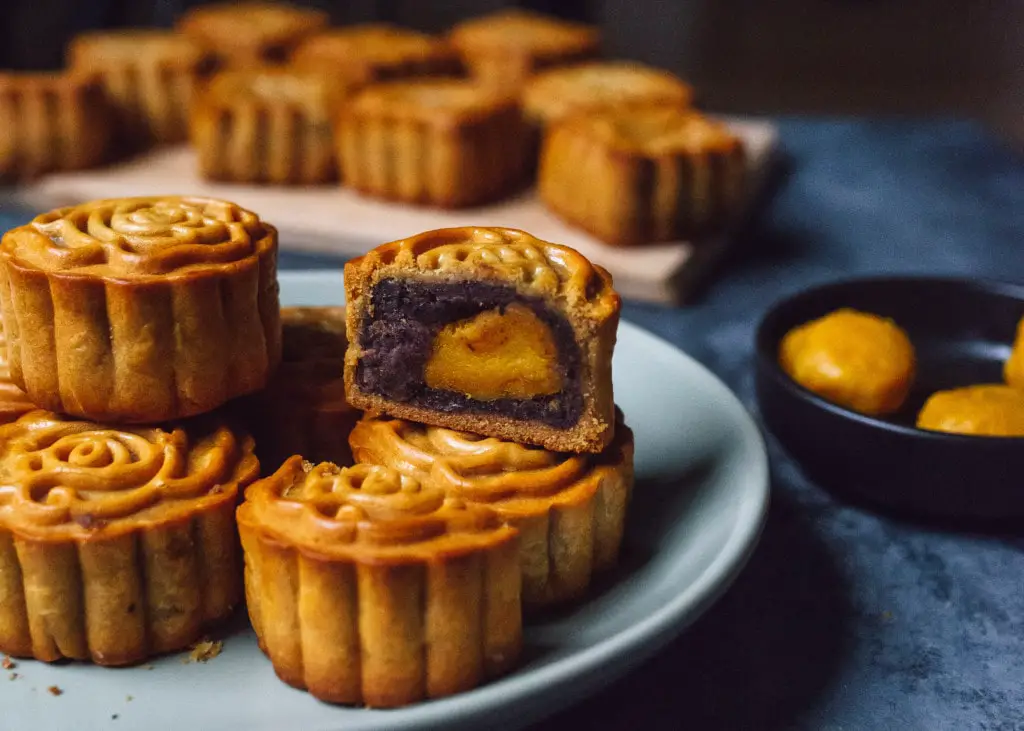
RED BEAN PASTE. Delicious. I was pleasantly surprised how closely the tangy, miso-infused saltiness resembled a true salted duck egg yolk.
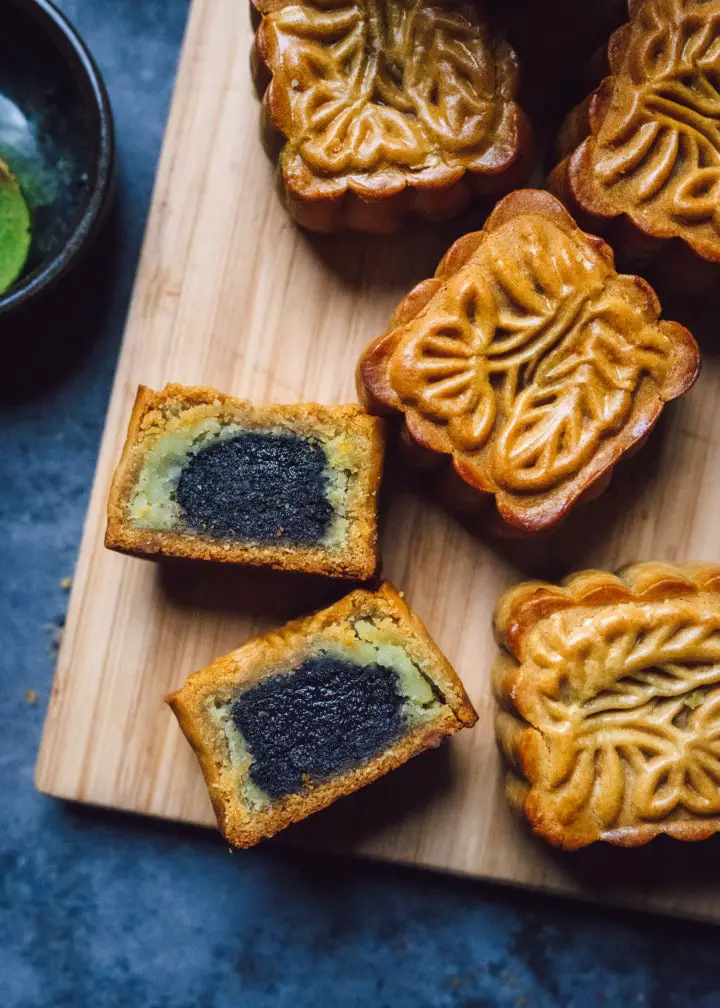
LOTUS SEED (莲蓉, lian rong)— this was so creamy and luxurious with a marzipan-like flavor. I thought the earthy matcha flavoring and the slightly bitter, salty richness of the black sesame was a great balance.
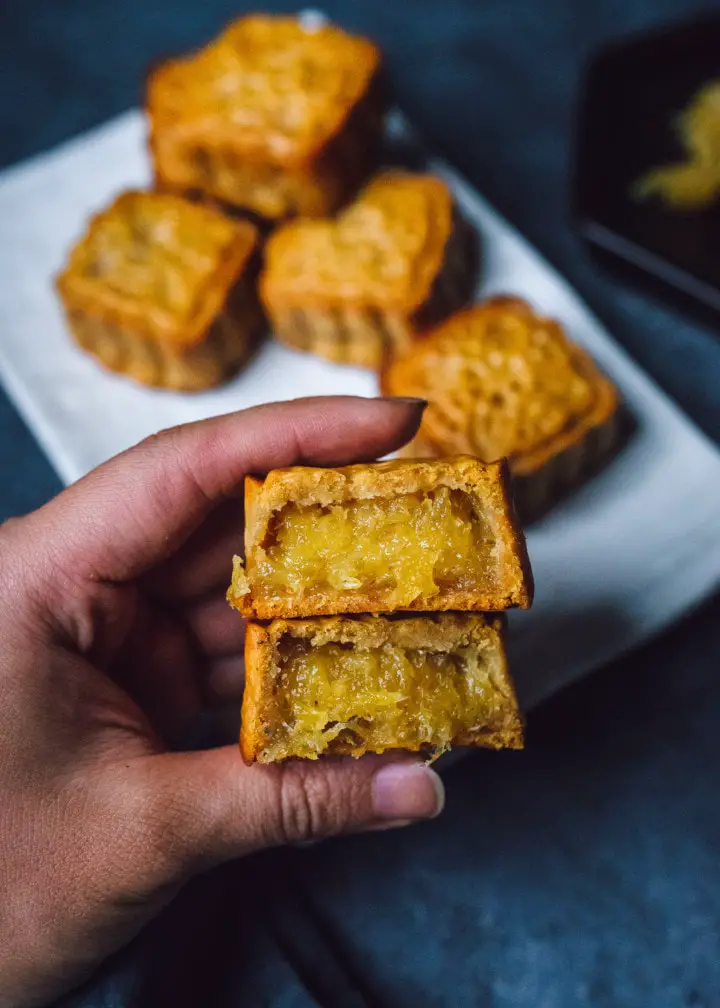
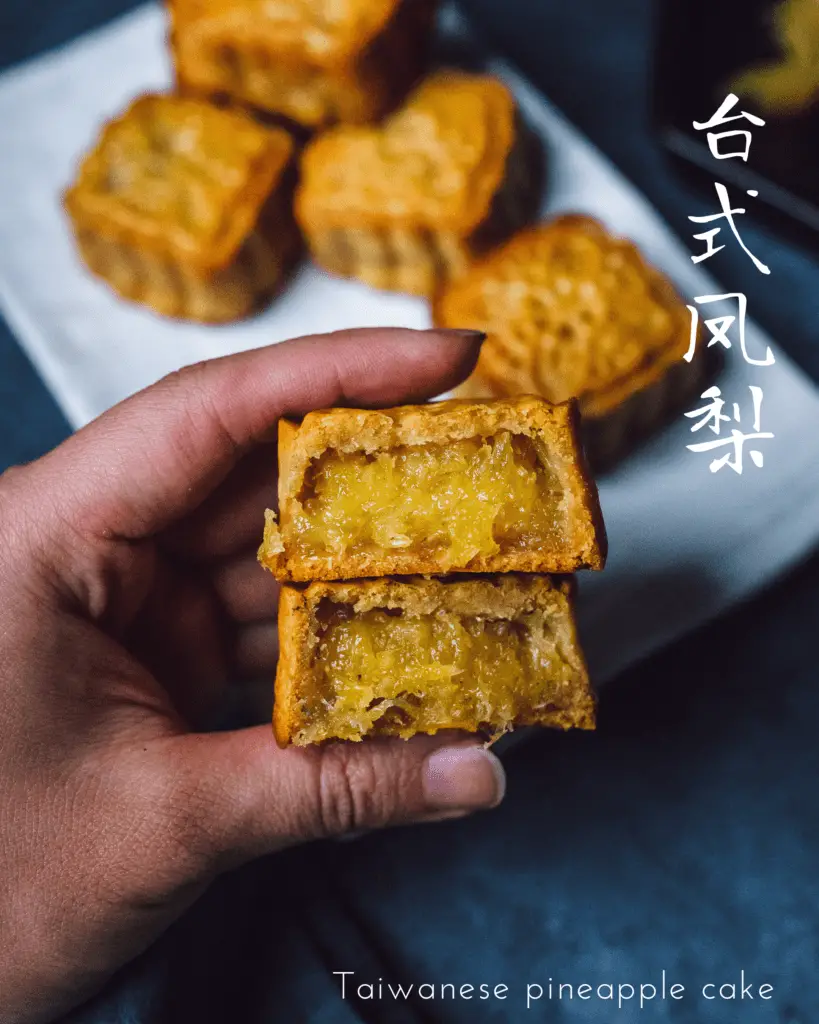
PINEAPPLE. This reminded me of a Taiwanese pineapple cake (凤梨酥). The pineapple’s juice and fibrous flesh cooks down into a caramelized, jammy sticky filling, and paired with the vegan browned butter, this was a delight.
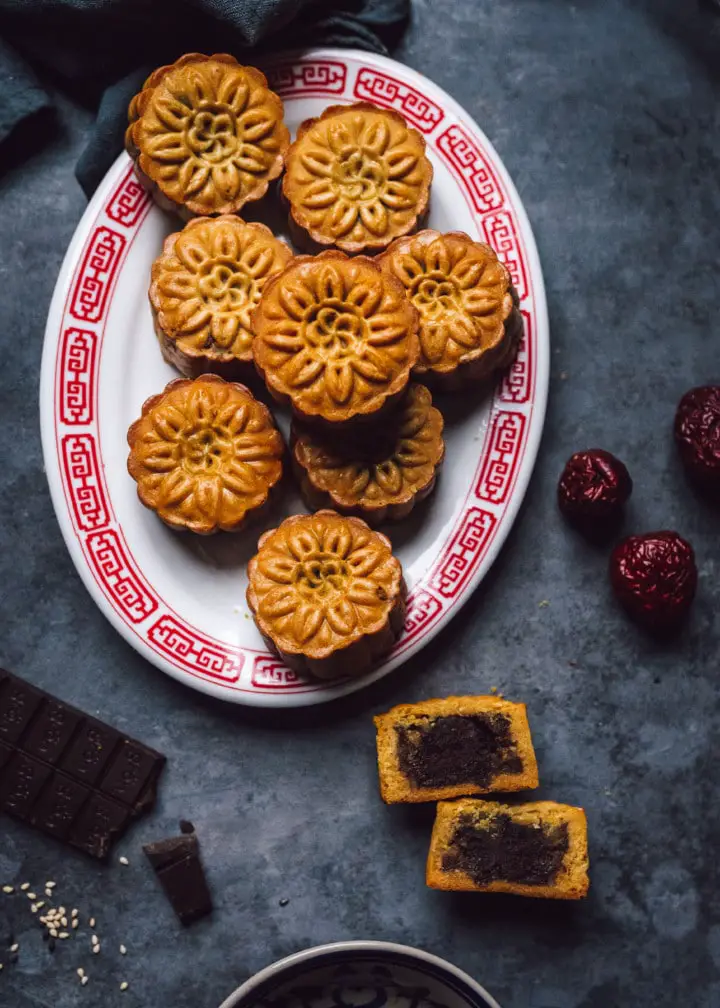
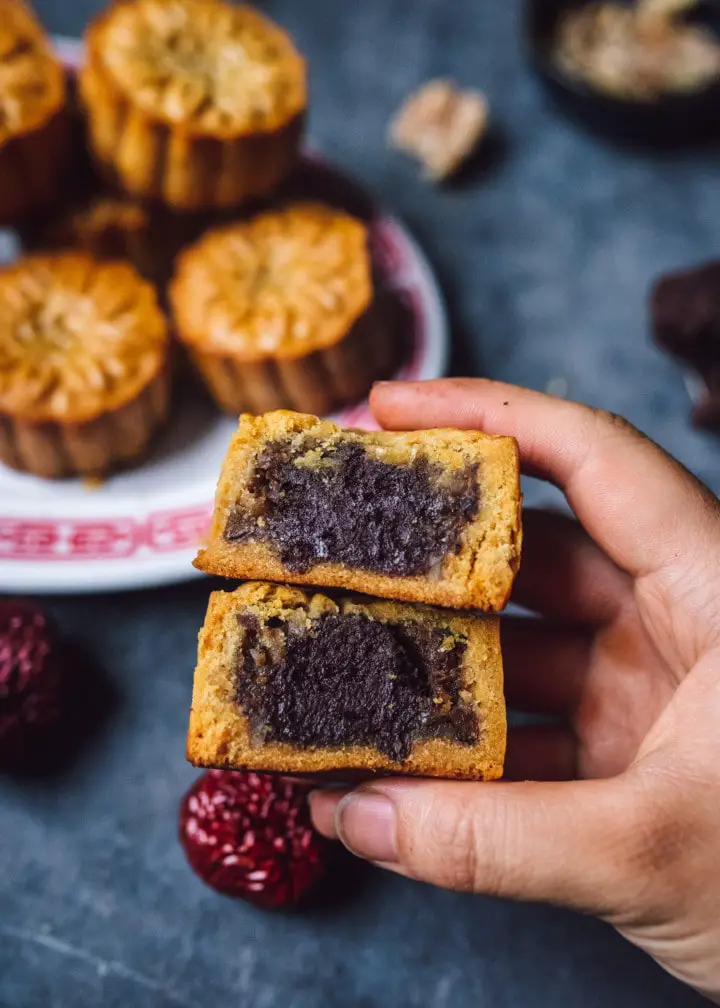
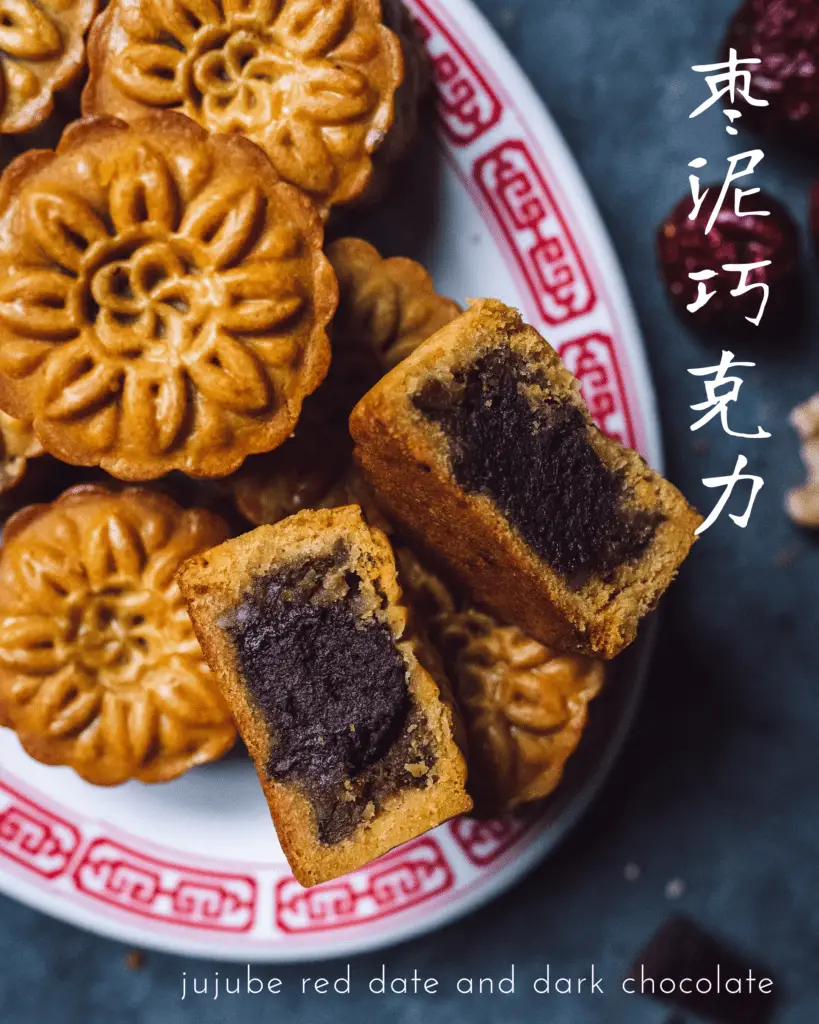
CHOCOLATE, WALNUT, and RED DATE. Fudgey, deep, and delightfully decadent. The studded walnuts and the smooth, bitter chocolate in contrast to the sweet date paste was the perfect combination.
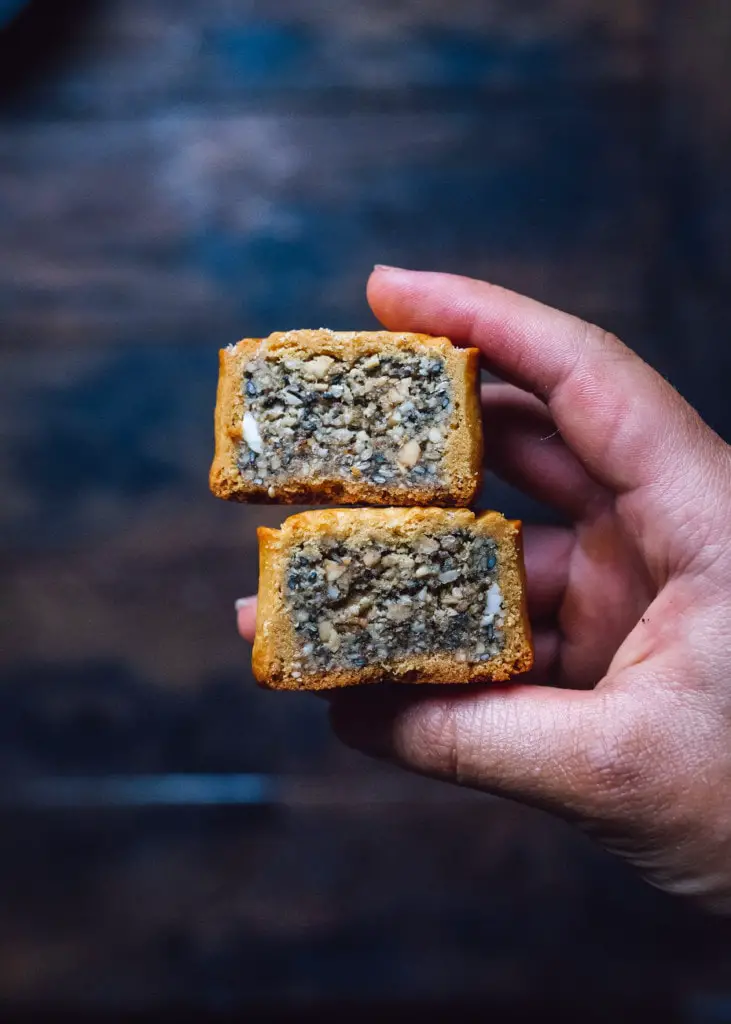
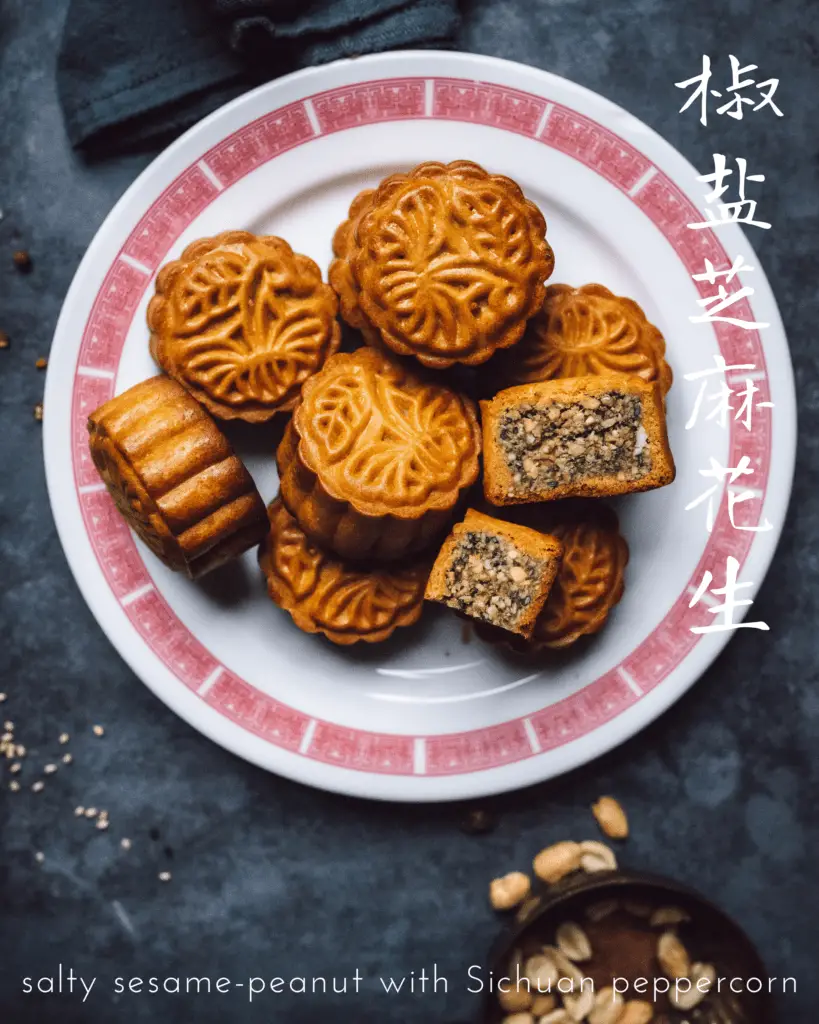
PEANUT, SESAME, HONEY. This was insanely good. I love how the Sichuan peppercorn added a nice kick, with a citrusy aroma and buzz of savoriness.
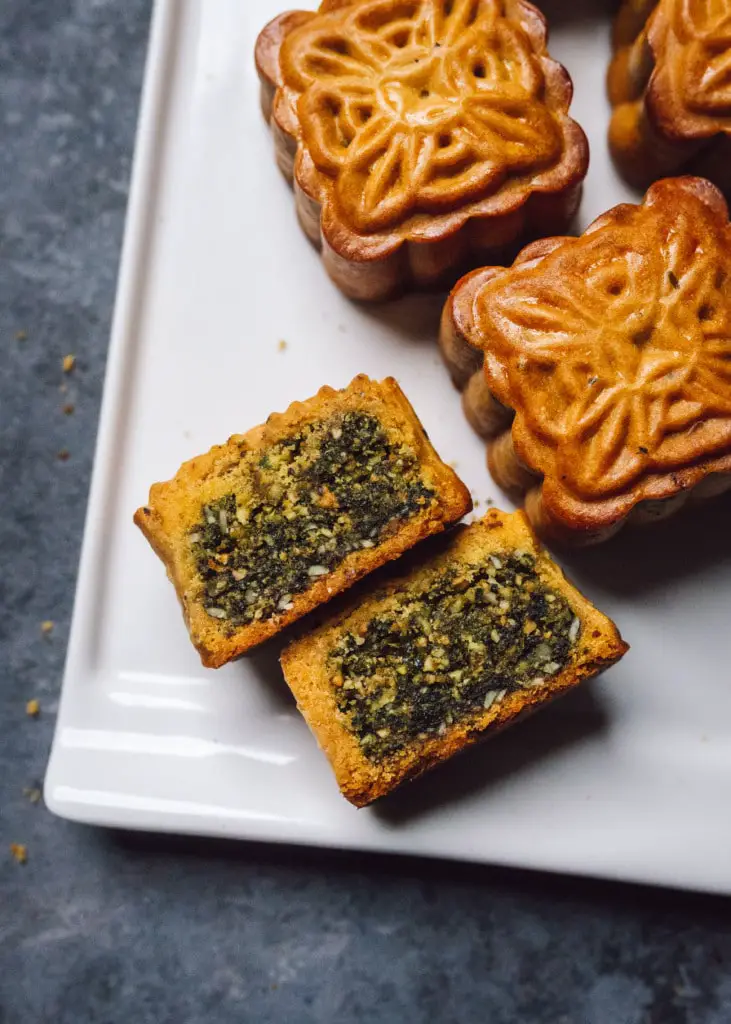
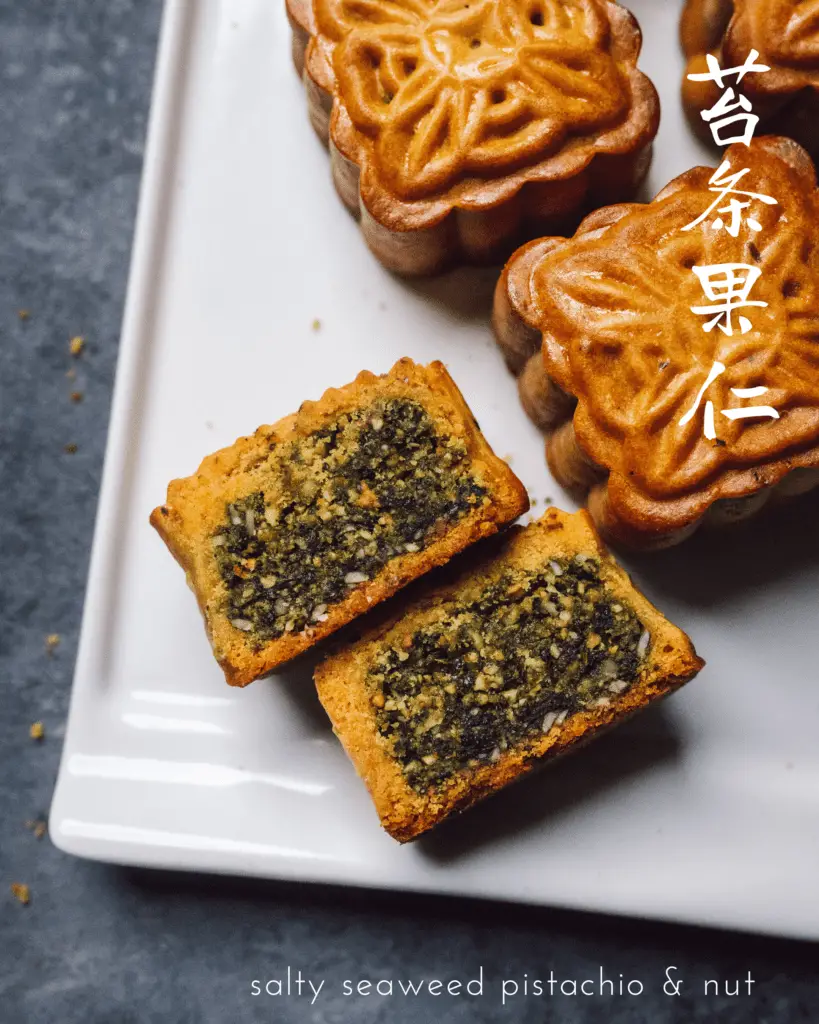
SALTY SEAWEED PISTACHIO. I love nori and all things furikake. This was my favorite.
That’s it! If you make any of these mooncakes, please tag me on Instagram @hannah.che and leave a review here, I love to see it. Let me know if you have any questions in the comments!
Print📖 Recipe
Vegan Mooncakes (with six fillings!)
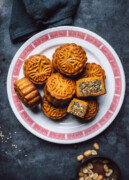
Traditional Chinese baked mooncakes with six vegan fillings.
- Prep Time: 1 day
- Cook Time: 2 hours
- Total Time: 2 days
- Yield: 18 mooncakes 1x
- Category: Desserts and Sweets
- Method: Bake
- Cuisine: Chinese
Ingredients
Dough (makes ~380g, enough for 18 50g-sized mooncakes):
- 175 grams (1 ¼ cups) all-purpose flour
- 25 grams (3 tbsp) cornstarch
- 70 grams (5 tbsp) vegetable oil or other neutral-flavored oil
- 105 grams (⅓ cup) golden syrup
- To make homemade golden syrup, see Notes. You will need 2 cups (400 grams) sugar and 2 tablespoons lemon juice.
- 6 grams (¾ teaspoon) lye or alkaline water (kansui)
Optional egg wash:
- 3 tbsp JustEgg (equivalent of 1 egg)
- 2 tablespoons water
Fillings: See instructions below.
Instructions
- Prepare two filling(s) of choice in advance. Follow instructions below to make eighteen 30g filling balls. Allow to rest in the refrigerator while you’re making the dough.
- Make the dough: combine the flour, oil, golden syrup, and alkaline water in a large mixing bowl. I made my own golden syrup since I couldn’t find it in a store nearby (see Notes below). You can also make your own alkaline water using baked baking soda, which I’ve done before to make pretzels. It’s very simple, although it adds some more prep time. Stir to form a dough, then knead with your hands until smooth and glossy, about 5 minutes. Form into a disc and rest in a covered bowl at room temperature for an hour.*
- Fill the mooncakes: divide the dough into 20g portions and roll into balls. Take one ball and place it in your palm, and use the heel of your other palm to flatten it into a thin, 3 ½-inch round. Place the 30g ball of filling in the center and wrap the edges of the dough up around the filling. Continue to pinch the dough to completely enclose the filling. It’s okay if some cracks form; pinch them together. The dough is pretty forgiving. Roll between your palms into a smooth ball, then roll it gently into an oblong shape to make it easier to place into the mold.
- Press/shape: Tuck the oblong ball (see photo below) into the mold, invert it, and press down firmly but gently to imprint the design. Some recipes will say to dust the inside of the mold with flour but I didn’t find it necessary, as the dough has quite a bit of oil. But it will help prevent sticking. Release the mooncake from the mold and arrange it on a parchment-lined baking sheet. Repeat for all mooncakes, placing them at least 2 inches apart.
- Bake the mooncakes. Preheat the oven to 350°F/177°C. Bake until edges are lightly golden for 10 minutes. Remove the mooncakes from the oven and allow to cool for 10 minutes.
- Lightly brush on a thin coating of the vegan egg wash, both the top and sides. Be careful not to brush on too much— the pattern on top, if covered, won’t be as distinct after baking. Place in the oven and bake a second time until the mooncakes are a deep, caramelly golden brown color, about 8-10 more minutes.
- Place the baking sheet to cool on a wire rack, then carefully transfer the mooncakes to an airtight container. Store at room temperature for up to a week. The dough will soften over time and fully absorb the oil, achieving a beautiful glossy shine and softer exterior after 1-2 days.
Filling Instructions
Option 1: Red Bean Paste and Vegan Salted Egg Yolk (makes enough for 9 mooncakes)
- For the red bean paste:
1 cup (200 grams) dried adzuki beans, soaked overnight or at least 4 hours
½ cup (100 grams) sugar
¼ teaspoon salt
2 tablespoons (28 grams) refined coconut oil - 9 (10 grams each) vegan salted ‘egg yolks‘, prepared and chilled in advance
Drain the soaked beans and place them in a small pot or Instant Pot pressure cooker. Add enough water to cover the top by 2 inches, then seal and cook on high pressure for 25 minutes, then let pressure release naturally for 10 minutes. OR, bring to a boil on the stovetop and simmer for 60-90 minutes until they are soft and easily crushable between your fingers. Transfer the cooked beans to a food processor, with just enough liquid to puree.
In a thick-bottomed pan or nonstick pan, heat the oil over medium-low heat. Add the bean puree and the sugar, and cook down, stirring every couple of minutes, until the puree has thickened and pulls away from the pan, holding its shape (a rubber spatula should come out clean). This will take about 8-10 minutes. Taste and adjust sugar as desired. Transfer to a heat-proof container and cool completely in the refrigerator.
Take one 20g portion of chilled red bean paste, flatten into a disc, place one 10g vegan egg yolk in the center, and tuck and wrap the red bean paste around to enclose, for 30g balls. Chill in the fridge until ready to use.
Option 2: Matcha Lotus Seed Paste with Black Sesame Filling (makes enough for 9 mooncakes)
- For the lotus seed paste:
100 grams (1 cup) dried lotus seeds, soaked for 3 hours or overnight
45 grams (¼ cup) refined coconut oil
50 grams (¼ cup) sugar
2 teaspoons matcha powder, optional - For the black sesame filling:
70 grams (½ cup) black sesame seeds, toasted
50 grams (¼ cup) sugar
½ teaspoon salt - 28 grams (2 tbsp) refined coconut oil
Make the lotus seed paste: Follow the same instructions for the red bean paste. The only difference is that the cooking time is shorter, 15 minutes for Instant Pot or 1 hour for stovetop. After removing from heat, stir in the matcha powder until smooth. Transfer to a heat-proof container and cool completely in the refrigerator.
Make the black sesame filling: toast the black sesame seeds until they pop in the pan, then transfer immediately to a plate and cool slightly. Add to a food processor or blender with the sugar and salt and pulse into a fine meal. Stir in the coconut oil and chill in the refrigerator to harden.
Divide the black sesame filling into 10g portions (you will have extra; save the rest for another use). Take a 20g portion of the prepared lotus seed paste, flatten into a disc, place the ball of black sesame filling in the center, and tuck and wrap the lotus seed paste around to enclose. The filling balls should be 30g each. Chill in the fridge until ready to use.
Option 3: Caramelized Pineapple Jam Filling (makes enough for 9 mooncakes)
- 1 (14-ounce) can crushed pineapple, drained OR 1 medium pineapple, trimmed, flesh and core cut into 1-inch chunks
- 2 tablespoons (28 grams) vegan butter or refined coconut oil
- ½ cup (100 grams) brown or granulated sugar
- ½ teaspoon salt
- 1 tablespoon (8 grams) cornstarch, more if needed
If using fresh pineapple, pulse the chopped pineapple flesh in a food processor until it resembles crushed pineapple. In a heavy-bottomed saucepan, heat the butter, stirring constantly, until it starts to foam and then forms brown specks at the bottom (and smells fragrant), about 5-8 minutes. Add the sugar, crushed pineapple and salt, and cook over medium heat, stirring frequently, until the liquid has evaporated and the pineapple is thick, sticky and caramelized, about 20-30 minutes. Transfer to a heat-proof container and let cool.
When cool enough to handle, divide into nine 30g balls (you will probably some extra pineapple, reserve for another use). If the filling is too sticky to work with, add 1 tablespoon cornstarch. Chill the balls in the refrigerator until ready to use.
Option 4: Jujube Date, Walnut, and Chocolate Truffle Filling (makes enough for 9 mooncakes)
For the red date paste:
- 3.5 ounces (100 grams) dried jujube/red dates
- ¼ cup (25 grams) shelled and halved walnuts, toasted
- 1 tablespoon (8 grams) cornstarch or glutinous rice flour
- 1 tablespoon (15 grams) refined coconut oil
- For the dark chocolate truffle centers: 1-3.5 ounce bar (100 grams) dairy-free dark or semi-sweet chocolate (I used 75%), very finely chopped
- 2 tablespoon (30 grams) full-fat coconut milk OR 2 tablespoon peanut butter
Make the red date walnut paste: Pit the dates. Place in a steamer and steam over boiling water on high heat until they’re softened and wrinkly, about 8-10 minutes. Add the dates to a food processor with the roasted walnuts and pulse until finely chopped (add some hot water from the pot if the dates are too dry). Transfer to a bowl and stir in the cornstarch and coconut oil, then form into nine 20g balls. You will have date paste leftover; reserve for another use. Transfer to a heat-proof container and cool completely in the refrigerator.
Make the chocolate truffles: Melt the chocolate either in the microwave in 30-second intervals or in a double boiler (place a saucepan on the stovetop with 1-inch of water, simmering, and a glass or metal bowl over top that rests high enough to not touch the water). When the chocolate is melted, remove from heat and stir in the coconut milk or the nut butter until the mixture is smooth. Transfer to a heat-proof container and cool completely in the refrigerator, then divide into 10g portions and shape into round ‘truffles’.
Take a 20g portion of date walnut paste, flatten into a disc, place the chocolate truffle in the center, and tuck and wrap the date paste around to enclose. The filling balls should be 30g each. Chill in the fridge until ready to use.
Option 5: Sichuan Peppercorn Peanut Sesame Filling (makes enough for 9 mooncakes)
- 1 cup (140 grams) unsalted roasted peanuts
- ¼ cup (35 grams) white sesame seeds, toasted
- 2 tablespoons (18 grams) black sesame seeds, toasted
- ¼ cup (85 grams) honey, or ¼ cup agave nectar or maple syrup + 1 tablespoon sugar
- ½ teaspoon ground Sichuan peppercorn (toast and grind whole peppercorns for the best flavor)
- ½ teaspoon black pepper
- 2 tablespoon (15 grams) cornstarch
- ¾ teaspoon salt
In a food processor, add the roasted peanuts and process until coarsely ground. Add the toasted sesame seeds, honey, ground Sichuan peppercorn, pepper, cornstarch and salt and pulse a few more times until the filling is still coarse but sticks together when pressed. Divide into nine 30g portions and shape into balls.
Option 6: Salty Seaweed Pistachio and Nut Filling (makes enough for 9 mooncakes)
- 1 cup (120 grams) shelled unsalted pistachios, toasted
- ¼ cup (35 grams) unsalted peanuts, roasted pumpkin seeds, or roasted sunflower seeds
- ¼ cup (18 grams) store-bought furikake seasoning OR 4 roasted nori sheets, torn into small pieces
- ¼ cup (85 grams) honey OR ¼ cup agave nectar/maple syrup + 1 tablespoon sugar
- 1 tablespoon (8 grams) cornstarch
- ½ teaspoon salt (omit if using furikake seasoning)
In a food processor, combine the pistachios, pumpkin/sunflower seeds/peanut, and process until coarsely ground. Add the roasted torn nori sheets or furikake, honey, cornstarch and salt and pulse a few more times until the filling is still coarse but sticks together when pressed. Divide into nine 30g portions and shape into balls.
Notes
- I highly recommend the egg wash for the glossy sheen. I love JustEgg, but if you can’t find it, use a mixture of 2 tablespoon coconut or almond milk + 1 teaspoon of agave nectar or maple syrup, whisked in a small bowl.
- How to make golden syrup:
- Add 2 cups (400g) sugar and 1½cup + 2 tablespoons (300ml) water in a medium heavy-bottomed saucepan. Bring to a boil, then stir in 2 tablespoons lemon juice and reduce the heat to low, until the mixture is slowly simmering.
- Cook, uncovered, WITHOUT STIRRING, until the mixture is darkened to a golden color and measures 230°C/110°F— this will take between 45 minutes to an hour. Remove the pot from heat and allow the syrup to cool; it will continue to thicken as it cools.
- *You can refrigerate the mooncake dough, covered, for up to a night. It will be hard the next day; allow to soften and warm before using.
- Use any 50g mooncake mold of choice— I used this set that I bought online. It came with three square designs and three round designs, which was perfect for 6 kinds of mooncakes.
Keywords: mooncake, vegan mooncakes, mooncakes, Chinese mooncakes, vegan

Jolene says
I just made these! But wondering if you have your Celsius and Fahrenheit mixed up? I had it baking at 177 degrees Fahrenheit as it says in the instructions and it was not browning even with the egg wash. I just now turned it up to 350 degrees Fahrenheit (which is 177 degrees Celsius) and it absolutely fixed it. They look amazing! I only tried canned red bean paste for the ease of it because I made these with my 8 year old and it’s our first time. We had trouble wrapping the dough around the red bean. I think we had it in our minds that the outside surface needed to look completely smooth. Ours kept cracking even with trying to pinch the cracks away. We finally decided to just stick it in the stamper, cracks and all. The added pressure from the stamper made them look perfect! We’re both super happy with the outcome and excited to try other flavor fillings. Thank you!
Hannah says
Hi Jolene,
Whoops, should definitely be Fahrenheit! Just fixed it. Thanks for your feedback!
Taylor Wu says
I made these yesterday and they turned out perfectly! The dough was surprisingly easy to work with. I did two fillings, red bean paste and salty seaweed pistachio and oh my god, the first was good and traditional (reminded my mom of the ones she used to make) but the nutty one was my FAVE. Just incredible.
★★★★★
Dylan T says
Holy crap, the pineapple filling one is amazing. Tastes like Taiwanese feng li su. Will be making these again!
★★★★★